📚 This post is part of my business blogging guide.
Here’s how to get the image sizing right on your website, along with some free tools and resources to help you find and use the right images.
- Introduction
- Hero image sizes and safe area dimensions
- How do I check the sizes of my images?
- Which image sizes work best on social media?
- Including hero images when sharing links on social media
- Where can I download free images?
- How can I create images for free?
- How can I make my images load faster?
- How to check image sizes
- Using image placeholders
- How to add a favicon to your website
- Let’s wrap up
Introduction.
If you write a blog, the most important image is the one that’s most often splashed across the top of the page – the so-called ‘hero’ image. I’ve got one of these at the top of this post, for example.
When your blogs are shared on social platforms such as Facebook, Twitter and LinkedIn, it’s good for them to include the hero image, as that makes the content more appealing than a plain and boring link.
You can make sure your social shares include an image by using the Yoast SEO plugin covered below.
But what about the hero image itself? How big should that be?
Hero image sizes and safe area dimensions.
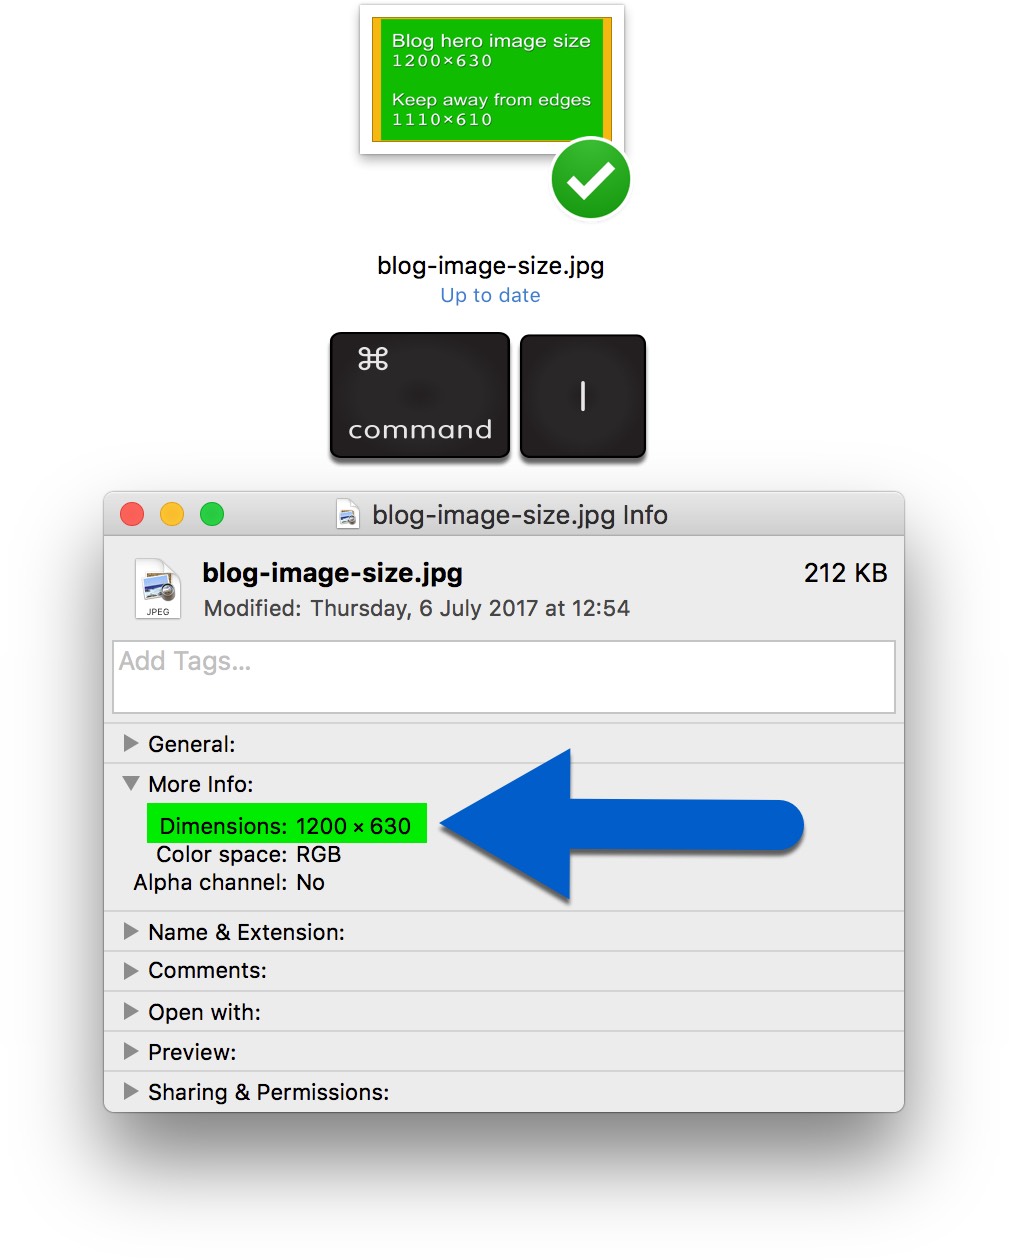
Your hero image should be this size:
Hero image size.
1200×630 pixels
You should keep your important content away from the edges. Otherwise, you might see that parts of the image are clipped off when the content is shared on social media.
Safe area inside hero images.
1110×610 pixels
Here’s what that looks like:
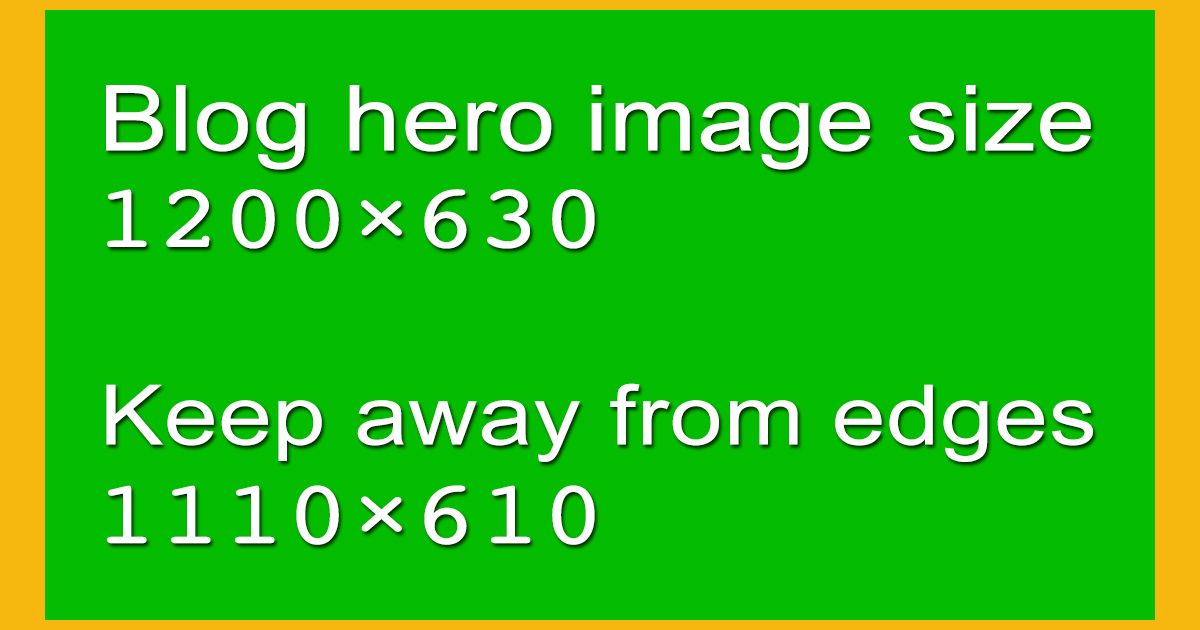
Feel free to save the image and use it for comparison with your own images.
If you know how to use Photoshop, you can download this PSD original instead.
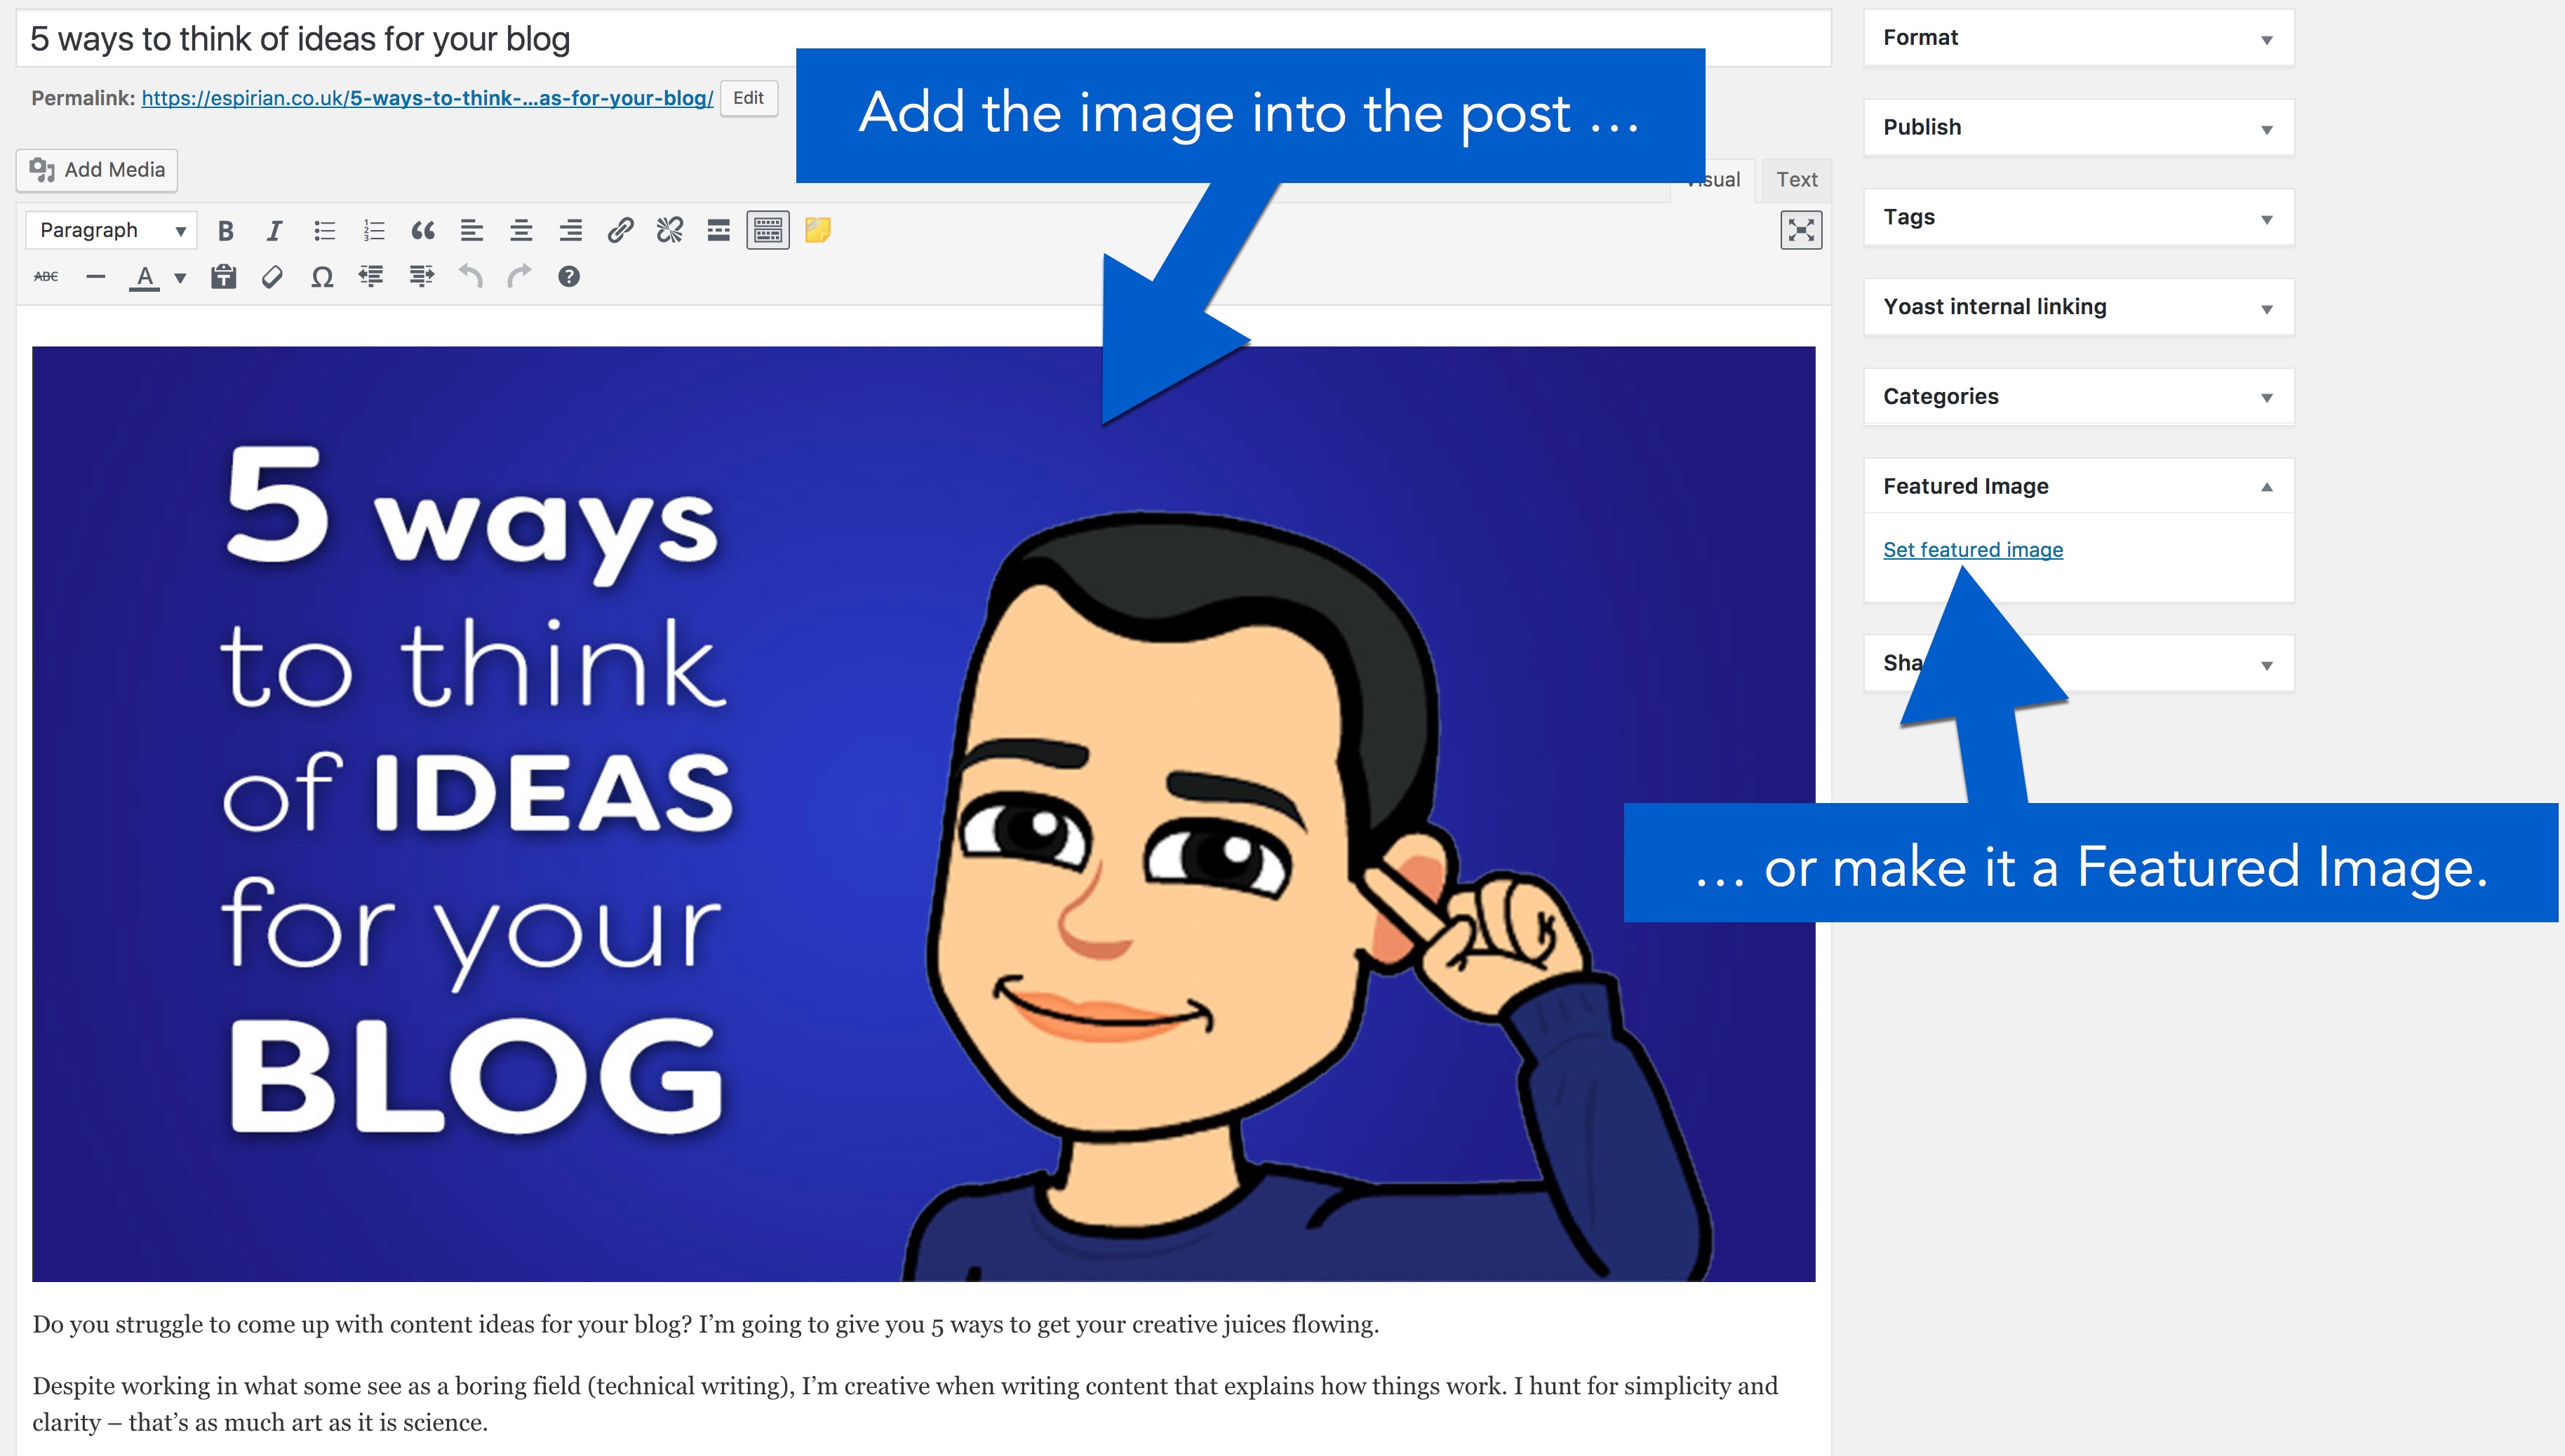
Once you’ve got the image you want, you can insert it at the top of your post or, if your blog theme supports it, set it as a ‘Featured Image’ for the post.
How do I check the sizes of my images?
I’ve covered how to check pixel sizes in macOS, Windows and on the web in How do I check image dimensions?
Do you write a blog? Make your hero images 1200×630 pixels. This size works well on Facebook, Twitter and LinkedIn.#UnclogYourBlog
— John Espirian (@espirian) August 18, 2017
Which image sizes work best on social media?
If you want to post images directly on social media, here are some sample sizes that work well:
- LinkedIn profile banner:
1584×396pixels - LinkedIn image posts:
1200×630pixels - LinkedIn article covers:
1200×630pixels - Twitter profile banner:
1500×500pixels - Twitter image posts:
1200×630pixels - Facebook image posts:
1200×630pixels - Instagram square:
1080×1080pixels - Instagram vertical:
1080×1350pixels - Instagram horizontal:
1080×566pixels
About LinkedIn article images.
LinkedIn articles look good with a landscape cover image, but the cover image preview is presented on your profile page in square format, which means it’s best to keep the important information in a 630×630 square in the middle of the 1200×630 image (see more).
About Facebook and Instagram images.
Instagram and Facebook work well with square images, e.g. 1080×1080 pixels.
But … both platforms support landscape images (e.g. 1024×576 pixels), and things can get a little messy because of display adjustments that are based on the orientation of your device.
Take a look at this Buffer post for more on this.
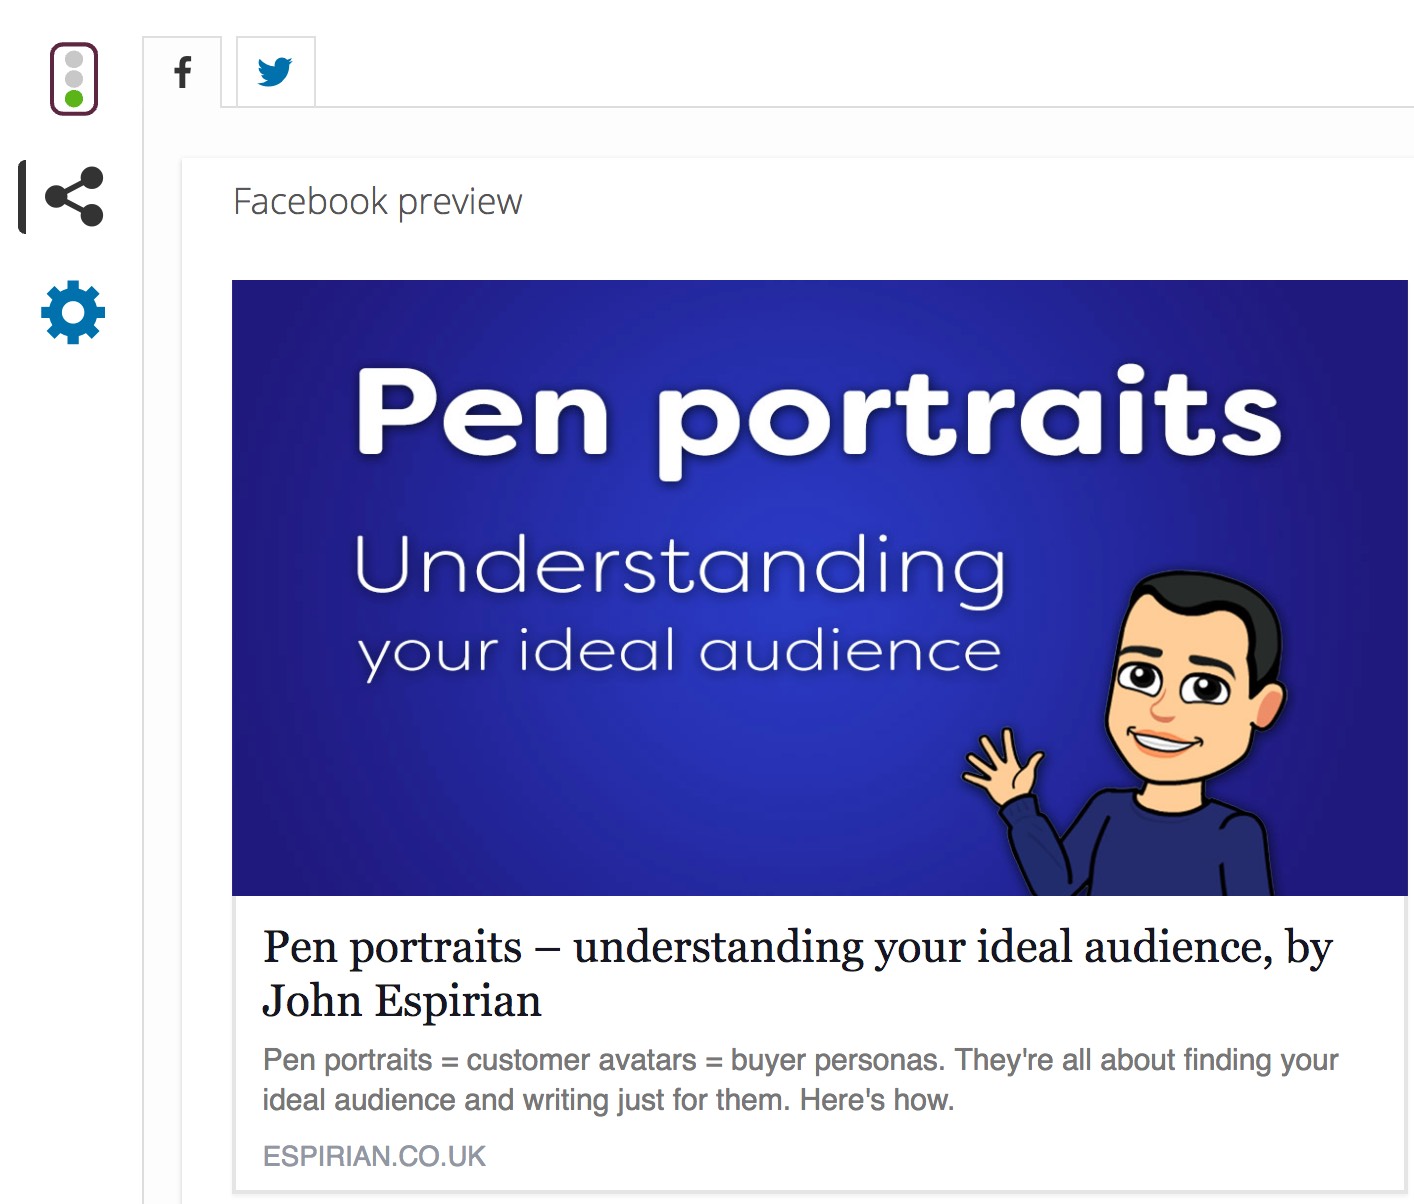
Including hero images when sharing links on social media.
If you use WordPress, you can include the right hero image whenever you post a blog link on social media.
To do that, install the Yoast SEO plug-in on your WordPress website. This will add an extra panel at the bottom of your WordPress editor.
As well as its other search engine optimisation (SEO) features, the Yoast plug-in lets you nominate the image you want to associate with each blog post, so that social shares include that image with the link.
The free version of Yoast doesn’t display a preview of the image in your WordPress editor, but that doesn’t matter if you’ve followed the sizing guidelines above.
Below is a screenshot of the premium version of Yoast, which does display a preview:
Where can I download free images?
Knowing your dimensions is all well and good, but what if you’re struggling to find some good images to begin with? Try these free resources:
I have no preferences here, so I’ve listed them in alphabetical order.
How can I create images for free?
If you want to create your own images for social media and your blogs, check out these free services:
- Canva – probably the world’s most popular image-creation tool.
- Pablo – perhaps not as powerful as Canva, but it’s easier to use (and it’s made by Buffer, who are cool).
- Fotor – not one I’ve tried myself but looks good and has been recommended to me by a colleague.
How can I make my images load faster?
It’s important to optimise your images to reduce their file size. The smaller the files, the quicker the loading time, which means a better user experience for your visitors.
Try these free image-optimisation tools. You won’t notice any difference in the image quality, but the file sizes will decrease.
- ImageOptim – macOS.
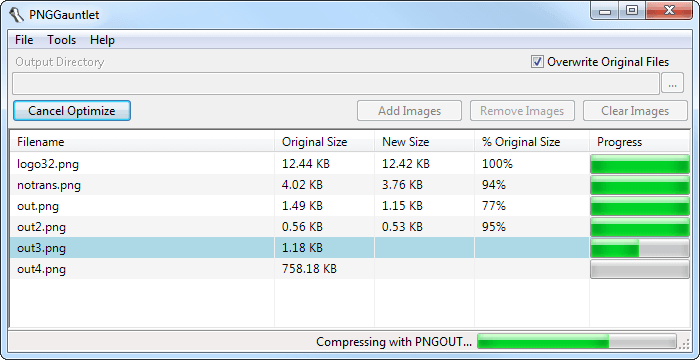
- PNGGauntlet – Windows.
- TinyPNG – WordPress and Photoshop plugin.
Check out my quick video on ImageOptim for macOS:
And this is what PNGGauntlet looks like:
Savings made when optimising images.
Here’s an example of some file size savings made on some test PNGs:
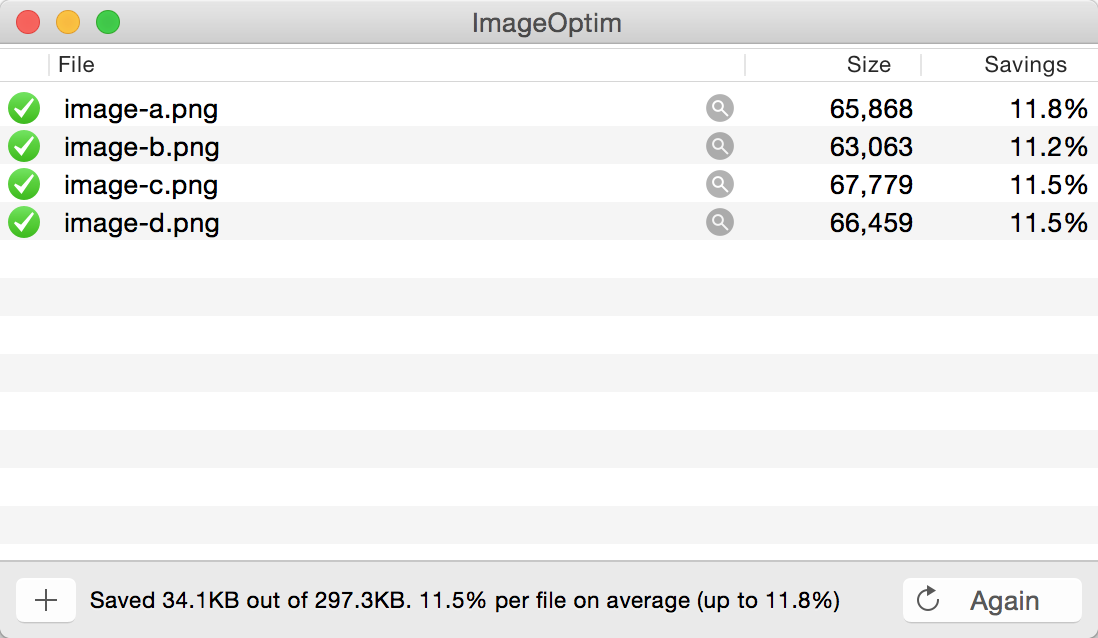
It might not sound like much, but optimising the images across a whole website could have a significant positive effect on the time your pages take to load.
How to check image sizes.
On the web, an image’s width and height are most often measured in pixels (short for picture elements).
Pixels are the individual points that form the visual content you see on your screen.
If I created a tiny version of the French flag, it might look like this up close:
The image dimensions are 3×3.
There are 9 pixels in total, but we’d usually write the dimensions as 3×3 pixels.
Image dimensions are always written in this order: width×height.
To give you some context about image dimensions in the real world:
- Landscape photos taken by my Canon DSLR camera have
5184×3456pixels. - A full HD monitor display has
1920×1080pixels. - A 4K monitor display has
3840×2160pixels.
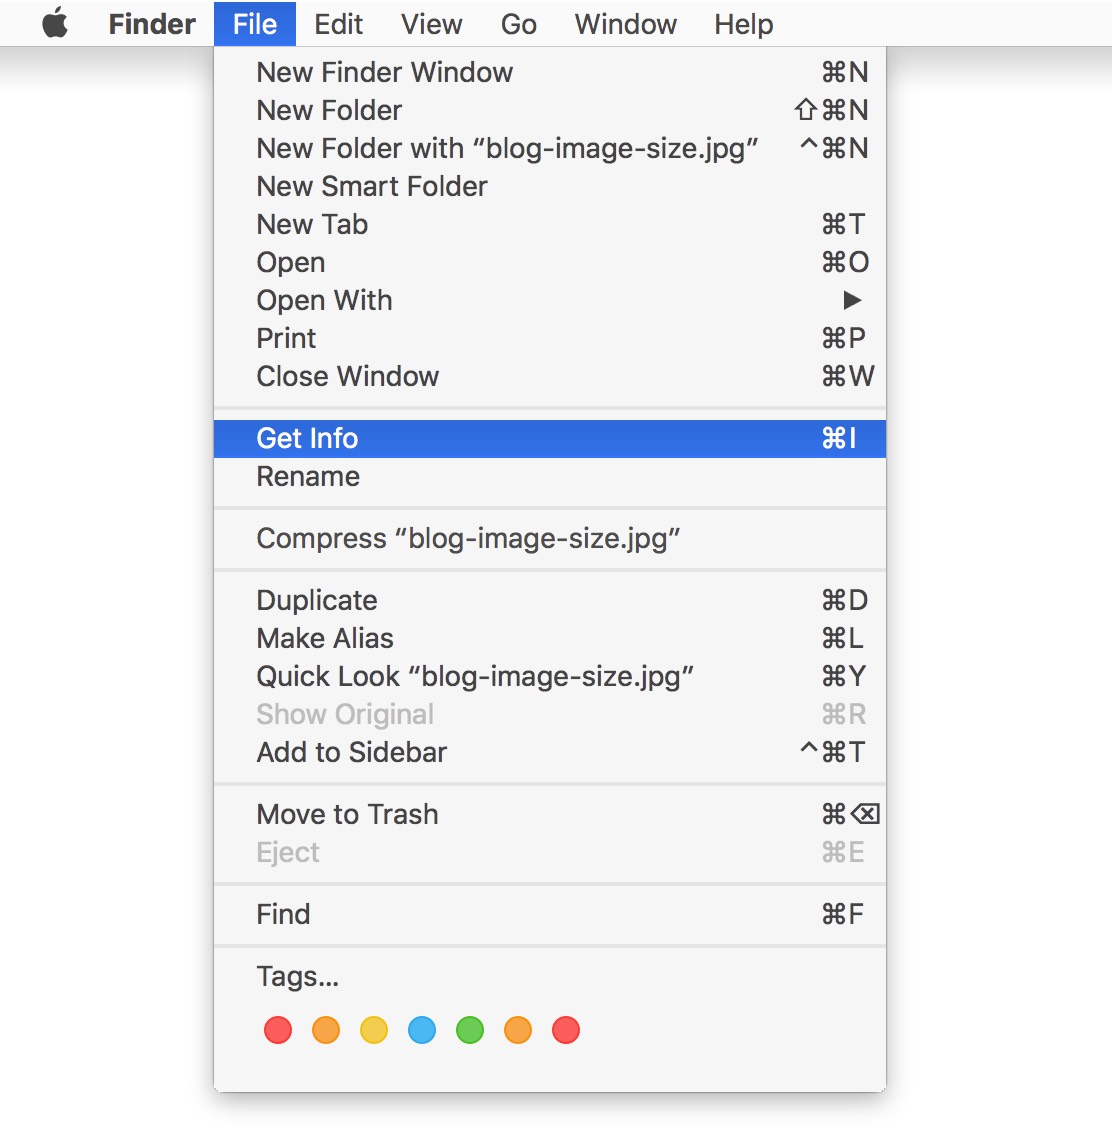
How to check image sizes on macOS.
To see the pixel size of an image on macOS:
- Click the image file.
- Press
Cmd–Ion the keyboard.
If keyboard shortcuts aren’t for you, you can use the system menus instead.
- Click the image file.
- Go to
File|Get Info.
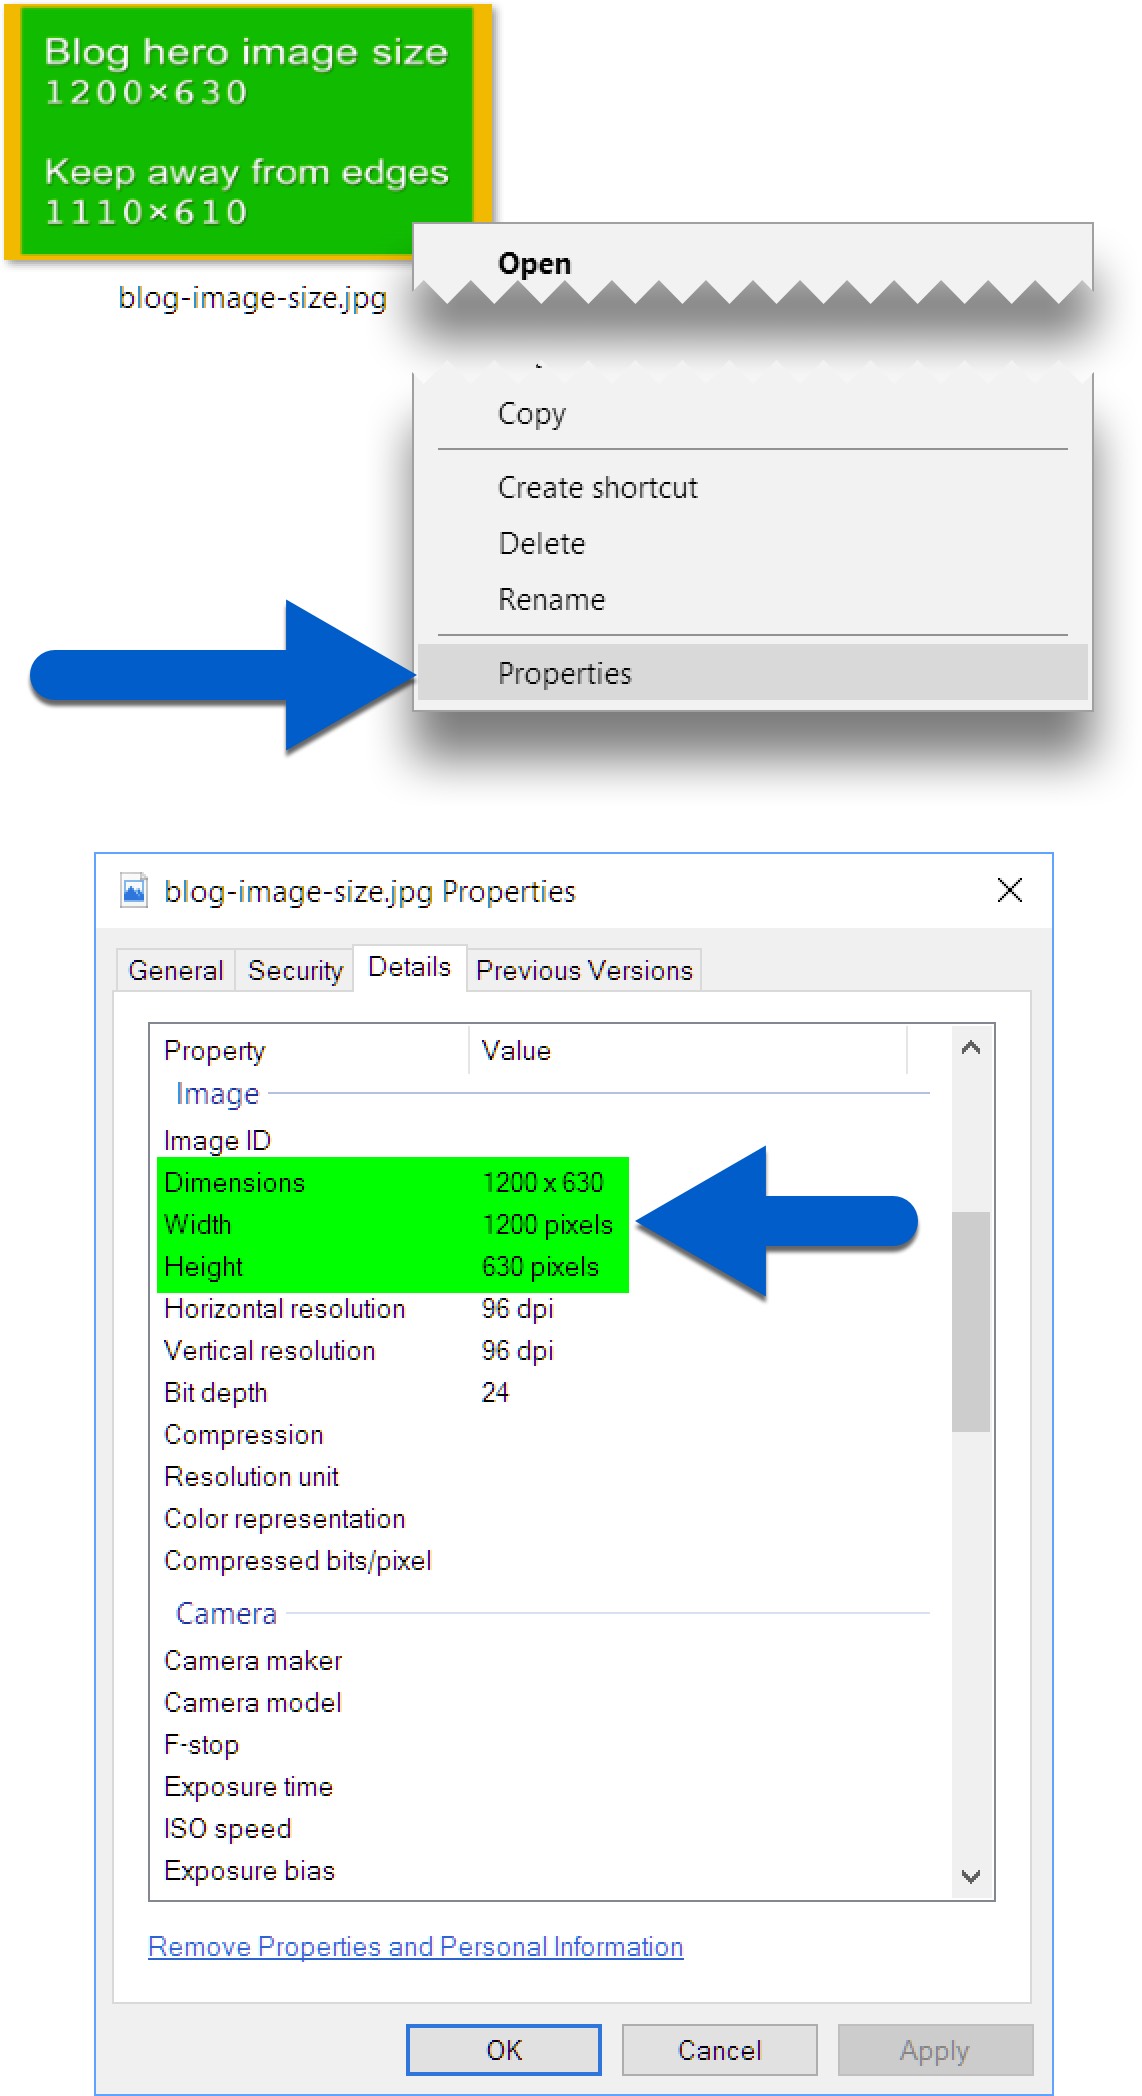
How to check image sizes on Windows.
On Windows, hovering the pointer over an image file will usually be enough for you to see the image size.
If that doesn’t work:
- Right-click the image file.
- Click
Properties. - Click
Details.
How to check image sizes on the web.
One easy way to check the sizes of images on the web is to save them to your desktop and then use one of the methods above to inspect the file on your machine.
Here’s an alternative method that doesn’t require any saving:
- Right-click the image on a web page.
- Click Inspect.
- Click Computed.
- Look for the width and height figures.
Here’s an example:
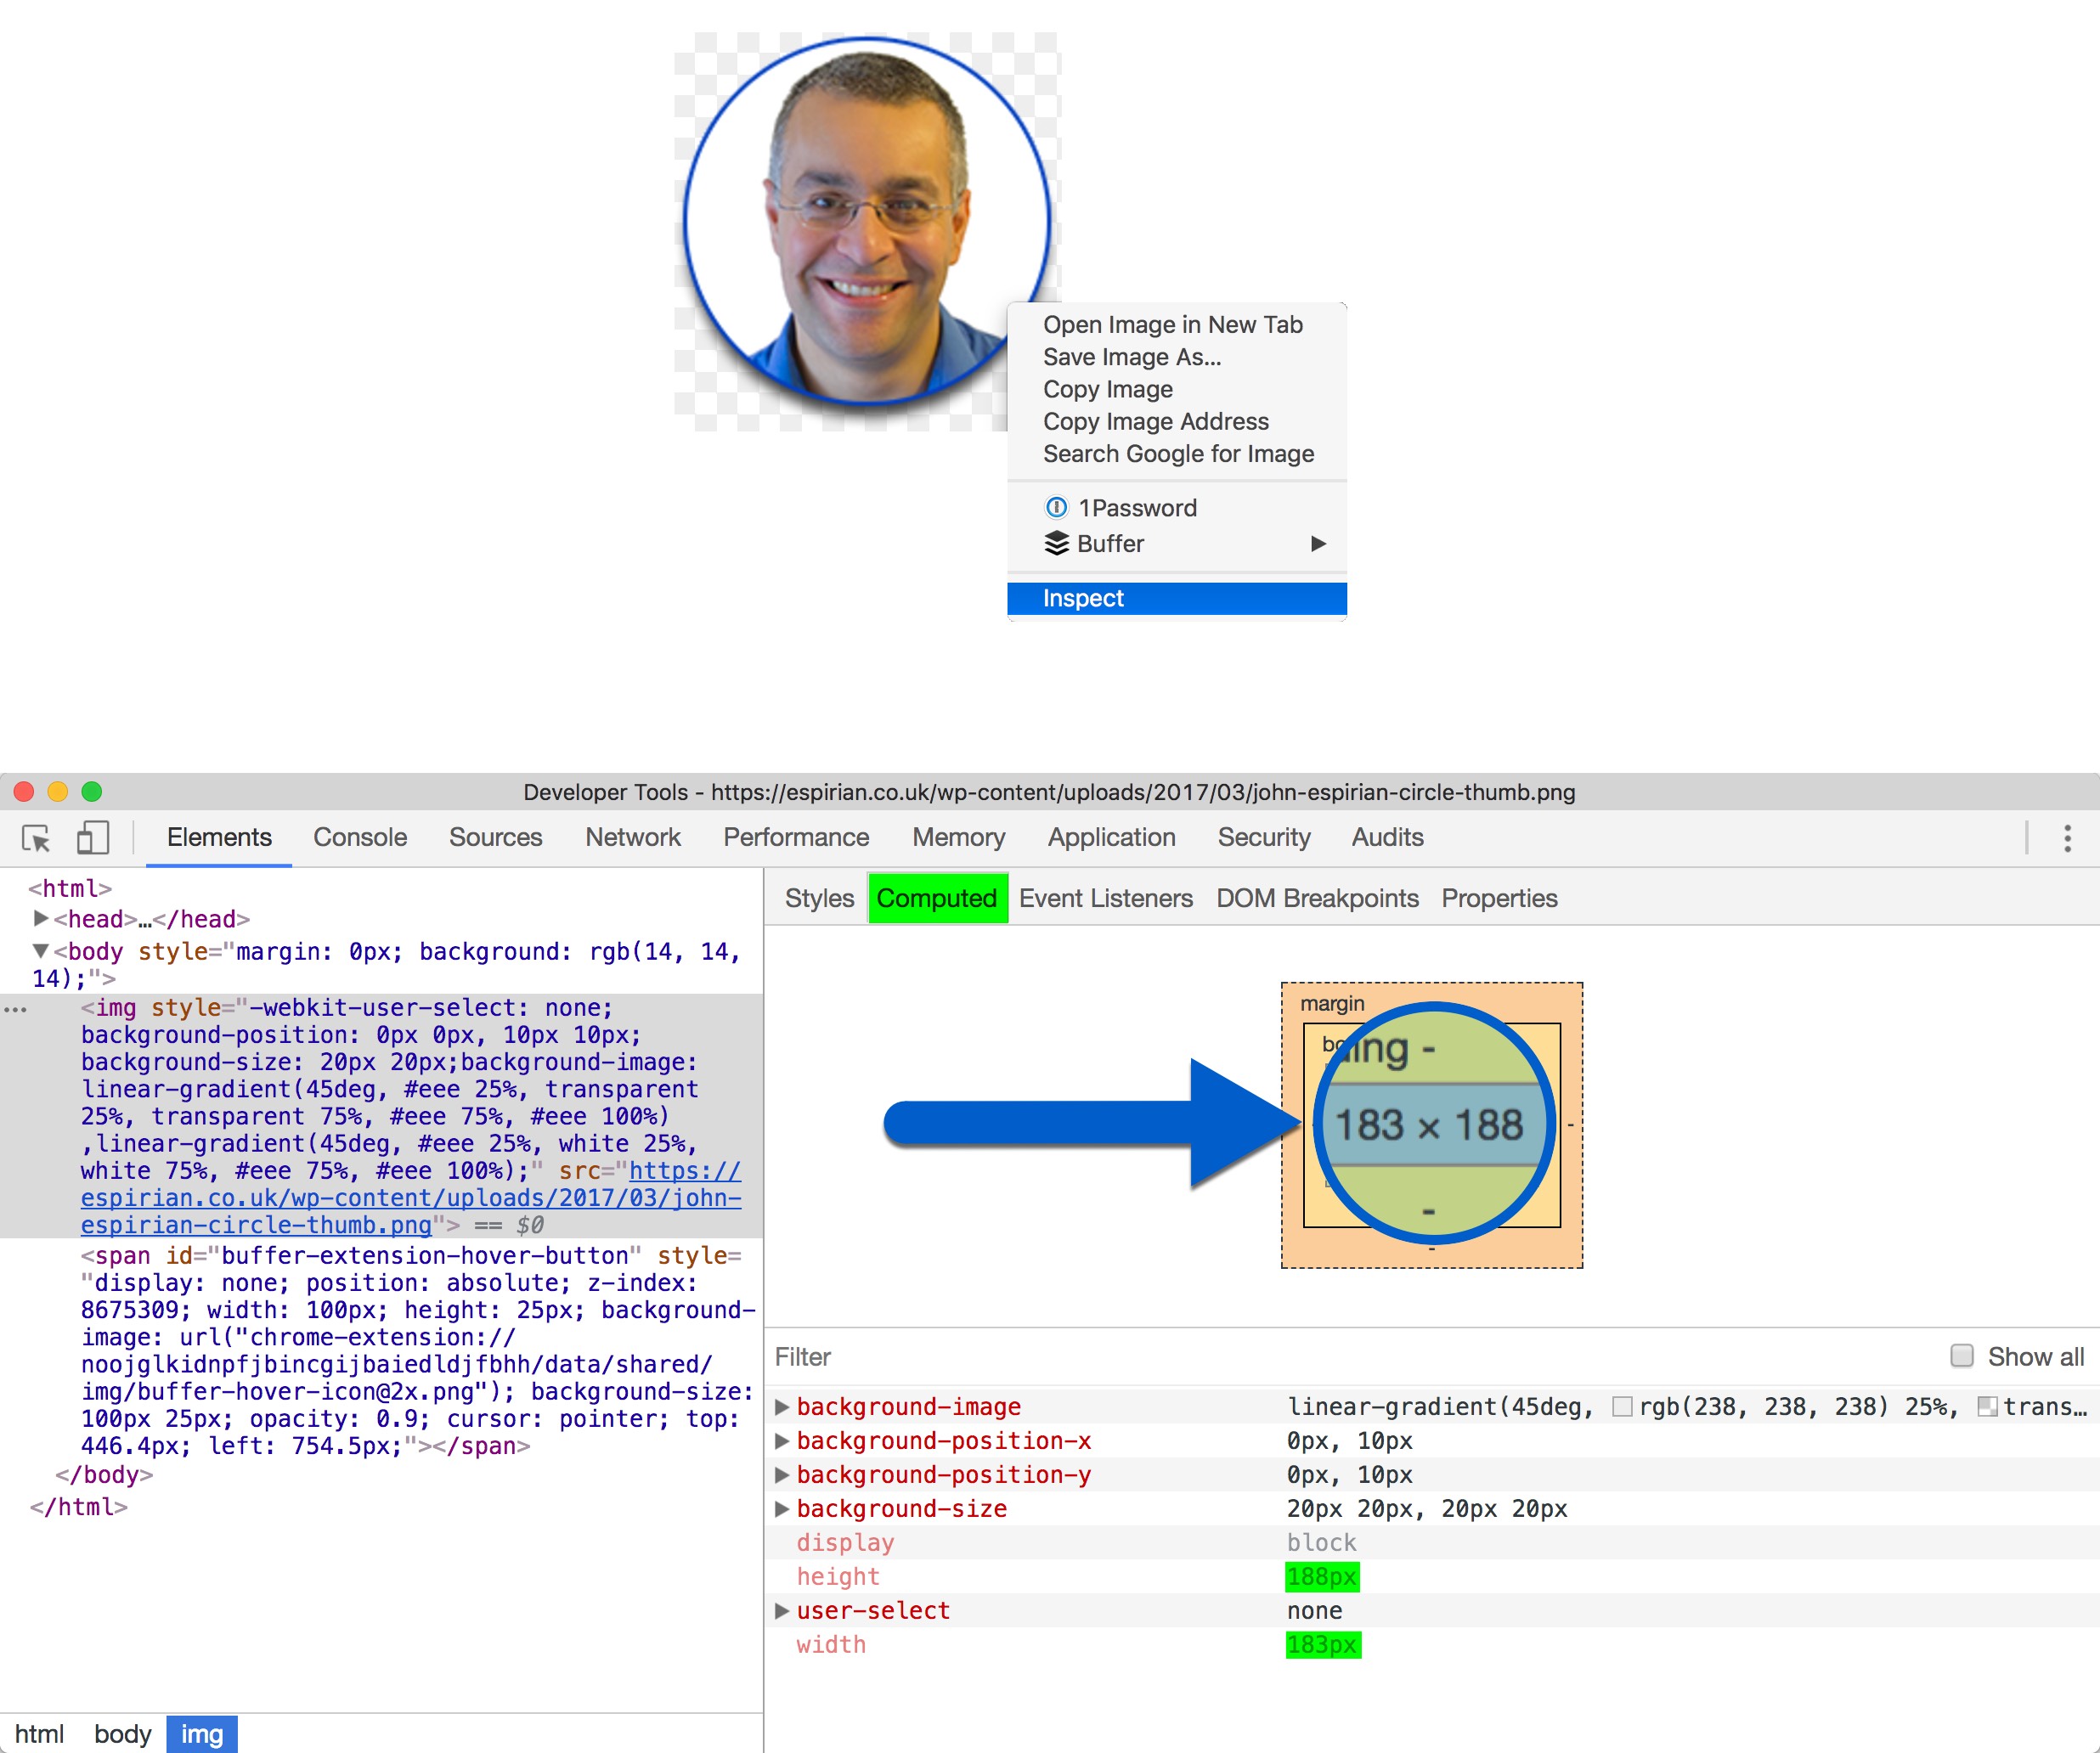
The innermost rectangle in the multicoloured box gives you the width and height in pixels.
Using image placeholders.
What if you know you’ll need an image for a web page or blog post but you don’t have something to hand?
You could use a free stock image but it might be quicker and easier to use an image placeholder.
Image placeholders give your layout the right dimensions – and you don’t have to upload any extra files to your website.
What is an image placeholder?
An image placeholder is simply an image of a given width and height that temporarily takes the place of another image that you intend to use on your website.
How do I add an image placeholder to a page?
Thankfully, there are now lots of free online services that will generate image placeholders for you. All you need to do is to place an
The clever bit is that the information in the code is what defines the width and height of the image. You won’t need to edit the images or even upload them to your server.
Here are a couple of examples.
Using LoremFlickr.
This service generates random pictures, and it’s free: LoremFlickr.
To change the dimensions, just change the figures in the code. The first figure is for the width, the second for the height. The figures are separated by the / character.
<img src="https://loremflickr.com/320/240" />
In this example, the width is 320 and the height is 240. The figures represent pixels (px) but the units must not be written into the code.
Using placehold.it.
This services generates simple grey boxes that display their dimensions.
<img src="https://placehold.it/100x150" />
This generates a 100×150 image that looks like this:
Unlike the earlier example, the dimensions here are separated by an x character instead of a / character.
How to add a favicon to your website.
A favicon is an image that is used to represent a website.
You’ll often see favicons in your browser’s address bar, tabs, bookmarks or other overview screens. Here’s an example in Chrome on macOS:
And here’s an example in Safari on iOS:
How do I create a favicon?
The most comprehensive way for creating a favicon is to use the following service.
The site asks you to upload a source image and then proceeds to generate the necessary favicons for you as well as the HTML code that needs to go on your website.
When supplying a source image, remember the following:
- Use an image that is at least
260×260 pixels - Make sure the image is square
Download your favicons to your computer.
Once you’ve supplied the source image, Real Favicon Generator will generate several favicons that you can then download to your computer as a zip archive.
Upload your favicons to your web server.
Copy the favicon files you downloaded to the top level (root) of your web server.
If your website allows you FTP access, a free FTP tool such as FileZilla (Client) or Cyberduck will let you do this.
You’ll need to get the server name, username and password from your web hosting provider. Ask for help if you don’t know how to do this step.
Edit the <head> of your pages.
On the page where you download the favicon image archive, you’ll see a block of code similar to the one below.
(Because some customisable options are presented when you supply your source image, the resulting code you see might not be identical to this.)
<link rel="apple-touch-icon" sizes="57x57" href="/apple-touch-icon-57x57.png">
<link rel="apple-touch-icon" sizes="114x114" href="/apple-touch-icon-114x114.png">
<link rel="apple-touch-icon" sizes="72x72" href="/apple-touch-icon-72x72.png">
<link rel="apple-touch-icon" sizes="144x144" href="/apple-touch-icon-144x144.png">
<link rel="apple-touch-icon" sizes="60x60" href="/apple-touch-icon-60x60.png">
<link rel="apple-touch-icon" sizes="120x120" href="/apple-touch-icon-120x120.png">
<link rel="apple-touch-icon" sizes="76x76" href="/apple-touch-icon-76x76.png">
<link rel="apple-touch-icon" sizes="152x152" href="/apple-touch-icon-152x152.png">
<link rel="apple-touch-icon" sizes="180x180" href="/apple-touch-icon-180x180.png">
<link rel="icon" type="image/png" href="/favicon-192x192.png" sizes="192x192">
<link rel="icon" type="image/png" href="/favicon-160x160.png" sizes="160x160">
<link rel="icon" type="image/png" href="/favicon-96x96.png" sizes="96x96">
<link rel="icon" type="image/png" href="/favicon-16x16.png" sizes="16x16">
<link rel="icon" type="image/png" href="/favicon-32x32.png" sizes="32x32">
<meta name="msapplication-TileColor" content="#112277">
<meta name="msapplication-TileImage" content="/mstile-144x144.png">
Copy and paste Real Favicon Generator’s code (not necessarily the same as the above!) into the <head> section of your site’s pages.
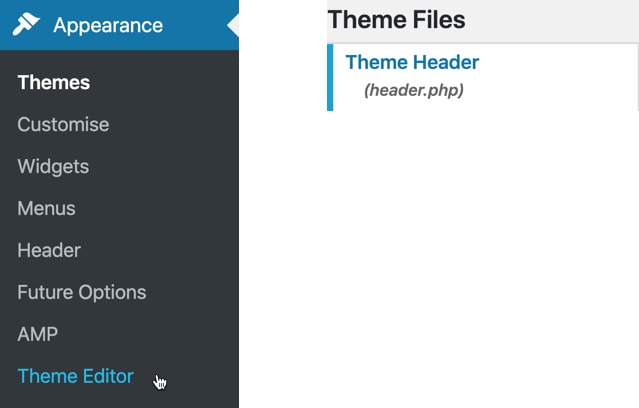
On WordPress, you can add the code by editing your theme’s header. Go to Appearance | Theme Editor | Theme Header to do this.
Once you’ve uploaded the images and edited the <head> section of your site’s pages, your favicons will start working straight away.
If the process doesn’t work after a refresh, it’s almost certainly because
- the images have been uploaded to the wrong folder, or
- the code has been pasted into the wrong place.
If you’re using a system that doesn’t give you full access to the web server, you may need to jump through some other hoops to display your favicon. For example, Weebly users should follow the advice in this Weebly favicon article.
Let’s wrap up.
Good images will help your blog posts stand out, and using dimensions of 1200×630 pixels for your hero images means that your visuals will work well when your posts are shared on most social platforms.
If you use WordPress, make sure to add the Yoast SEO plug-in to make it easy to associate your social posts with your hero images.
Tools such as Canva and Pablo can help you produce images at the right dimensions for all social platforms, so give them a whirl and see whether they help you get your content noticed.
Continue the business blogging guide
This post is part of my definitive business blogging guide.
Previous step
Improve your writingNext step
Create videos