
Whenever I’m busy working on a project, I often find myself regularly referring to a small group of files. It might be a style guide, a client brief or a general crib sheet. I don’t like to interrupt my stream of thought too much, so it’s important to me that such files are easily accessible. The last thing I want is to try to remember where a particular document is and then go clicking about through folders to open it.
Here’s a quick video tip to show you how to put your important files within easy reach:
Put your files within reach
Here’s a typical macOS Finder window:
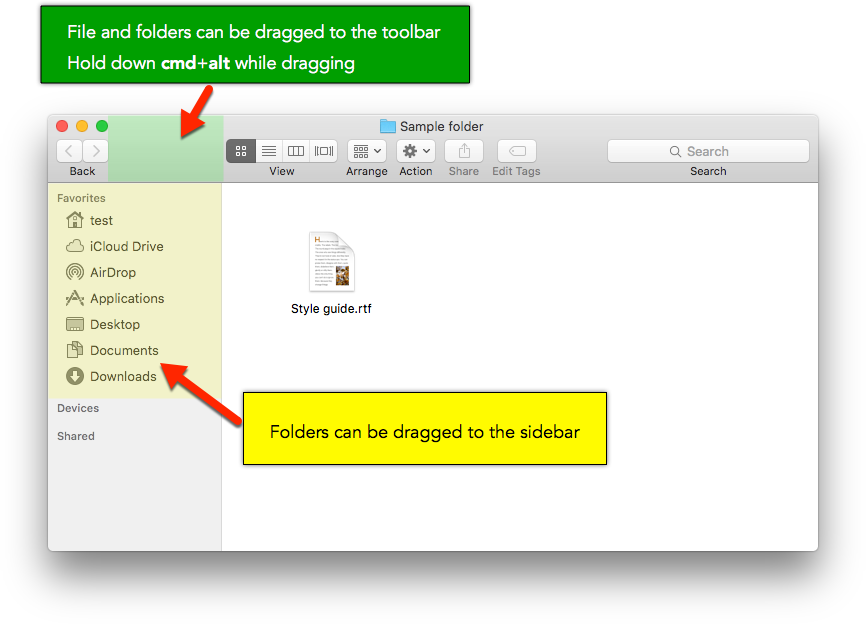
I’m sure some of you will know that you can add shortcuts by dragging folders over to the sidebar at the left-hand side of the window. That’s certainly a useful way to speed up your work, and if you haven’t tried it yet you really ought to.
But this method allows you to make quick links only to folders. What if you want to do the same thing with files?
Here’s the secret: the toolbar running along the top of the window is capable of displaying shortcuts to both files and folders. But, unlike the sidebar, items can’t be added to the toolbar at the top of the window simply by dragging them there.
Adding a toolbar shortcut
Here’s how to add a file or folder to the toolbar at the top of a Finder window:
- Open the Finder window containing the file or folder you want.
- Hold down the
Cmd+Altkeys. - Drag the file or folder to a blank part of the top toolbar.
That’s all there is to it. You can now access the file or folder from any Finder window. As we’re just creating a shortcut, the original file isn’t moved or changed in any way.
Renaming a toolbar shortcut
One of my biggest annoyances with shortcuts in the left-hand sidebar is that they can’t be renamed without the original folder also being renamed. As ever, there is a way to get around this, though it’s not particularly elegant.
All we need to do is to create an alias to the file or folder, rename it appropriately and then place it in the top toolbar, again using the Cmd+Alt trick above.
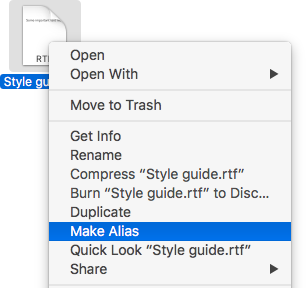
Bonus tip: about aliases
In macOS, an alias is the term for a file that acts as a pointer to another file. (Windows users usually call them ‘shortcuts’.)
To create an alias, Ctrl-click a file and click Make Alias.
You can rename an alias and move it almost anywhere – usually to the desktop – without affecting anything about the original file.
Removing a toolbar shortcut
To remove a shortcut from the top toolbar, simply hold down the Cmd+Alt keys again and then drag the shortcut icon out of the window. It will vanish with a pleasing puff. Note that this doesn’t delete the original file: it just removes the shortcut.
Let’s wrap up
There we are – a nice and easy tip for keeping your files close at hand.
Have you got any tips to share? Post them in the comments below. I’d love to hear from you.