Having recently almost filled my iMac’s hard disk, I needed a way to free up some disk space. But where to start?
I decided the best approach would be to find the largest files on my computer, deleting the ones I didn’t need.
Here’s how to do it.
Check existing disk space
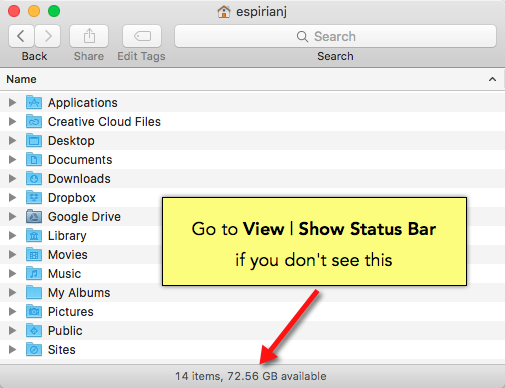
Open a Finder window and take a look at the Status bar at the bottom.

If you don’t see the Status bar, you can turn it on by going to the View menu and clicking Show Status bar (or press Cmd+/).
Look for large files
Now it’s time to search for the files taking up lots of disk space. Here’s how:
- Go to the File menu and click Find (or press
Cmd+F). - Click This Mac to make sure the search applies to the whole machine.
The single search rule displayed by default looks like this:
[Kind] is [Any]
![[Kind] is [Any]](https://espirian.co.uk/wp-content/uploads/2019/11/kind-is-any.png)
- Set the left dropdown menu to Other…
- Look for the File Size item, tick the corresponding In Menu checkbox, and then click OK.
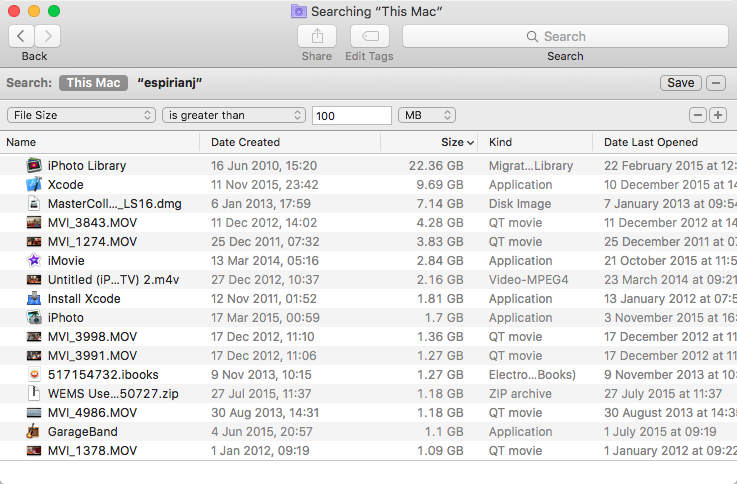
- Set the left dropdown menu to File Size.
The search rule changes to display 3 dropdown menus.
- Set the middle dropdown menu to is greater than.
- Set the right dropdown menu to MB and enter a value in the text field – say 100.
Now we can see all files larger than 100MB.

We can now review the files to see which ones can be safely deleted.
Start by looking out for duplicate files and old videos and apps that you no longer need or use.
Bonus tip
To view a file quickly, click it once and then press the Space bar. This ‘Quick Look’ mode is faster than opening the app associated with the file.
I use this Space bar trick all the time to preview Word documents, images, videos and music files.
The amount of free disk space will change only after you empty the Trash. Remember to be sure before deleting anything.


