
An intro to HTML, the language of the web
Do you ever have to fiddle with your website pages beyond just editing text?
If you’re confused by the code view, this guide to HTML should make things a bit less scary.
- Introduction
- Elements: the building blocks of HTML
- Creating an HTML document
- Building the hierarchy
- Page titles
- Paragraphs and formatting
- Headings
- Images
- Links
- Lists
- Comments
- Tables
- Special characters
- Blockquotes
- Citing a source
- Inline quotations
- The
<head>element revisited - Adding some style with CSS
- Adding supporting information with metadata
- Meta tags for social sharing
- Adding scripts
- Let’s wrap-up
Introduction
Whenever you view a website, your web browser converts HTML code into rendered text, images and other media. If you ever want to fix or amend the contents of a page, you’ll often need to change that HTML code. The very thought of this strikes fear into many hearts, but that needn’t be the case.
By understanding the basic anatomy of a page, we can soon get to grips with our content.
Elements: the building blocks of HTML
HTML is made up of a series of hierarchical elements. Most elements have an opening tag and a closing tag, with some content sandwiched in between. If you’re used to marking up chapters, headings and subheadings, this concept should be easy to grasp.
If this sounds alien to you, just think of HTML as a tree with the elements as its branches.
Here’s an example of the paragraph (<p>) element:
<p>The content goes between the opening and closing tags. This paragraph can be as long as I want it to be, and there's no problem with the content spilling over multiple lines. This whole block will be treated as a single paragraph.</p>
A small number of elements use a single tag. These are sometimes referred to as self-closing elements. Here’s an example of a self-closing element – the line break (<br>):
Line breaks insert new lines into<br>
the text. It's usually better to<br>
use paragraph elements instead.<br>
Note for nerds
In XHTML, self-closing elements need to be written with a forward slash (e.g. <br />), but we won’t worry about that in this series.
Creating an HTML document
With a basic understanding of the sorts of elements that exist, we can start to build our own HTML page. First, let’s create the file that will contain our code:
- Create a new text file in a plain-text editor such as Notepad (Windows) or TextEdit (Mac).
- Save the empty file as
sample.html.
Text editor recommendations
If you want a better plain-text editor than the one pre-installed on your machine, you won’t go wrong by trying one of these:
OK, we now have somewhere to place our HTML code. When we’re done editing the sample file, we can save the file, close it, and then double-click to re-open it in a web browser. (By default, .html files open automatically in a web browser.)
The simplest web documents start with this opening tag:
<html>
We can help web browsers to correctly display our content by declaring the HTML standard we’d like to use on our page. To use the latest HTML5 standard, we should start our page as follows:
<!DOCTYPE html>
<html>
Because <html> is a standard element, its opening tag needs a complementary closing tag. Therefore, at the end of the document, we’ll use this code:
</html>
We don’t need to close the <!DOCTYPE html> tag at the end of the document, because it’s not really an element.
Building the hierarchy
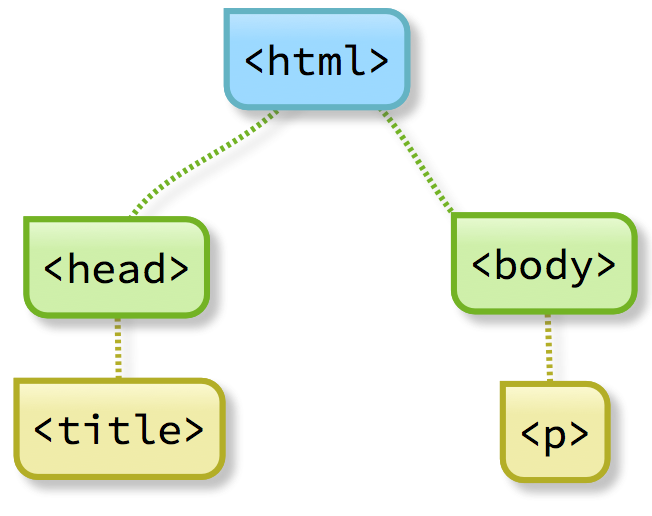
Just as a real tree’s branches can have their own branches, elements in HTML can be nested within other elements. Think of the <html> element as the single root from which all those branches ultimately grow.
Our root <html> element must contain the following elements, in this order:
<head>– includes information about the page<body>– includes information displayed on the page
Another useful analogy – one I’ll refer to in a future post – is to think of the <html> element as the ‘parent’ and the <head> and <body> elements as the ‘children’.
Let’s put this together and see what we’ve got:
<!DOCTYPE html>
<html>
<head></head>
<body></body>
</html>
The above code defines a basic, empty HTML page. Everything else we add to the page will now be nested within the <head> or <body> elements. These elements will therefore become the parents of their own child elements.
Page titles
We can add a title to the page by including a <title> element within the <head> element. Here’s how that looks:
<head>
<title>Page title goes here</title>
</head>
Did you notice that I added a carriage return after the opening <head> tag? That was done to aid readability. In HTML, you can add spaces, tabs and carriage returns pretty much anywhere and the code will still work.
You won’t see the page title appear within the main part of your web browser screen, but it’s often displayed at the very top of the browser window, as shown in this example from Google Chrome:

Paragraphs and formatting
Most text on a page should be placed inside <p> elements within the <body> element. We can set text in bold or italics by using the <strong> and <em> elements respectively. Here’s an example:
<body>
<p>This text sits within a paragraph element.</p>
<p>Other elements are used to write text in
<strong>bold</strong> or <em>italics</em>.</p>
</body>
The result
If we put all of this code together, we produce the following:
<!DOCTYPE html>
<html>
<head>
<title>Page title goes here</title>
</head>
<body>
<p>This text sits within a paragraph element.</p>
<p>Other elements are used to write text in
<strong>bold</strong> or <em>italics</em>.</p>
</body>
</html>
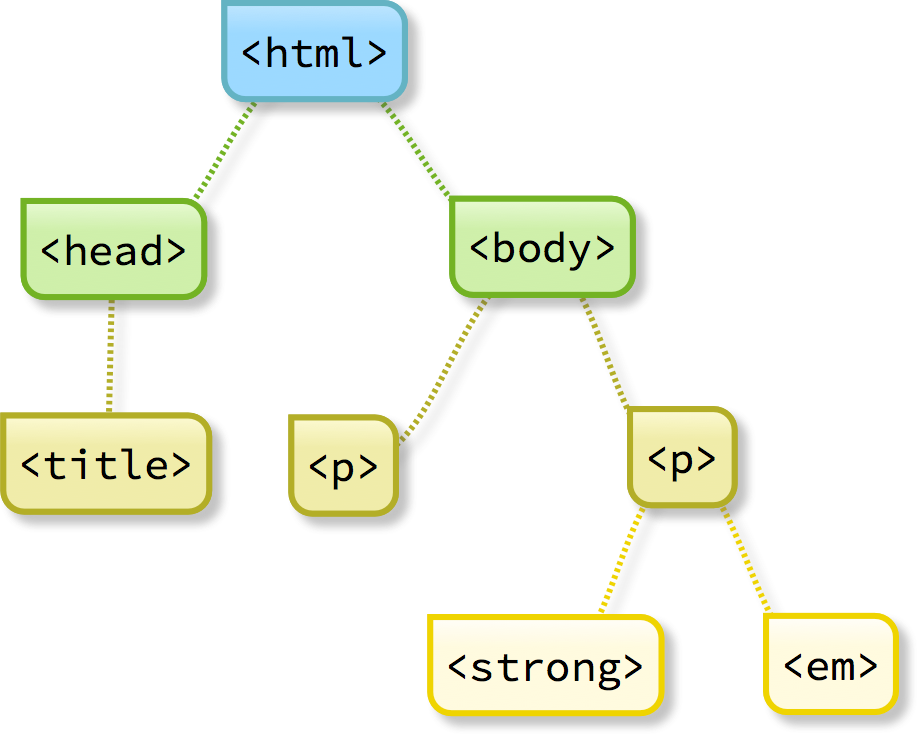
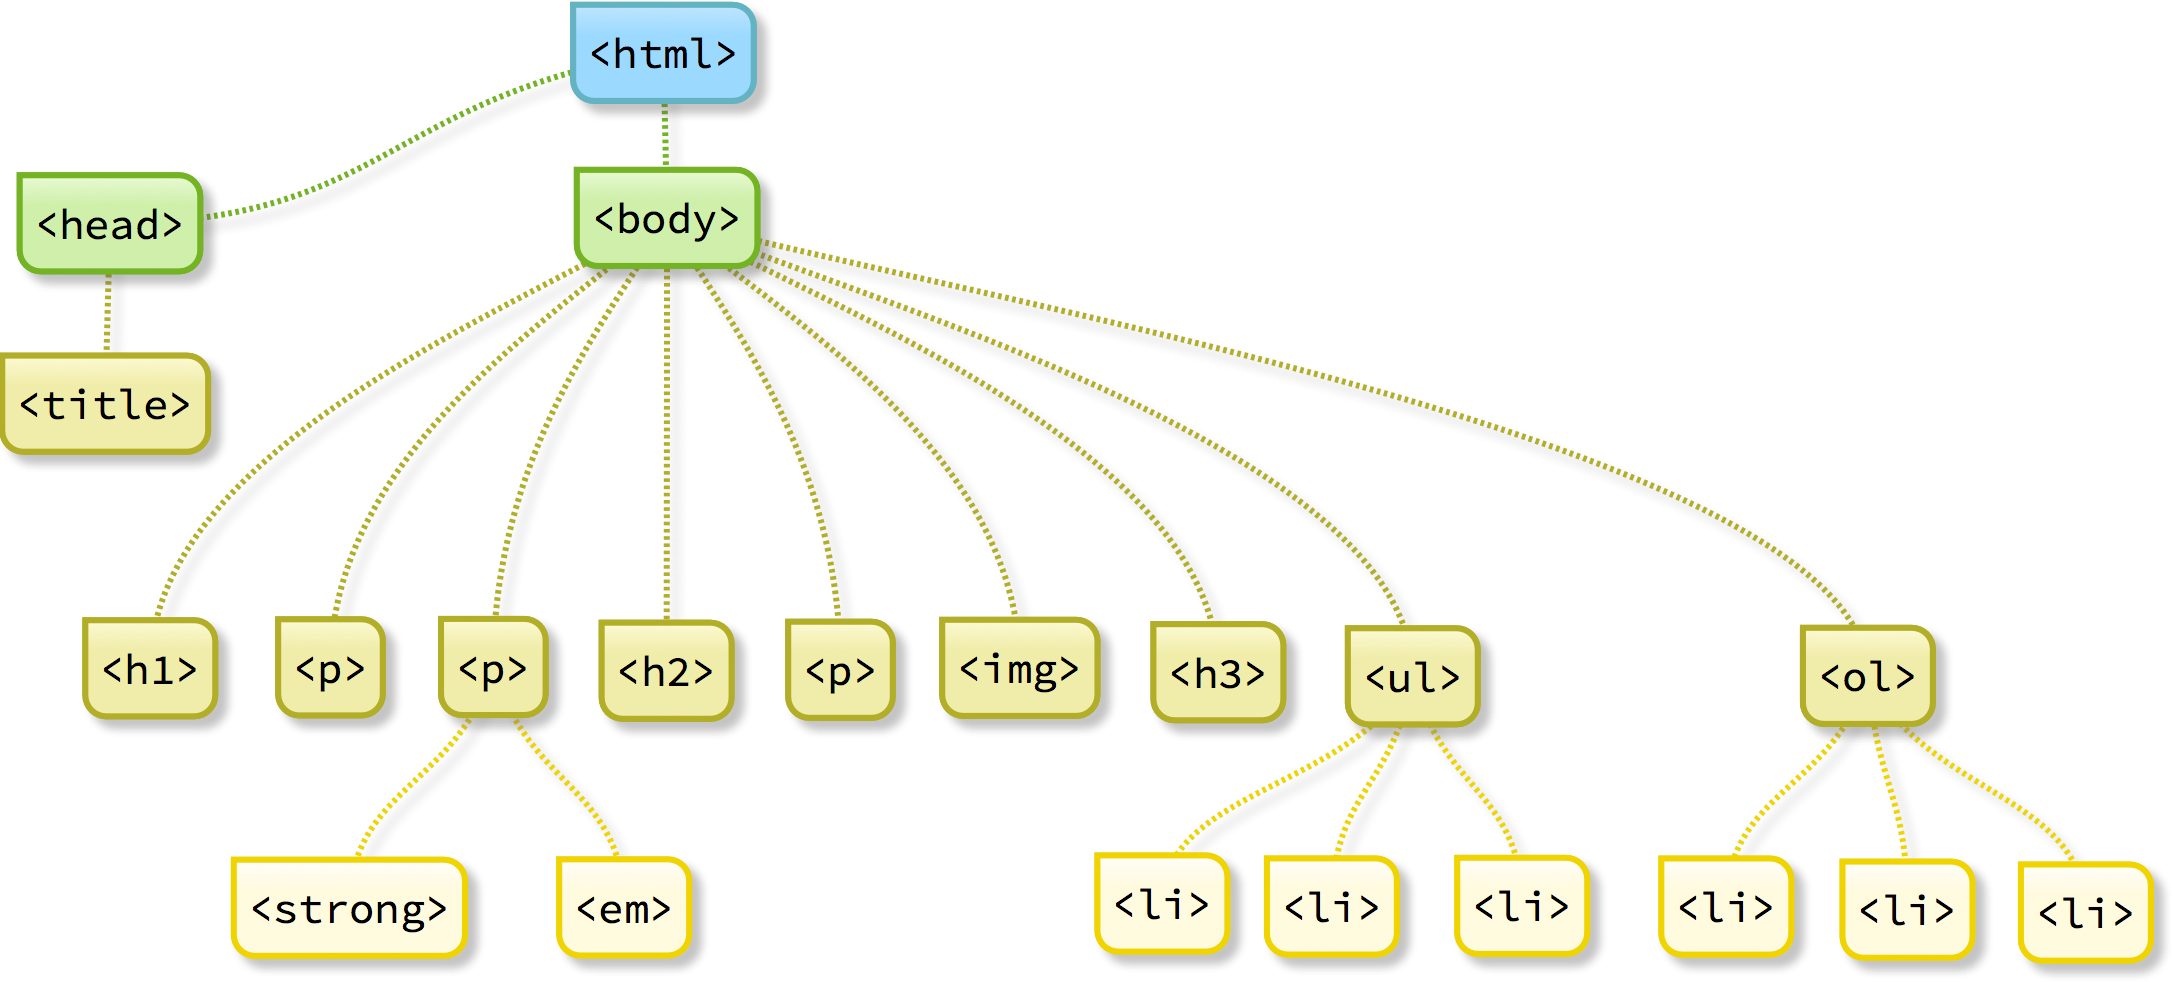
Still struggling to understand how all these elements fit together? Here’s a view of the code that emphasises the tree structure I mentioned earlier:
To see how the code looks when viewed in a web browser, take a look at this side-by-side screenshot of my own code editor and web browser:
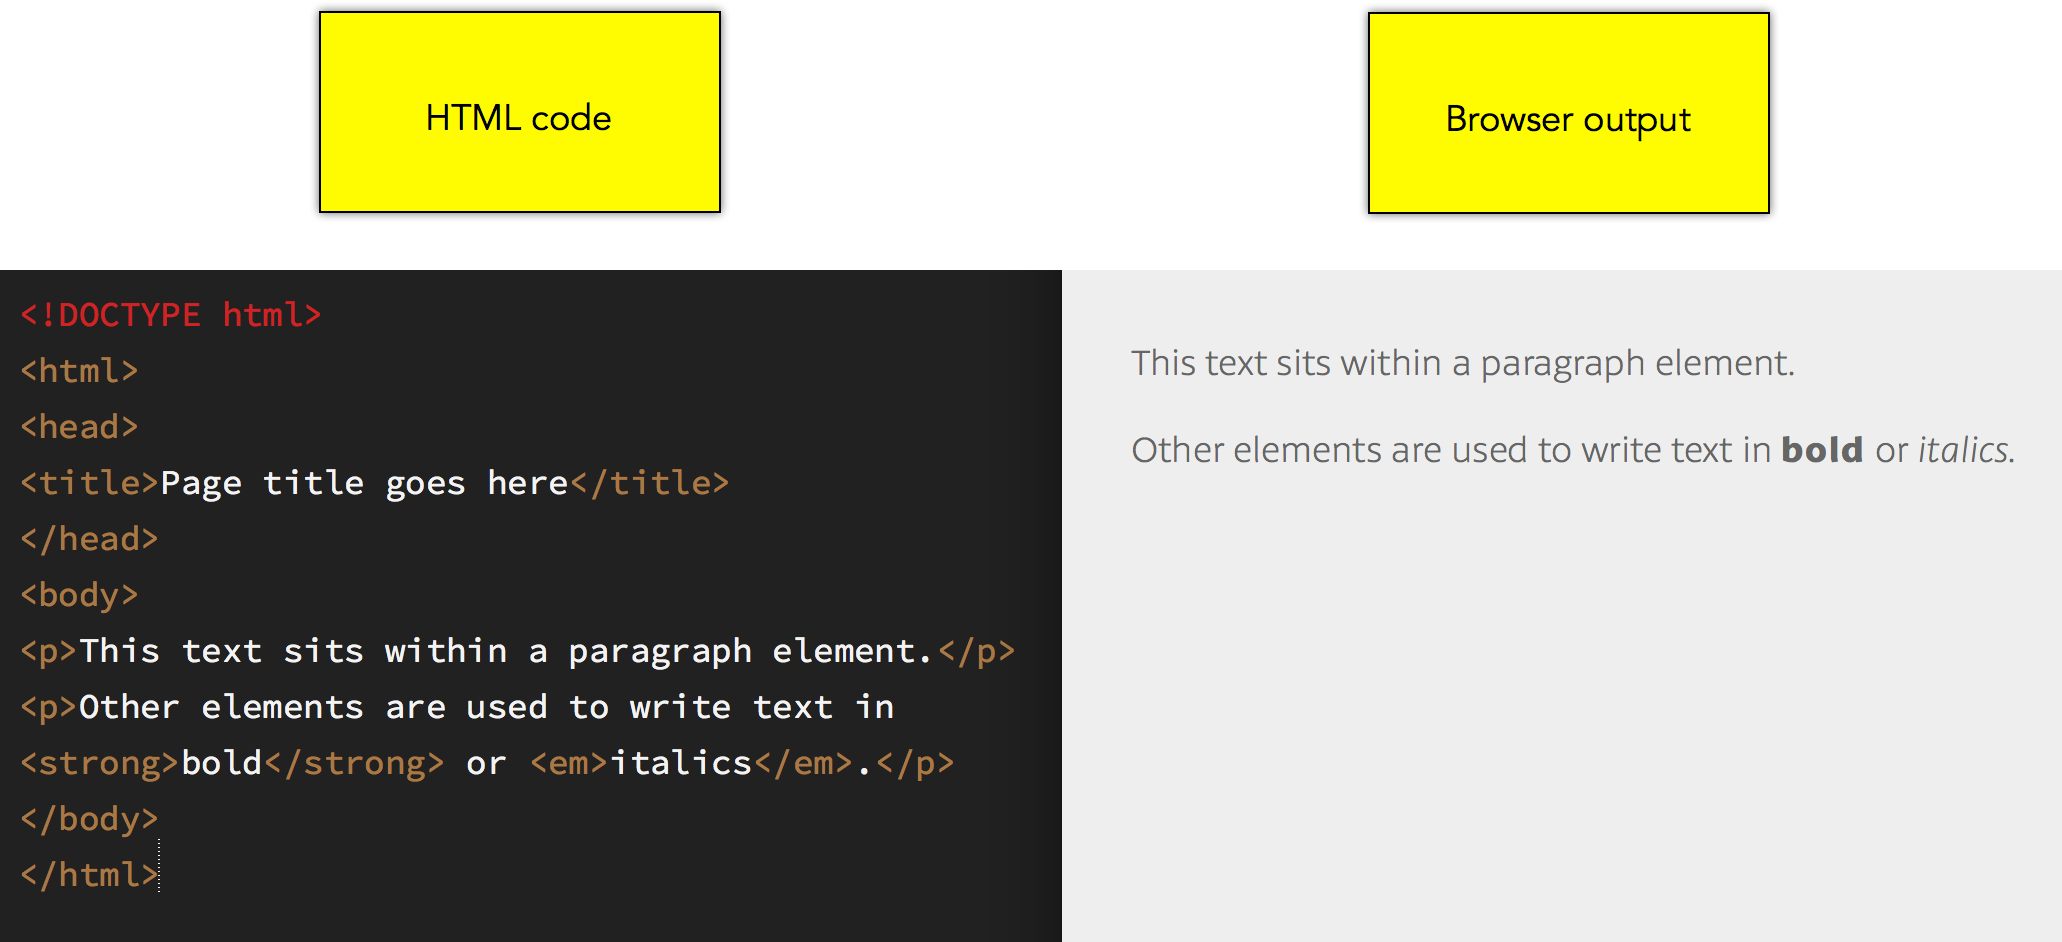
And if you wish to view the real HTML page in question, here it is: sample.html.
Headings
HTML supports 6 levels of heading. Here’s the code you’ll need:
<h1>This is a level 1 heading</h1>
<h2>This is a level 2 heading</h2>
<h3>This is a level 3 heading</h3>
<h4>This is a level 4 heading</h4>
<h5>This is a level 5 heading</h5>
<h6>This is a level 6 heading</h6>
The level 1 heading (<h1>) is the most important on the page. It should appear at or very near the top of the page, and it’s best to use just one <h1> per page.
So long as we’re sensible about it, we can use other headings any number of times. It’s logical for an <h2> to be used after an <h1>, for an <h3> to be used after an <h2>, and so on. But HTML won’t enforce this: how you use the headings is ultimately up to you.
Use headings to break up body text
It’s not a good idea to write walls of text on the web. Use headings to break up text into readable chunks. Your readers will thank you!
By default, an <h1> is the largest heading and an <h6> the smallest. There’s a way to change the styling of headings (and indeed of every other HTML element), but we’ll get to that in a future post.
Images
Images are added by using the self-closing <img> element. We use ‘attributes’ inside the element to specify which image to display and to provide some information about the image.
Definition: attribute
In HTML, an attribute defines a property of an element. Attributes are found inside element tags and are most often written in the format attribute="value".
Here’s an example of an <img> element with 3 attributes:
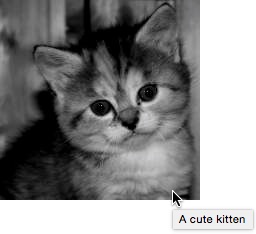
<img src="kitten.jpg" alt="A cute kitten" title="A cute kitten">
This code produces the image below:
Let’s look at each part of the code:
<img>– the element used to display an imagesrc="…"– the attribute used to set the name and location of the image filealt="…"– the attribute used to set the text to display when the image can’t be loadedtitle="…"– (optional) the attribute used to set the text to display when the pointer hovers over the image.
The order of the attributes (items 2, 3 and 4 above) doesn’t matter, though consistency makes for a better world. Note that these are not the only available attributes, though they’re certainly the most important ones for now.
Image sources
The src="…" attribute has to be written so that the image can be located. This sounds rather obvious but it’s important to know how to locate the image on your website so you don’t end up with a broken (missing) image on your page.
In my example above, I’ve shown only the filename of the kitten image. In the real world, this would be correct only if the HTML page and the image were in the same folder on the website. In most cases, images will be placed in some other folder and so our src="…" attribute would need to point not only to the right image but also to the right folder that contains the image.
There are a couple of ways to define the correct ‘path’ to an image. I find the easiest method is to start from the top level of the web server and list every folder that has to be opened to reach the image.
Here’s an example: let’s say that I keep my favourite kitten photo in a folder called images, which is inside my blog folder. Let’s also say that this blog folder is at the highest level of my web server. This highest (or ‘root’) level is usually a folder labelled either public_html or wwwroot on the web server. That might sound a bit confusing so here’s a visual representation of the example:
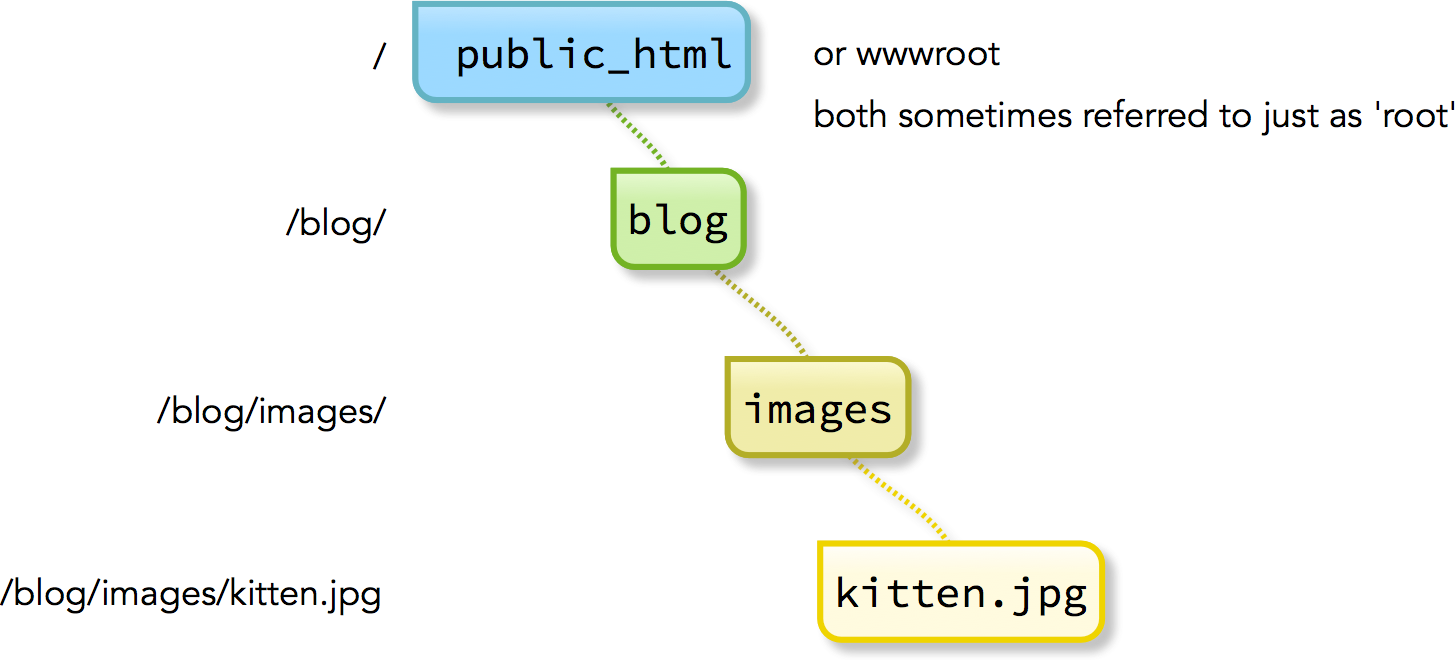
In this case, our <img> code would be written as follows:
<img src="/blog/images/kitten.jpg" alt="A cute kitten" title="A cute kitten">
See how I’ve adjusted the src="…" attribute. I begin with a forward slash, which says ‘look at the root of the web server’. I then list all the folders between the root and the image, with each separated by a forward slash. This code lets me display my kitten image on any page of my website. Just bear in mind that this approach means there’ll be trouble if I ever rename my blog or images folders.
Before we move on, I should mention that it’s possible to quote a whole web address as part of an image path. For example, this is valid code:
<img src="http://resources.espirian.co.uk/anatomy-of-an-html-page/kitten.jpg" alt="A cute kitten" title="A cute kitten">
This means it’s possible to link to images from other websites; however, you must check that this is permitted – something that ought to be second nature to the copy-editors in the audience. As a content-protection measure, some websites automatically block third parties from linking to their images.
Links
To link from one page to another, we use the <a> element (it stands for ‘anchor’). This takes an href="…" attribute, which is used to specify the address of the destination page.
<a href="https://espirian.co.uk/">Technical copywriting</a>
Note that a closing </a> tag is necessary, and the text between the tags is what turns into the familiar, clickable hyperlink, e.g. Technical copywriting.
Useful attributes of anchor links:
title="…"– the text that appears when hovering over the link (not for essential info, though: mobile users and users with accessibility issues won’t see this text)target="…"– usetarget="_blank"to force the link to open in a new browser window
Lists
HTML supports these list types:
- Unordered
(<ul>)– bulleted lists - Ordered
(<ol>)– numbered lists
Individual entries in each type of list are created with the <li> (‘list item’) element. Here’s an example of an unordered list:
<ul>
    <li>Apples</li>
    <li>Oranges</li>
    <li>Pears</li>
</ul>
Notice that I’ve chosen to indent the list items, which makes the structure clearer. Good news: this won’t affect the output in a web browser.
Here’s the browser output of this unordered list:
- Apples
- Oranges
- Pears
And here’s the code for an ordered list:
<ol>
    <li>First</li>
        <li>Second</li>
      <li>Third</li>
</ol>
I’ve deliberately messed up the spacing but the code will still work. As you might expect, it’s best to be a little more logical with real code.
Here’s the browser output of this ordered list:
- First
- Second
- Third
Most of us know how to create a list in a word processor. In HTML, the process is a little more involved. Let’s look at this in a bit more detail:
Ordered lists
An ordered list is created using the <ol> element. All list items within are created using the <li> element.
Ordered lists are used when the list items should follow a sequence, with Arabic numerals (1, 2, 3, etc.) as the default list item markers. Here is an example:
<!-- Pay attention, learner drivers -->
<ol>
   <li>Mirror</li>
   <li>Signal</li>
   <li>Manoeuvre</li>
</ol>
Here is the output of the code:
- Mirror
- Signal
- Manoeuvre
Now, look back at the code and notice that the numbers are not shown there. Adding another list item anywhere within the list will result in the list being automatically renumbered – a handy feature familiar to anyone who has ever created a numbered list in a word processor.
Alternative list styles
We don’t have to stick to common numerals when creating an ordered list. Special list styles allow us to use alternative numbering schemes. Here is an example:
<ol style="list-style-type:lower-roman;">
   <li>Mirror</li>
   <li>Signal</li>
   <li>Manoeuvre</li>
</ol>
Adding the lower-roman style to the list results in this output:
- Mirror
- Signal
- Manoeuvre
There are several different list style types. You can find the full set on the CSS list-style-type Property page of the W3Schools site.
The method above uses CSS, which we’ll cover in more detail in future posts. Another way of changing an ordered list’s numbering style is by using the type="" attribute. This method is better in some ways, but, unlike CSS, it doesn’t support all possible numbering styles. For more information about the type="" attribute, see the HTML <ol> type Attribute page of the W3Schools site.
Changing or restarting list numbering
It’s sometimes necessary to change the list numbers themselves (rather than just their style), often because we wish to split up a list into two or more parts. We can do this by using the start="n" attribute on the <ol> element, where n represents the number at which the list should start.
Here is an example:
<ol>
   <li>First step</li>
   <li>Second step</li>
</ol>

<p>Some explanatory text that breaks up the list.</p>
<!-- This break in the list could be of any length. -->

<ol start="3">
   <li>Third step</li>
   <li>Fourth step</li>
</ol>
And here’s the result:
- First step
- Second step
Some explanatory text that breaks up the list.
- Third step
- Fourth step
An alternative approach is to use the value="n" attribute on the relevant <li> element. This time, n represents the number to assign to the targeted <li> element. Here’s an example:
<ol>
   <li>Step A</li>
   <li>Step B</li>
   <li value="4">Step D</li> <!-- Subsequent numbers adjust automatically -->
   <li>Step E</li>
</ol>
And here’s the output, with a jump in numbering on the third step:
- Step A
- Step B
- Step D
- Step E
A note about deprecated code
You may see some advice on the web to the effect that the start="n" and value="n" attributes are deprecated and therefore should not be used. This advice applies to the old HTML 4.01 standard but not the current HTML 5 standard – so feel free to take advantage of these very useful features.
Reverse-ordered lists
The reversed attribute allows us to reverse the ordering of ordered lists, which can be useful for creating a countdown. At the time of writing, this feature is not supported by all web browsers (see browser support list).
Here’s an example:
<ol reversed>
   <li>Bronze</li> <!-- Should be numbered 3 -->
   <li>Silver</li> <!-- Should be numbered 2 -->
   <li>Gold</li>   <!-- Should be numbered 1 -->
</ol>
And here’s the result:
- Bronze
- Silver
- Gold
If you see the numbers in ascending rather than descending order, your browser does not yet support the reversed attribute.
The long-hand alternative for writing out a reverse-ordered list would be to use the value="n" attribute on each <li> element, entering the numbers manually.
Unordered lists
An unordered list is created using the <ul> element. All list items within are created using the <li> element.
Unordered lists are used when the list items need not follow a sequence, with bullets as the default list item markers. Here is an example:
<ul>
   <li>Apples</li>
   <li>Bananas</li>
   <li>Oranges</li>
</ul>
Here is the output of the code:
- Apples
- Bananas
- Oranges
As with ordered lists, the list item markers in unordered lists can be changed. Here’s an example:
<ul style="list-style-type:circle;">
   <li>Apples</li>
   <li>Bananas</li>
   <li>Oranges</li>
</ul>
And here’s the output:
- Apples
- Bananas
- Oranges
Again, refer to the CSS list-style-type Property page to see other list styles.
Multilevel lists
If we need to create lists within lists, we can do so by placing the code for a list inside the list item of a parent list. Here’s an example:
<ul>
   <li>Apples <!-- Instead of closing the list item, we start a new list -->
      <ul>
         <li>Red apples</li>
         <li>Green apples</li>
      </ul>
   </li> <!-- Now we close the Apples list item -->
   <li>Bananas</li>
   <li>Oranges</li>
</ul>
And here’s the output:
- Apples
- Red apples
- Green apples
- Bananas
- Oranges
Interactive examples
To edit the examples used above, take a look at this CodePen page.
About CodePen
CodePen is a free web-based service for writing code (not just HTML) and seeing the results in the same browser window. The code is at the top of the page, the output at the bottom.
Ordered and unordered lists provide good examples of the importance of correctly nesting HTML elements. The examples given above should be fairly easy to follow – things do get more complicated when lists are nested within lists, though.
Let’s update the hierarchical view of the page we started above:
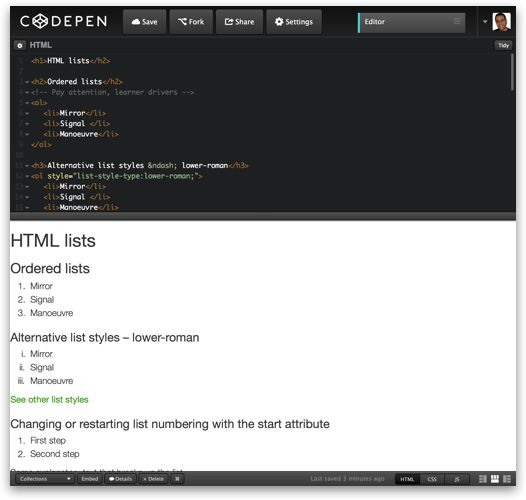
Let’s see how the code has developed so far. Here’s a side-by-side screenshot of my own code editor and web browser:

And if you wish to view the real HTML page in question, here it is: sample2.html.
If you notice that the sample’s a bit plain compared with the right-hand side of the above screenshot, don’t worry: my browser applies some automatic styling to web content so that it doesn’t look so drab.
Comments
As with other computer languages, HTML allows us to write comments in our code. Comments are useful for leaving notes about what certain bits of code do or why particular decisions were taken.
HTML comments aren’t displayed when the page appears in a web browser, but they can be viewed by anyone who looks at the page source (so don’t assume that comments are private).
Comments start and end with <!-- and --> tags. In the example below, the comment is shown in grey:
<h1>Welcome</h1>
<p>Here's an introductory paragraph.</p>

<!-- Remind John to write a better intro -->

<p>This paragraph has a lot more content. Or rather, it would if I could think of anything to write here. Perhaps it'll come to me if I sit here long enough.</p>
Remember: HTML comments are not private
Anyone who looks at your page source will be able to read your comments.
Tables
We use tables to display information that would normally be presented in tabular form. This seems self-evident but the common practice of using tables to control the visual design and layout of a page is an example of misuse of the <table> element.
Most tables are made up of these elements:
<table>– element containing all information about the table<tr>– ‘table row’ element that defines a row<th>– ‘table heading’ element that defines a heading cell<td>– ‘table data’ element that defines a normal cell.
The <table> element should appear somewhere within the document’s <body> element. We can create as many tables as we wish.
Here’s an example table. I’ve added comments to clarify what’s going on:
<body>
<!-- Some other elements could appear here -->

<table>
    <tr>                                <!-- Beginning of the 1st row -->
        <th>Row 1, column 1</th>        <!-- 1st heading cell in this row -->
        <th>Row 1, column 2</th>        <!-- 2nd heading cell in this row -->
    </tr>                               <!-- End of the 1st row -->
    <tr>
        <td>Row 2, column 1</td>
        <td>Row 2, column 2</td>
    </tr>
    <tr>                                <!-- Beginning of the 3rd row -->
        <td>Row 3, column 1</td>        <!-- 1st data cell in this row -->
        <td>Row 3, column 2</td>        <!-- 2nd data cell in this row -->
    </tr>                               <!-- End of the 3rd row -->
    <tr>
        <td>Row 4, column 1</td>
        <td>Row 4, column 2</td>
    </tr>
</table>

<!-- Even more elements could appear here -->
</body>
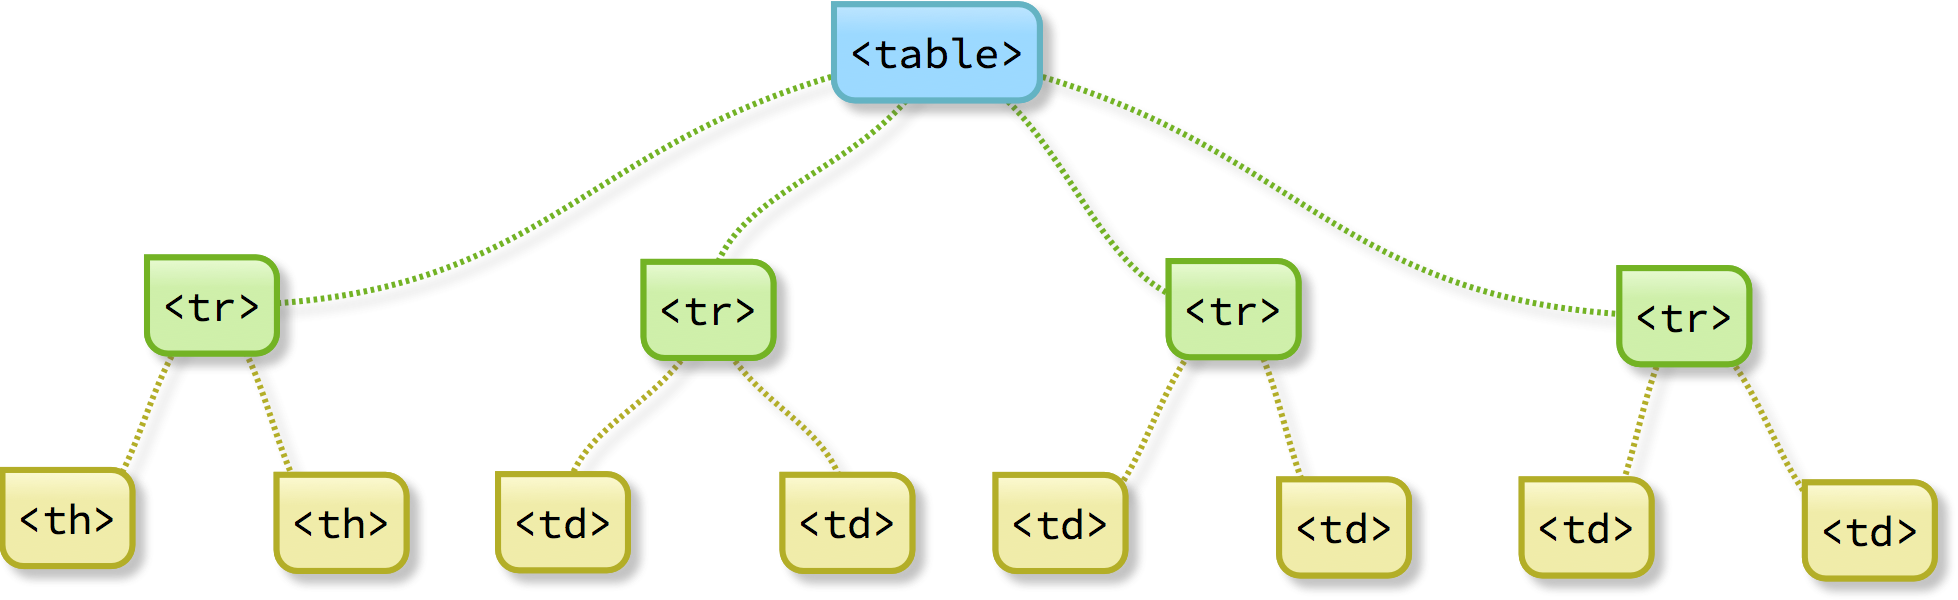
Here’s a visual representation of the table’s structure:
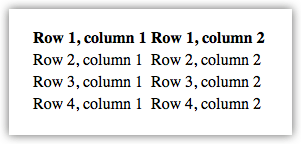
The output of the above code can be seen in the screenshot shown below. For the real HTML version, see example 1 on this page: table.html.
Each <tr> defines a row in the table, with 2 ‘child’ elements in each row. The child elements (<th> or <td>) each define their own columns.
The first <tr> element contains 2 <th> elements. These are the 2 heading columns of our table. By default, <th> elements are styled so as to stand out. In my sample table, the column headings have a bold style applied automatically by the browser. Each web browser has its own default styling rules, so, in your browser, the table.html page may look different from what’s shown in the example screenshot above.
The subsequent rows contain only <td> elements, which define normal table cells.
Table attributes
We’ve looked at some attributes of the <img> element.
The <table> element supports its own set of attributes, with 3 of the commonest ones shown in this example:
<table border="1" cellpadding="5" cellspacing="10">
<!-- Rest of the code within the table unchanged -->
</table>
Here’s what these attributes do:
border– defines the width in pixels of the border around the tablecellpadding– defines the space in pixels between the cell content and the cellcellspacing– defines the space in pixels between cells.
The screenshot below shows the effect these attributes have on the table we created earlier. For the real HTML version, see example 2 on this page: table.html.
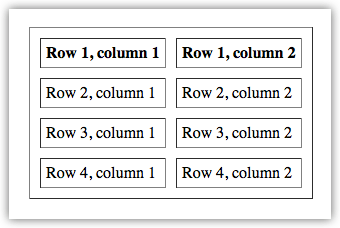
Table attributes are mentioned here only because they’re still quite common in HTML documents, and it’s therefore helpful to understand what they are. But the best way to format tables and other HTML elements is to use Cascading Style Sheets (CSS), which we’ll discuss in a future post.
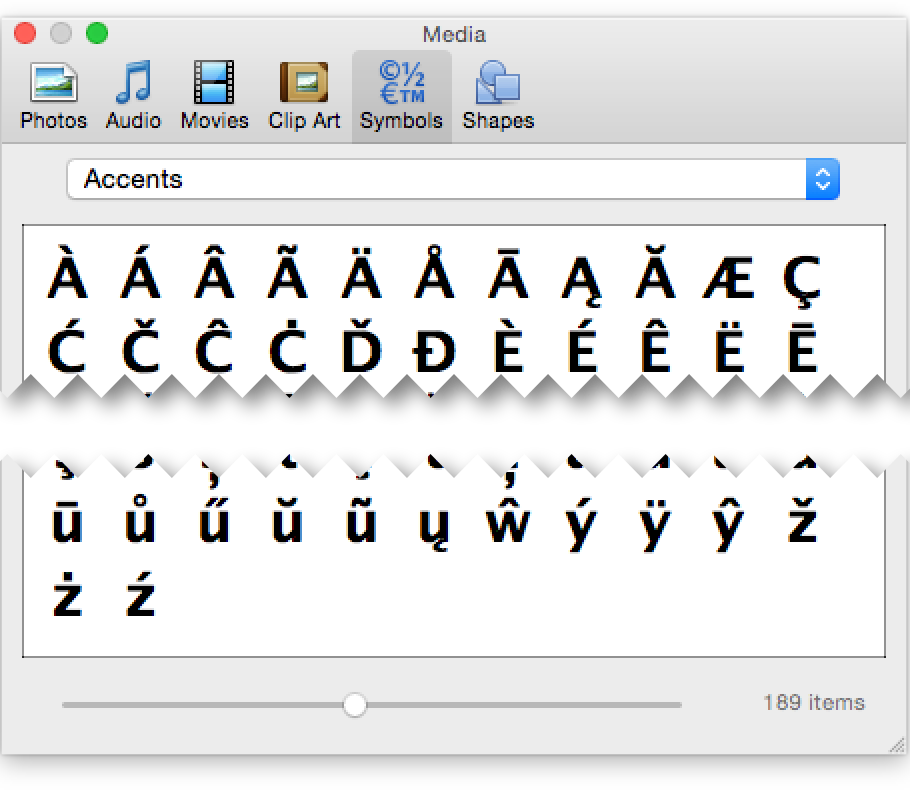
Special characters
When writing content for the web, it’s common to use characters that aren’t labelled on most keyboards. Anyone familiar with Microsoft Word is likely to have seen the Symbols panel, which allows entry of these special characters. Here’s an example of the Symbols panel in the Mac version of Word:
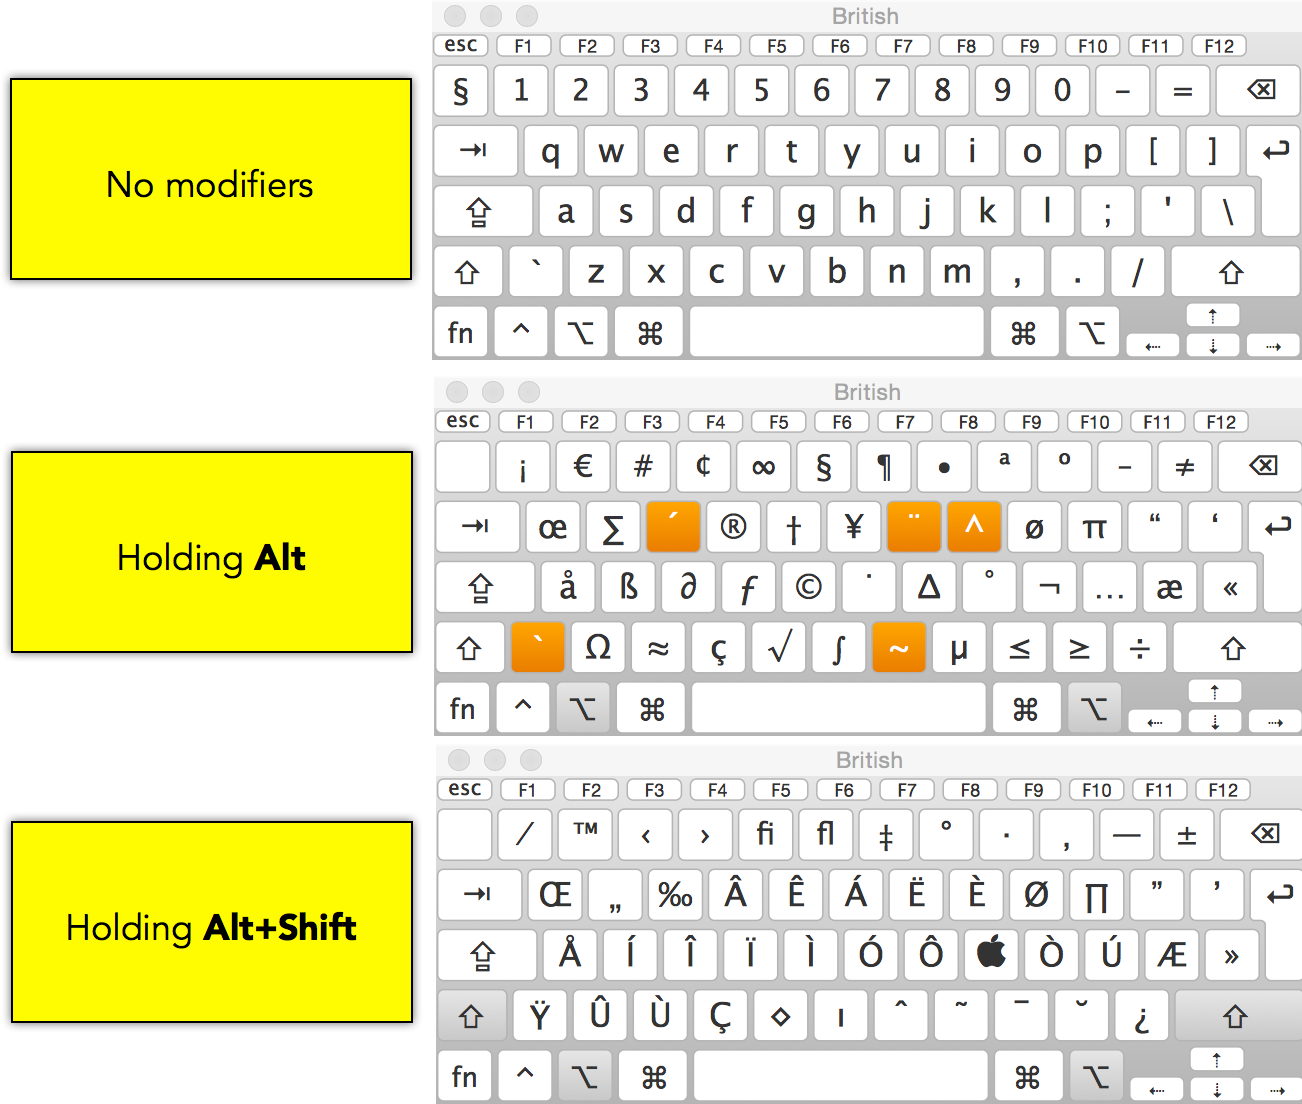
A quick digression: Mac users can enter many special characters by using the Alt or Alt+Shift keys in combination with other characters on the keyboard. This graphic shows the options available:
Placing such special characters directly into an HTML document could lead to those characters not being displayed correctly when the page is viewed in a web browser. (We’ll touch on a way of avoiding this when we discuss the <head> element.)
The safest approach is to write any special characters in HTML using what are known as ‘entities’.
Definition: entity
In HTML, an entity is a short sequence of code that represents a particular character.
All entities start with & (ampersand) and end with ; (semicolon).
Here’s an example, with the entities shown in red:
<!-- Without entities -->
<p>They’ve sent us the black & white version – oh dear.</p>

<!-- With entities (recommended) -->
<p>They’ve sent us the black & white version – oh dear.</p>
And this screenshot shows what can happen when special characters aren’t handled properly:
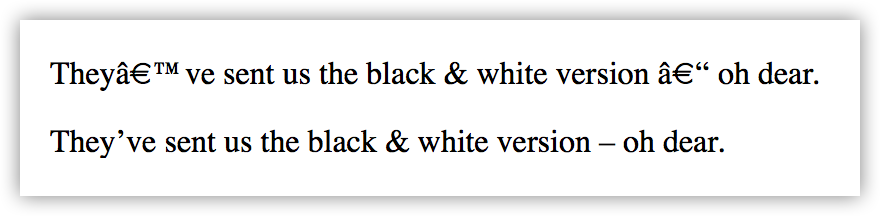
The commonest special characters have ‘named’ entities (e.g. ’ stands for ‘right single quote’). There are so many characters available that it’s not practical for all entities to be named in this way, and so a numeric system is used to handle such characters.
The good news is that it’s quite easy to look up these name/number codes. To get you started, here are some common characters:
| Character | Entity | Numeric | |
|---|---|---|---|
| Ampersand | & | & |
& |
| Non-breaking space | |
  |
|
| Pound | £ | £ |
£ |
| Copyright | © | © |
© |
| Registered trademark | ® | ® |
® |
| Degrees | ° | ° |
° |
| Lowercase acute e | é | é |
é |
| En dash | – | – |
– |
| Em dash | — | — |
— |
| Left single quote | ‘ | ‘ |
‘ |
| Right single quote | ’ | ’ |
’ |
| Left double quote | “ | “ |
“ |
| Right double quote | ” | ” |
” |
| Ellipsis | … | … |
… |
When I don’t know the entity name or numeric code for a special character, I often find the quickest lookup tool to be Google: searching for the character name plus ‘HTML entity’ is usually sufficient. There’s a useful entities reference list here: Web Design Group.
The result
In previous posts, I’ve put together a hierarchical view of how all the elements fit together, starting with the root <html> element. You can probably tell that things would look rather complicated if I did this again here. Instead, I’ve placed the content discussed in this post, along with everything from the earlier posts, into this file: sample3.html.
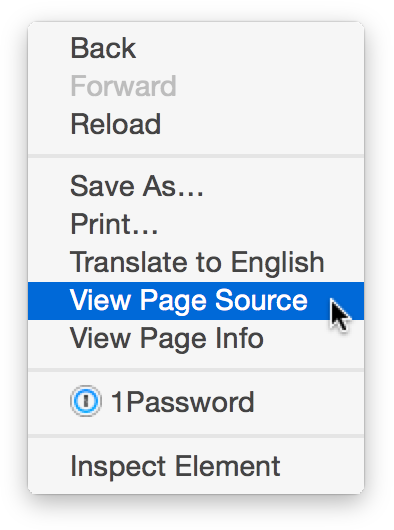
Remember that you can view the source of the page to see the underlying code. The easiest way is to go to the page, right-click on a blank area and click View Page Source (or similar).
Many people will be familiar with the common HTML elements used to write headings and paragraphs. But what about displaying quotations?
Let’s start by looking at blockquotes.
Blockquotes
In HTML, the <blockquote> element is used to set content (often just text) apart from the copy above and below. This gives us a good way to display quotations and other notes.
Here’s an example of the <blockquote> element:
<p>This is a normal paragraph.</p>
<!-- Note the default indentation of the blockquote when viewed in the browser -->
<blockquote>
<p>This text has been placed into a blockquote element to show what happens when using one of the most basic quoting features in HTML. All web browsers handle blockquotes slightly differently, but the general behaviour is pretty much the same across the board.</p>
</blockquote>
This is how the code looks in the browser:

Quotation marks are not automatically added to the content. This is consistent with the treatment of most ‘displayed’ material in print.
The default style is for a generous left indent to be applied to the content within the blockquote, thus clearly setting it apart from any content above and below.
It’s not good form to use the <blockquote> element only to move content across the page.Such changes are better handled by Cascading Style Sheets (CSS), which allow us to apply margins and padding. As I’ve mentioned before, we’ll discuss CSS in a future post.
Citing a source
As anyone who works in the editorial field will know, it’s important to include a source whenever quoting someone else. So far as HTML goes, though, this isn’t essential: blockquotes do not require a citation.
If you wish to include a citation, the correct method is to use the <cite> element. This appears inside the <blockquote> element, as shown here:
<blockquote>
<p>Be a yardstick of quality. Some people aren't used to an environment where excellence is expected.</p>
<cite>
<a href="https://www.brainyquote.com/quotes/quotes/s/stevejobs126246.html">Steve Jobs</a>
</cite>
</blockquote>
It makes sense to include not only the name of the person being quoted but also a source on the web (if there is one), so I’ve placed a hyperlink to the quote in the <cite> element. The hyperlink is added by using the <a> (for ‘anchor’) element with an href="" attribute.
Here’s the result in the browser:

My browser’s default styling is to italicise text within the <cite> element.
Inline quotations
To include a quotation in running text, we usually place quotation marks around the content to be quoted and then follow it with the source in brackets.
A quick digression on notes
In print, it’s common to use numbered cues to point to footnotes (at the bottom of the page) or endnotes (at the end of a chapter or book). This approach isn’t best suited to the web.
The good news is that hyperlinks allow us to point directly to sources on the web.
Now, back to inline quotations. HTML has its own <q> element specifically for this sort of construction. Here it is:
<p>I agree with Carl Sagan's take on this: <q>Absence of evidence is not evidence of absence.</q></p>
Here’s the result in the web browser:

As you can see, the quote marks appear in place of the start and end of the <q> element. It may seem academic to use this element when you could just as well write the quote marks directly into the HTML, but there can be styling and semantic reasons for retaining the use of the <q> element.
Here’s what the HTML 5.1 specification has to say about the use of the <q> element:
The <q> element must not be used in place of quotation marks that do not represent quotes; for example, it is inappropriate to use the <q> element for marking up sarcastic statements.The use of <q> elements to mark up quotations is entirely optional; using explicit quotation punctuation without <q> elements is just as correct.
I’ve also used this example to show off my own style of blockquotes. And to see a slightly fancier set of blockquotes, look at what I’ve done on my Testimonials page.
The result
Download and inspect an updated sample file here: sample4.html.
This series has covered some of the common elements found within the <body> element of HTML documents. This time, we’re going to look at the <head> element, which contains the essential metadata that helps give our content both meaning and style.
The <head> element revisited
At the beginning of this guide, we created a very simple <head> element that contained only one thing: the page’s title. Here’s how that looked:
<head>
<title>Page title goes here</title>
</head>
To remind ourselves of where the <head> element should appear in the context of the whole HTML document, here’s a slightly larger example:
<!DOCTYPE html>
<html>
<!-- The head starts here -->
<head>
<title>Page title goes here</title>
</head>
<!-- The head ends here -->

<!-- Everything below this line is the main body of the page -->
<body>
<p>This text sits within a paragraph element.</p>
</body>
</html>
We can visualise this as shown below:
OK, we have a <head> element that allows us to include information that supports the main body content. But what sort of information can we place into the <head>?
Adding some style with CSS
One of the most common components to see in the <head> element are Cascading Style Sheets (CSS). If you’ve read the previous posts in this series, you’ll recall I’ve mentioned CSS on more than one occasion.
Definition: Cascading Style Sheets (CSS)
CSS controls the look and feel of web pages by using simple text rules to target and style HTML elements.
Size, position, colour, transparency, borders, margins, padding: these are some of the features we can control through CSS rules.
There are a couple of ways to add CSS to the <head> element.
1. External CSS (recommended)
The code for ‘attaching’ an external CSS file to an HTML page looks like this:
<link rel="stylesheet" type="text/css" href="/style.css">
Here’s how that breaks down:
<link>: the self-closing element that houses the reference to the CSS file.rel="stylesheet": an attribute that defines the type of the linked document.type="text/css": an attribute that defines the MIME type of the linked document.href="": an attribute defining the specific CSS file we wish to use.
As with previous examples, the order of the attributes isn’t important. For consistency, it helps to define attributes in a regular order, especially when several elements appear next to each other in the <head>.
In the above example, we link to a separate file (style.css) that contains rules defining the look of the page.
2. Embedded CSS
Rather than attaching an external stylesheet, it’s possible to embed a stylesheet directly within the <head> element. We do this with the following code:
<style type="text/css">
/* CSS comments look a little different from HTML comments */
p {
    color: red;
}
</style>
In the example above, we’ve placed a simple CSS rule into the HTML document. In this case, the rule targets all paragraphs and sets their text colour to red.
Whether we embed or externalise our styles, the syntax of CSS is quite different from that of HTML. I may go into this in a future series of posts, but, if you just can’t wait, take a look at this CSS Introduction on W3Schools.
Adding supporting information with metadata
Definition: metadata
Metadata is often referred to as ‘data about data’. In HTML, it is the supporting information that helps search engines and other systems to categorise what a page is about.
Although search engines don’t like long lists of keywords stuffed into metadata, they do like short summaries of the page content – a sentence or two capturing the essence of whatever the page is about.
Here’s an example of a metadata summary of a page:
<meta name="description" content="In the fourth post in this series, we'll cover HTML's handling of displaying quoted material, using the blockquote and cite elements.">
And here’s the breakdown:
<meta>: the self-closing element that houses the metadata.name="": the attribute that defines the type of metadata.content="": the attribute that defines the metadata content.
I’ve set the name="" value to description and then written a short summary of the post.
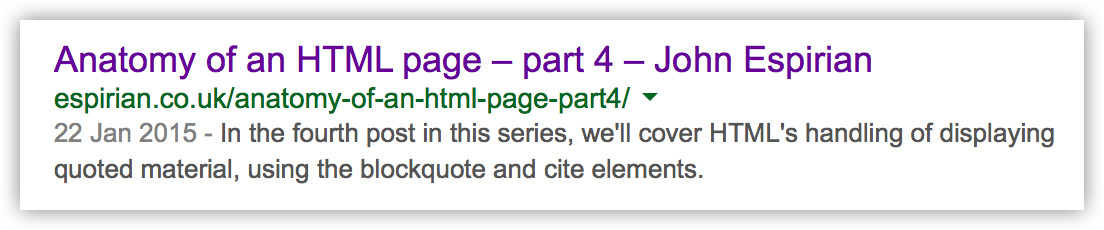
Crucially, the description appears when you find the page through a search engine. Here’s how Google presents the search result for this page:
If you don’t add the description meta tag to your page, you allow search engines to control what goes in to the page summary.
Without the relevant metadata to rely on, a search engine will probably use the opening section of text on your page as the summary it displays in its search results. But those words won’t necessarily be the right ones to describe the whole page.
It’s best to take control over the display of the page description so that you can write a summary that will appeal to potential viewers. For that reason alone, you should aim to include a ‘description’ meta tag on all pages.
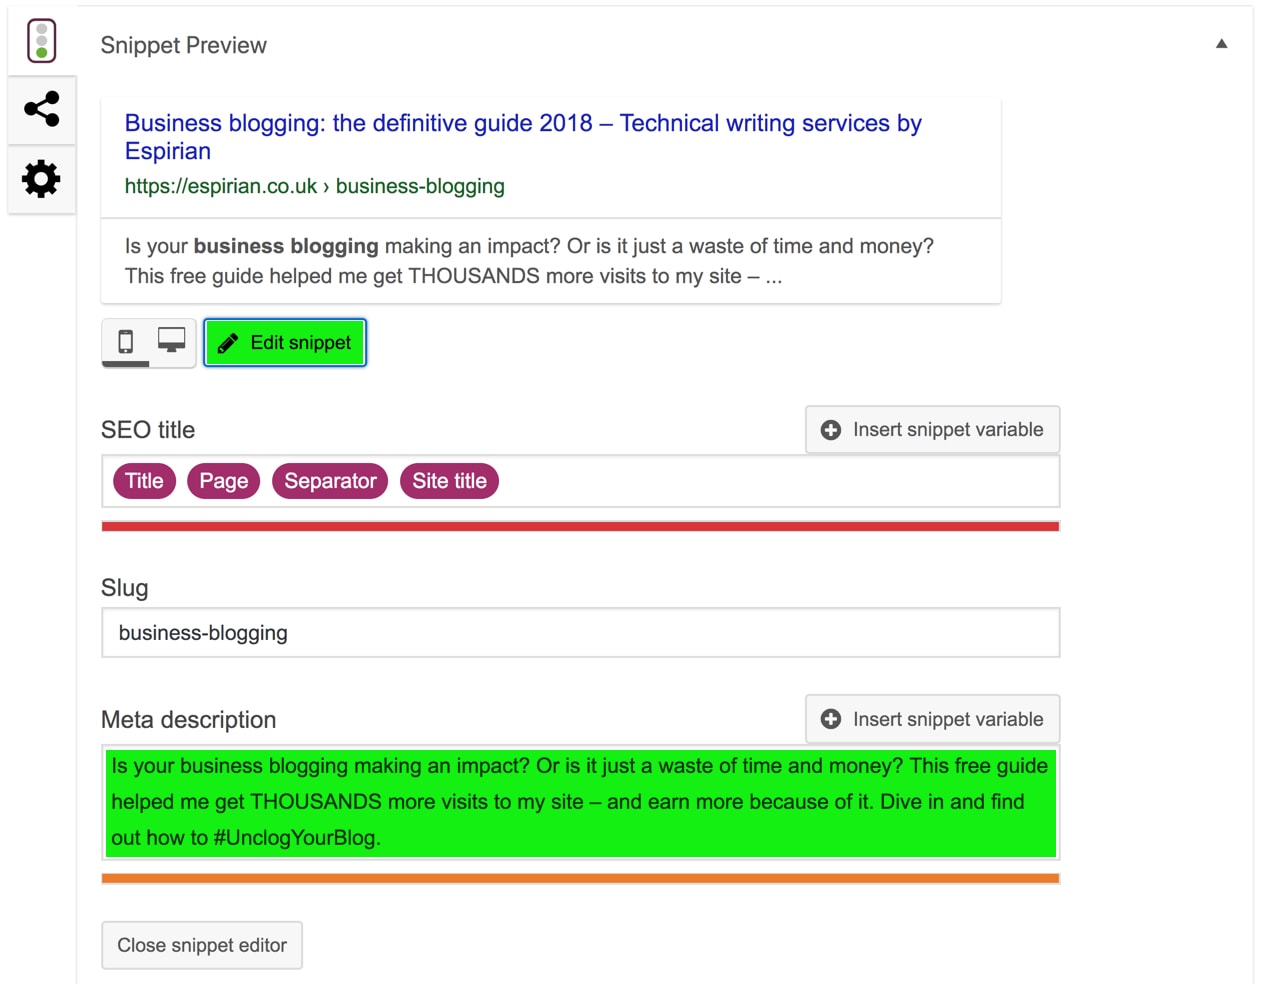
The good news is that you can define this sort of metadata without digging into the code. If you use WordPress, the Yoast SEO plugin will let you define metadata at the bottom of each page.
This screenshot shows the plugin as shown at the bottom of each page and post in the WordPress editor.
Meta tags for social sharing
The advent of social sharing has meant it’s important to have a way of previewing content before an entire page is viewed or shared. Many of us expect to see more than just a boring web address, and metadata allows us to build rich links to content we wish to share.
Here’s an example of how the Facebook sharing feature treats my post on Powerline:
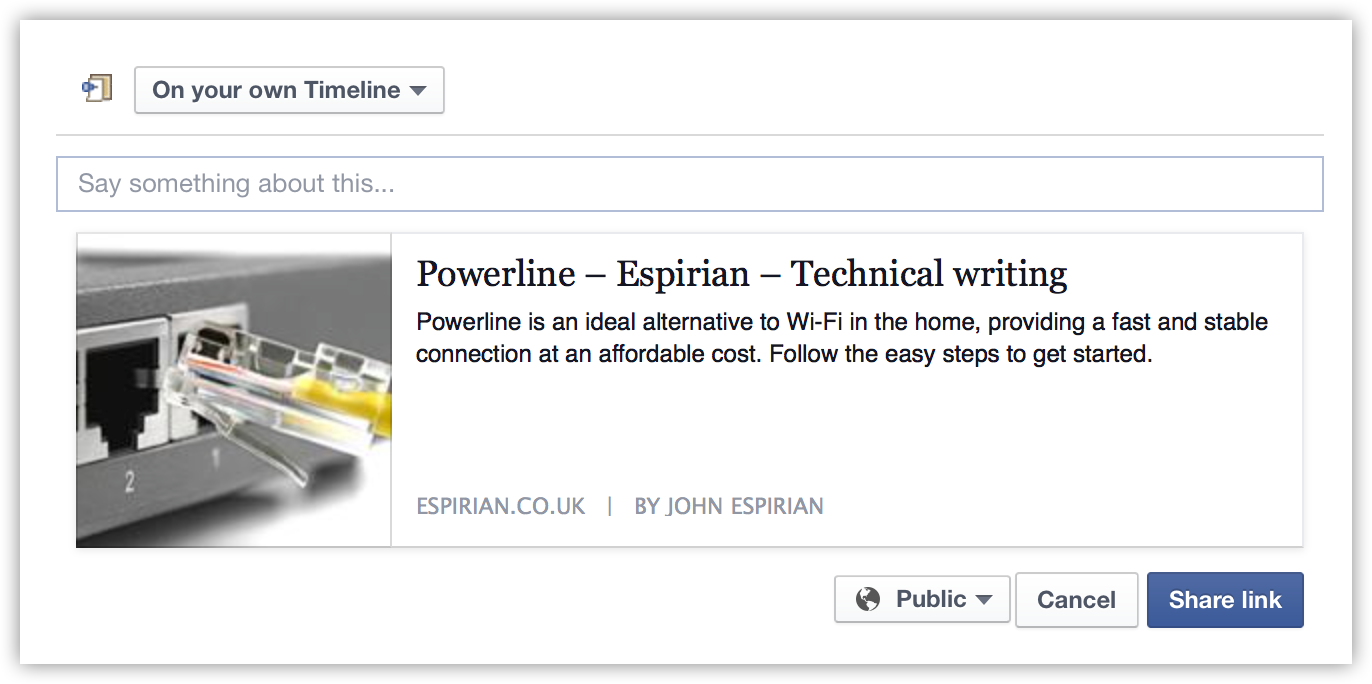
Had no metadata been added to the page, it’s possible that the same content would have been sucked into Facebook’s sharing page – but there’s no guarantee of that. It’s better, then, to define the metadata we’d like to see used by this sort of service.
Here are some real examples of metadata that the likes of Facebook will look at when we try to share a page:
<meta property="og:title" content="Powerline – Espirian – Technical writing">
<meta property="og:url" content="https://espirian.co.uk/powerline/">
<meta property="og:site_name" content="Espirian – Technical writing">
<meta property="og:image" content="https://espirian.co.uk/wp-content/uploads/2014/11/powerline_port_cable.jpg">
The ‘og’ in each of these tags is short for ‘Open Graph’, which is a special metadata system. You can read more about this on the Open Graph protocol site.
As mentioned above, this sort of metadata is easiest to define via Yoast SEO for WordPress.
Adding scripts
As if styling and metadata weren’t enough, the <head> element can also be used to add scripts to a page.
Definition: script
In HTML, a script is a set of text instructions written in a programming language compatible with the web. The most popular scripting language on the web is JavaScript. (Despite its name, JavaScript is not the same as Java.)
Scripts are used to add interactivity to web pages. For example, a script could be used to make a new window pop up when a button is clicked.
Here’s an example of some code that, when placed in the <head>, will ‘attach’ a JavaScript file to the page:
<script type="text/javascript" src="/js/respond.min.js"></script>
And here’s the breakdown:
<script>: the self-closing element that houses the script.type="text/javascript": the attribute that defines the type of script.src="": the attribute that defines the location of the script file.
Just as CSS can be embedded or externalised, so too can scripts. The above shows an externalised example, which is the most common way of including scripts. Scripts themselves are made up of text instructions that define variables, functions and other components. I may post about this topic in the future but even to scratch the surface would probably be a bit too much in this article.
Let’s wrap up
This article provided a short(!) intro to help you get to grips with HTML, the principal language of the web.
Thankfully, you should be able to edit most of your web content through a system such as WordPress, which means you can usually hide much or all of this code from view. It’s still good to have a basic understanding of how it works under the hood, in case you need to make fine adjustments.
Let me know if you have any HTML questions and I’ll do my best to answer.