📚 This post is part of my business blogging guide.
Do you create video for YouTube, your website or your social media accounts? If so, adding captions (text subtitles) will improve the viewing experience for your audience.
Summary for busy people.
Add captions to iPhone video via Apple Clips or Brivvio.
Add captions to pre-recorded desktop video via Rev ($1.25/min) or Subly.
- Why bother with captions?
- What does a captions file look like?
- Open versus closed captions
- The time-saving method for creating captions
- How to upload an SRT file to a YouTube video
- How to upload an SRT file to a Vimeo video
- How to create free captions via YouTube
- How to add live captions to mobile video (iOS and Android)
- Which platforms support SRT caption files?
- How to force closed captions on in YouTube
- How to add captions to LinkedIn native videos
- How to add (“burn in”) captions to an existing video
- How do I produce written transcripts instead of captions?
- How do I fix captions that are out of sync?
- What other captioning tools are available?
- Splasheo
- Subly
- QuiCC
- Kapwing
- Zubtitle
- Headliner
- Caption This!
- Y Translator
- CapCut
- Clideo
- Clipchamp (iOS)
- AutoCap (Android)
- Voicella (Android)
- Let’s wrap up
Why bother with captions?
Video captions are not just for the benefit of people with disabilities.
Accessibility for all means better content for all, and there are several stats out there to prove that captioned video content adds more business value, through longer watch times, increased engagement, greater comprehension and better conversion rates for calls to action.
In 2021, an official LinkedIn article stated that:
(A similar insight was shared in another official LinkedIn article from 2018.)
In 2016, Digiday reported that 85% of Facebook video is watched without sound.
Did you know?
A small study by Instapage of 16.5 hours of Facebook videos showed that:
- Average reach of a captioned video was 16% higher than the same video without captions.
- Reactions to the video were also higher on the version with captions, by more than 17% on average.
- Average shares dropped when captions were removed, by nearly 15%.
- CTA clicks fell by 26% when captions were removed.
You’ll have a better chance of making people watch your content if your videos contain captions, especially if there’s something appealing in the first caption.
Here are some good use cases for adding captions to videos. Consider that the audience:
- is in a shared space and can’t turn the sound on.
- is deaf or hard of hearing.
- can’t understand the speaker’s accent.
- is not a native English speaker.
Even if none of the above applies, captions give a more polished, professional look to a video – and that could serve to keep people engaged and increase the time they spend watching your content.
What does a captions file look like?
Captions files are plain-text files.
The most popular format is SubRip Subtitle (SRT), probably because this is the format supported by Facebook and LinkedIn.
Another popular format is Web Video Text Tracks (WebVTT or VTT).
SRT and VTT files are almost identical, so I’m going to focus only on SRT.
Here’s a screenshot of a real captions file:
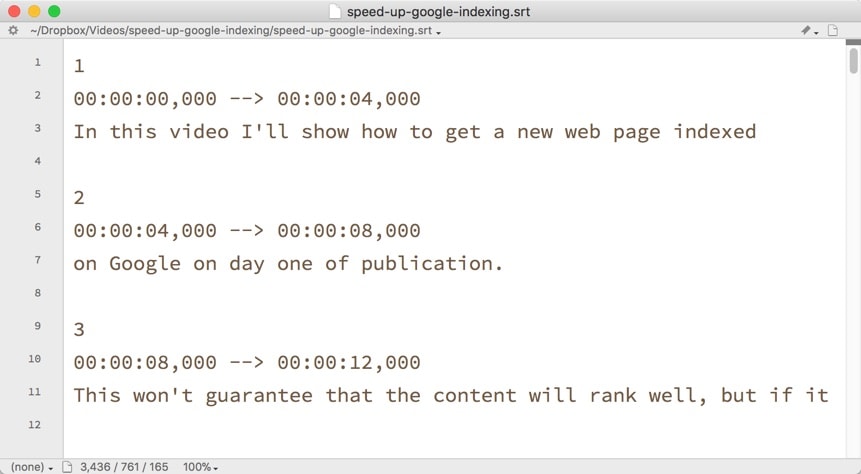
This snippet shows numbered scenes, start times, end times and the text to display in each scene.
You could create such files manually but that would require a lot of effort. There are much better ways of creating captions, so read on to see what suits you.
Facebook captions file tip.
Facebook expects captions files with a filename ending .en_US.srt
This should work for anyone creating captions in English.
What is the difference between open and closed captions?
Open captions are part of the video file. They are “burned in” to the video, which means they’re always visible. The viewer has no choice whether or not to see the captions.
Closed captions are not part of the video file. They’re uploaded as a separate file (usually in SRT format) along with the video. They’re optional and the viewer can turn them on or off using controls on the video.
There are pros and cons to both approaches.
With open captions, the video creator has control over the placement, size and style of the captions, depending on which tool is used to add the captions.
With closed captions, the display is determined by the platform hosting the video. For example, closed captions look different on YouTube from how they do on LinkedIn.
The time-saving method for creating captions.
I create my captions by sending my videos to Rev. Their captioning service costs $1.25 per minute of video, and it’s quick and accurate.
I’ve often received Rev captions back in under an hour, and rarely have to make more than a couple of edits to the text.
Here’s how this method works:
- Publish your video as normal on YouTube or Vimeo.
- Go to Rev and supply the link to the published video.
- Sign in and pay as prompted.
- Wait for an email containing the SRT captions file.
- Upload the captions file to YouTube or Vimeo.
What if I really can’t wait?
Rev now has a “rush” option to speed up the delivery of captions, but you have to pay double for the privilege.
It’s still good value even at $2.50 per minute of video, though.
How to upload an SRT file to a YouTube video.
If you’ve created an SRT captions file, add it to YouTube by doing the following:
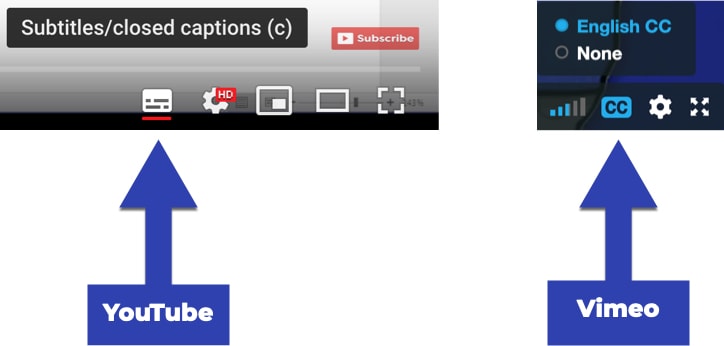
- View the video in YouTube on a desktop browser.
- Click Edit video.
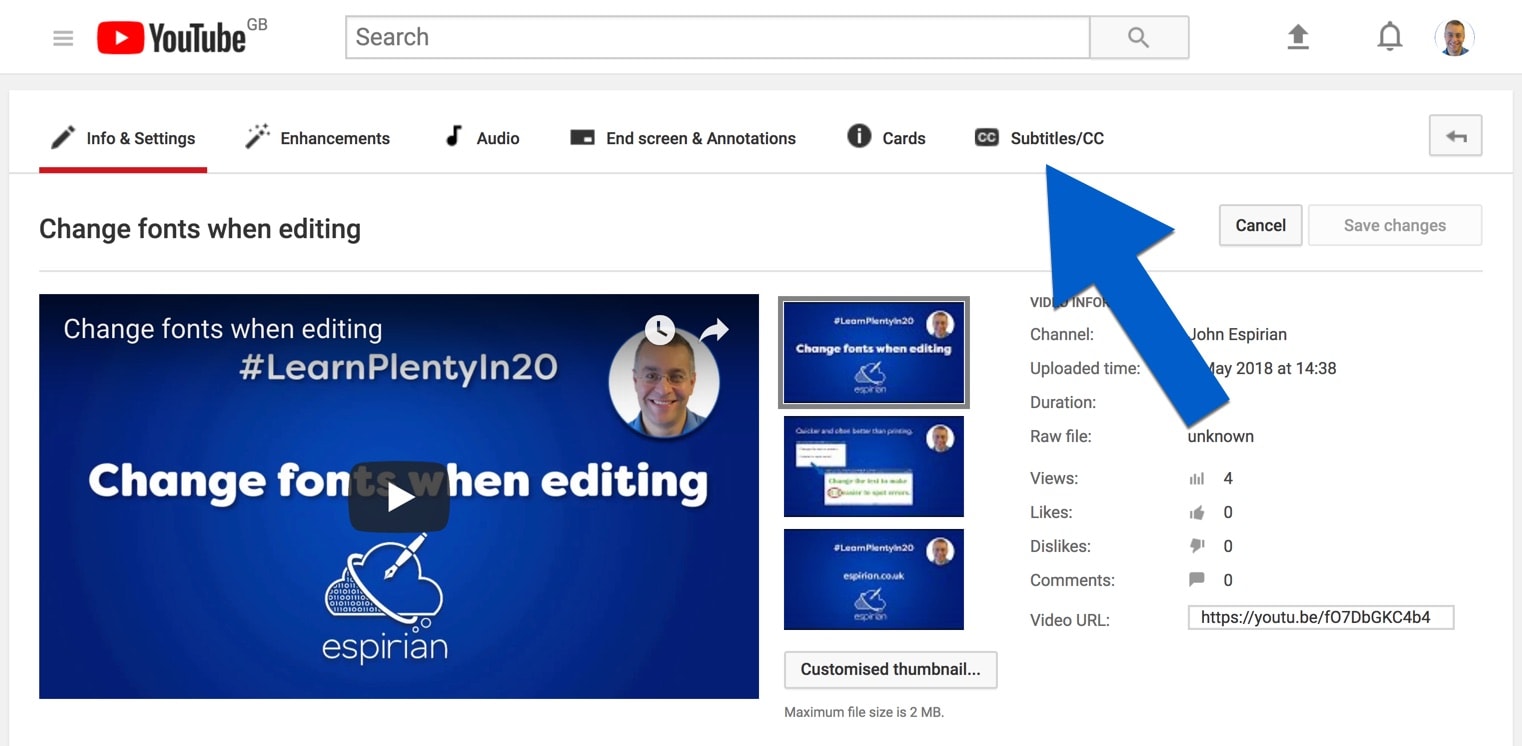
- Click Other features | Translation & transcription.
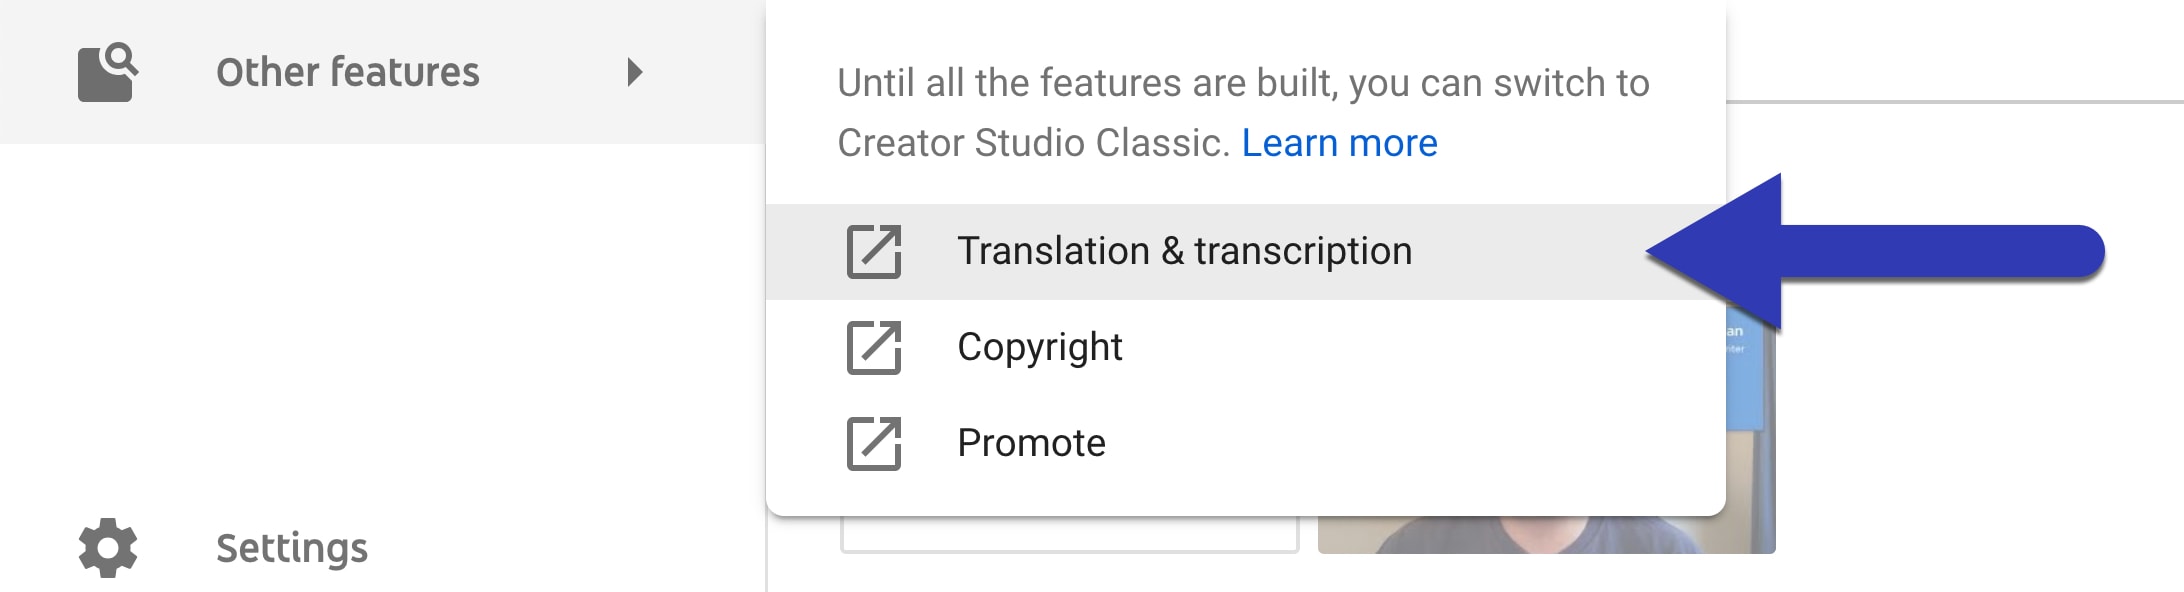
(Click to enlarge)
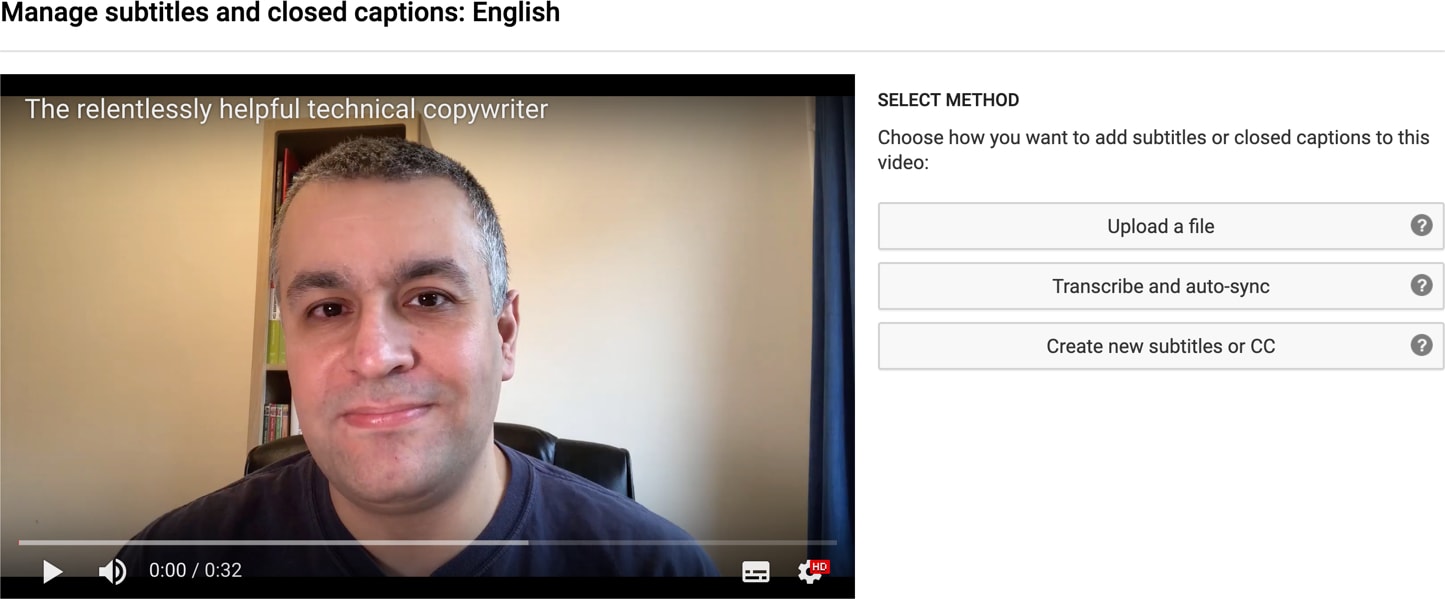
- Click Add new subtitles or CC.

(Click to enlarge)
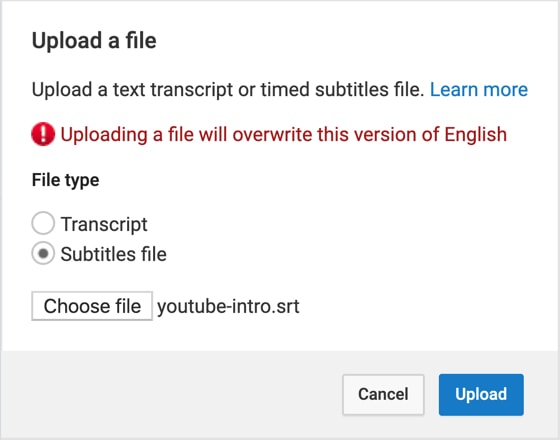
- Click Upload a file.
(Click to enlarge)
- Click Subtitles file.
- Click Choose file and select the SRT file.
- Click Upload.
- Edit the captions if needed and click Publish.
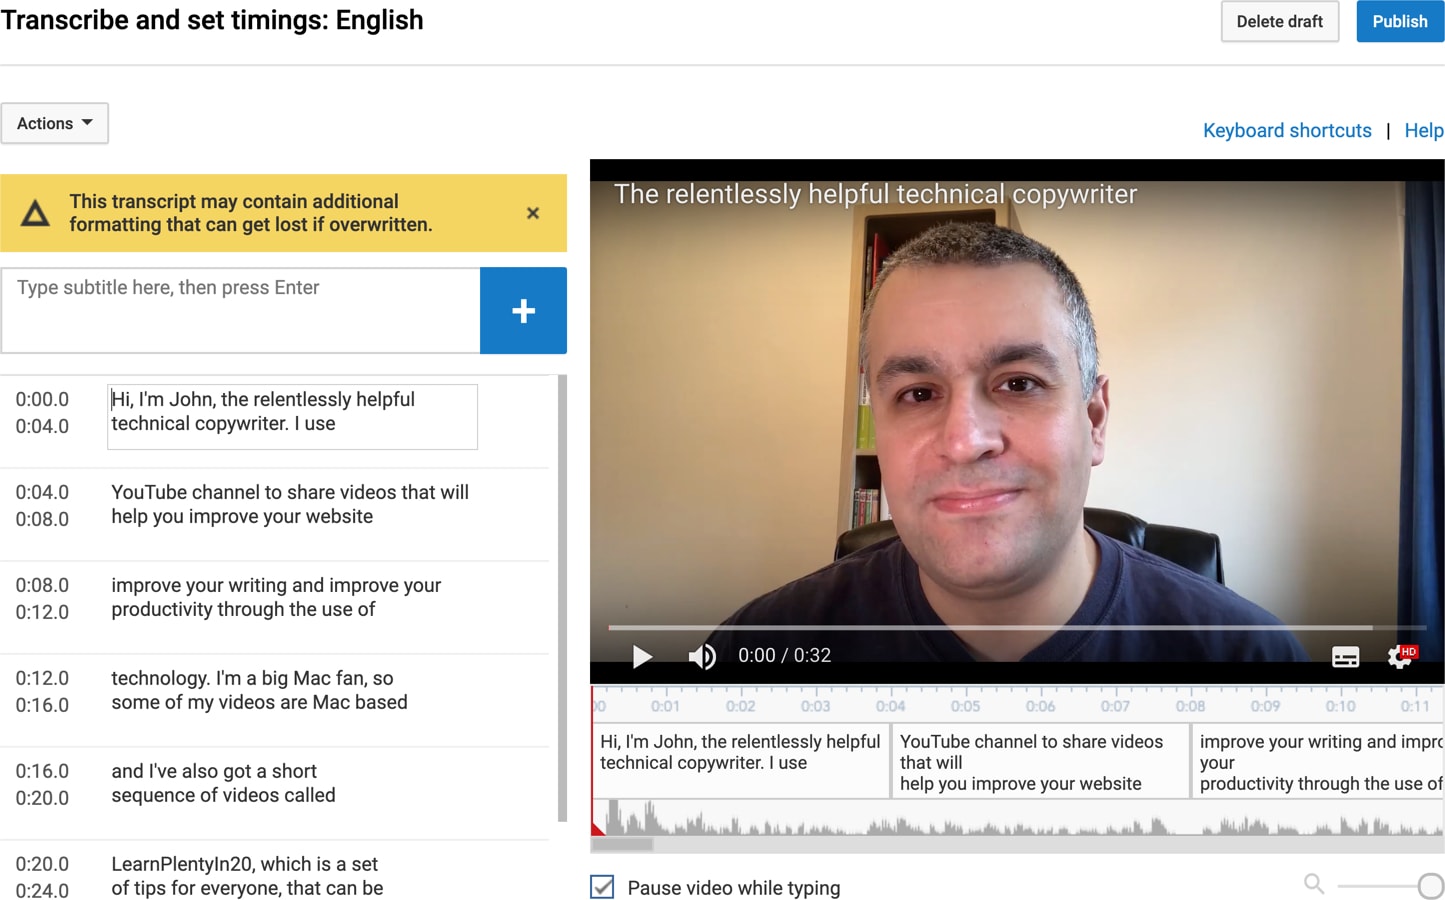
(Click to enlarge)
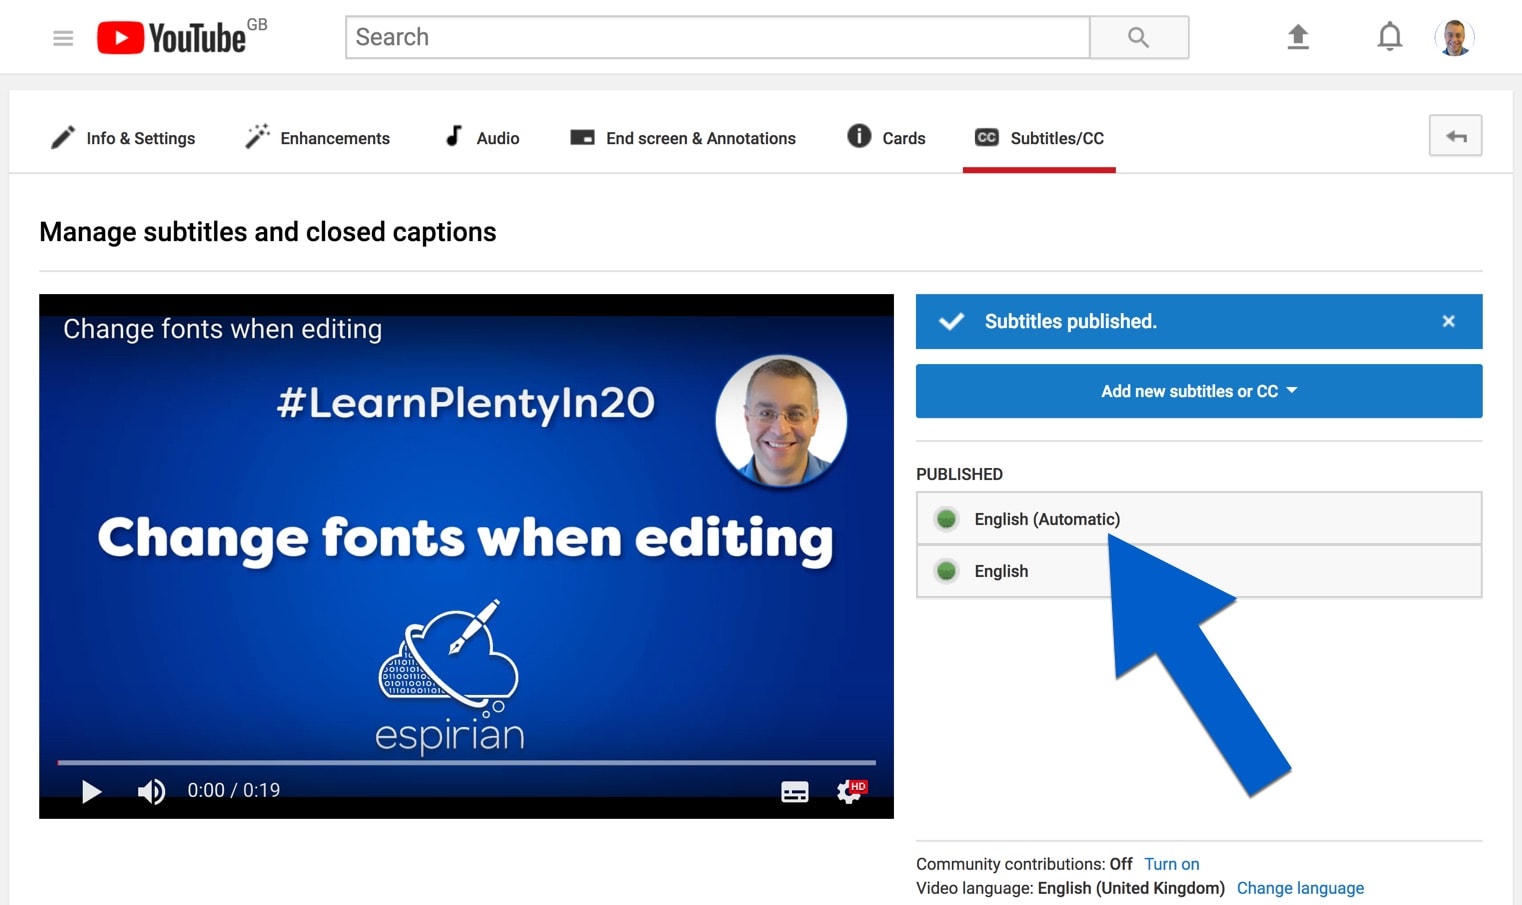
You may see more than one set of captions listed on the video. To ensure that your viewers see the correct captions:
-
- Click English (Automatic).
- Click Unpublish.
(Click to enlarge)
How to upload an SRT file to a Vimeo video.
If you’ve created an SRT captions file, add it to Vimeo by doing the following:
-
-
- View the video on a desktop browser.
- Click Settings.
- Click Distribution.
- Click Subtitles.
- Click the + symbol.
- Set the language to English.
- Set the type to Captions.
- Click Choose File and select the SRT file.
- Click the grey slider to set it to the on position (blue).
- Click Save.
-
If you don’t want people to see the video until your captions are ready, publish it as a private video YouTube or Vimeo and then make it public after you’ve completed the above process.
If you haven’t published your video at all but still want captions for it, you can upload your video direct to Rev.
How to create free captions via YouTube.
If you don’t want to use a captioning service, you can get YouTube to create free captions on your videos.
You’ll need to edit the automatically generated captions and then you can save the SRT file for reuse elsewhere.
Here’s a quick step-by-step process for editing and downloading the automatically generated captions in one of your YouTube videos.
-
-
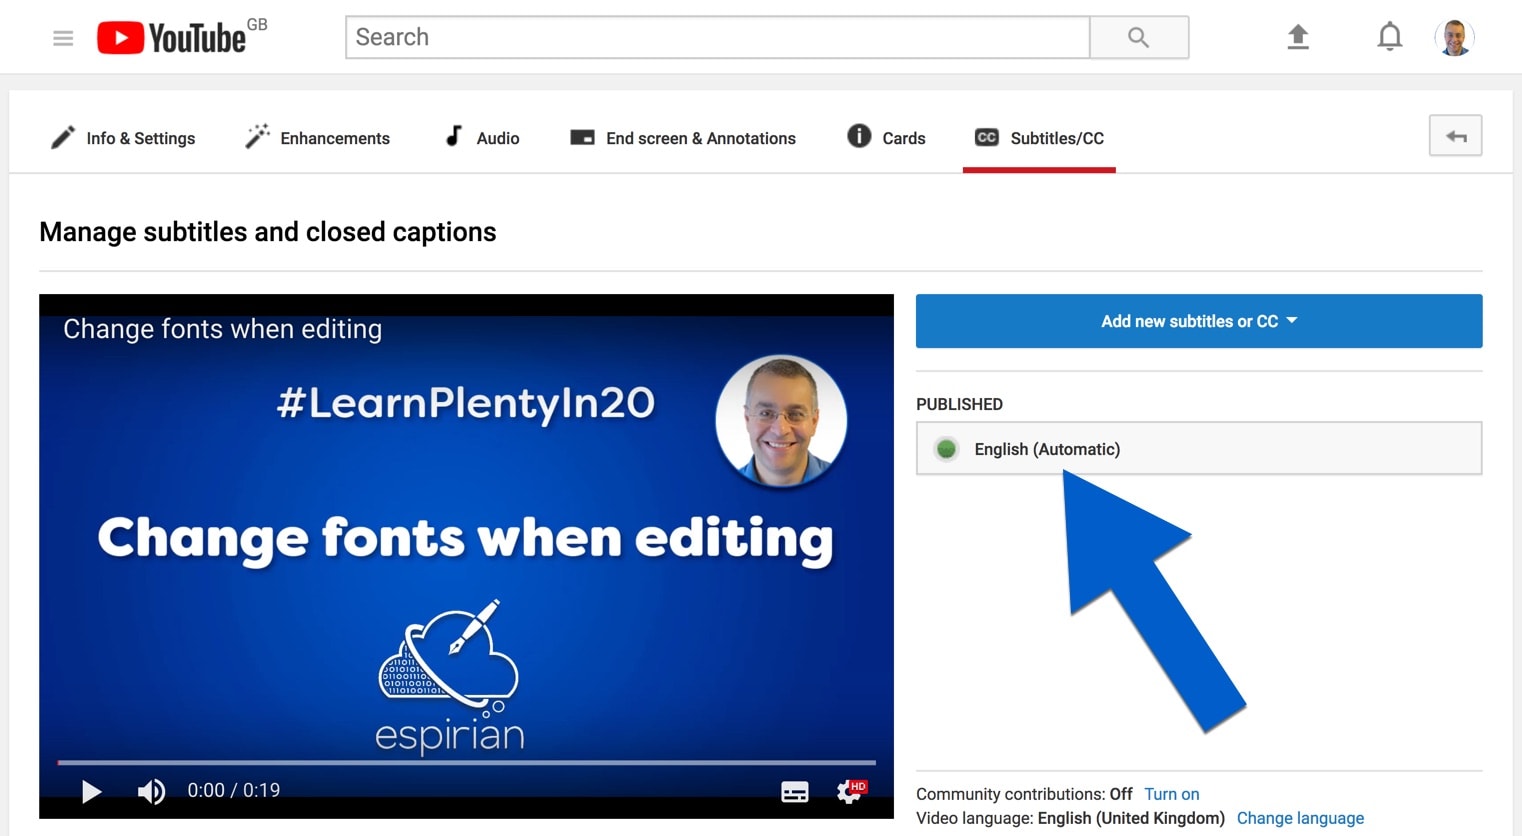
- Go to the settings page of one of your videos, and then click Subtitles/CC.
-
-
-
- Click English (Automatic).
-
If you don’t see this, it’s probably because the video is brand new. You usually have to wait at least 15 minutes before automatic captions appear.
-
-
- Click Edit.
-

-
-
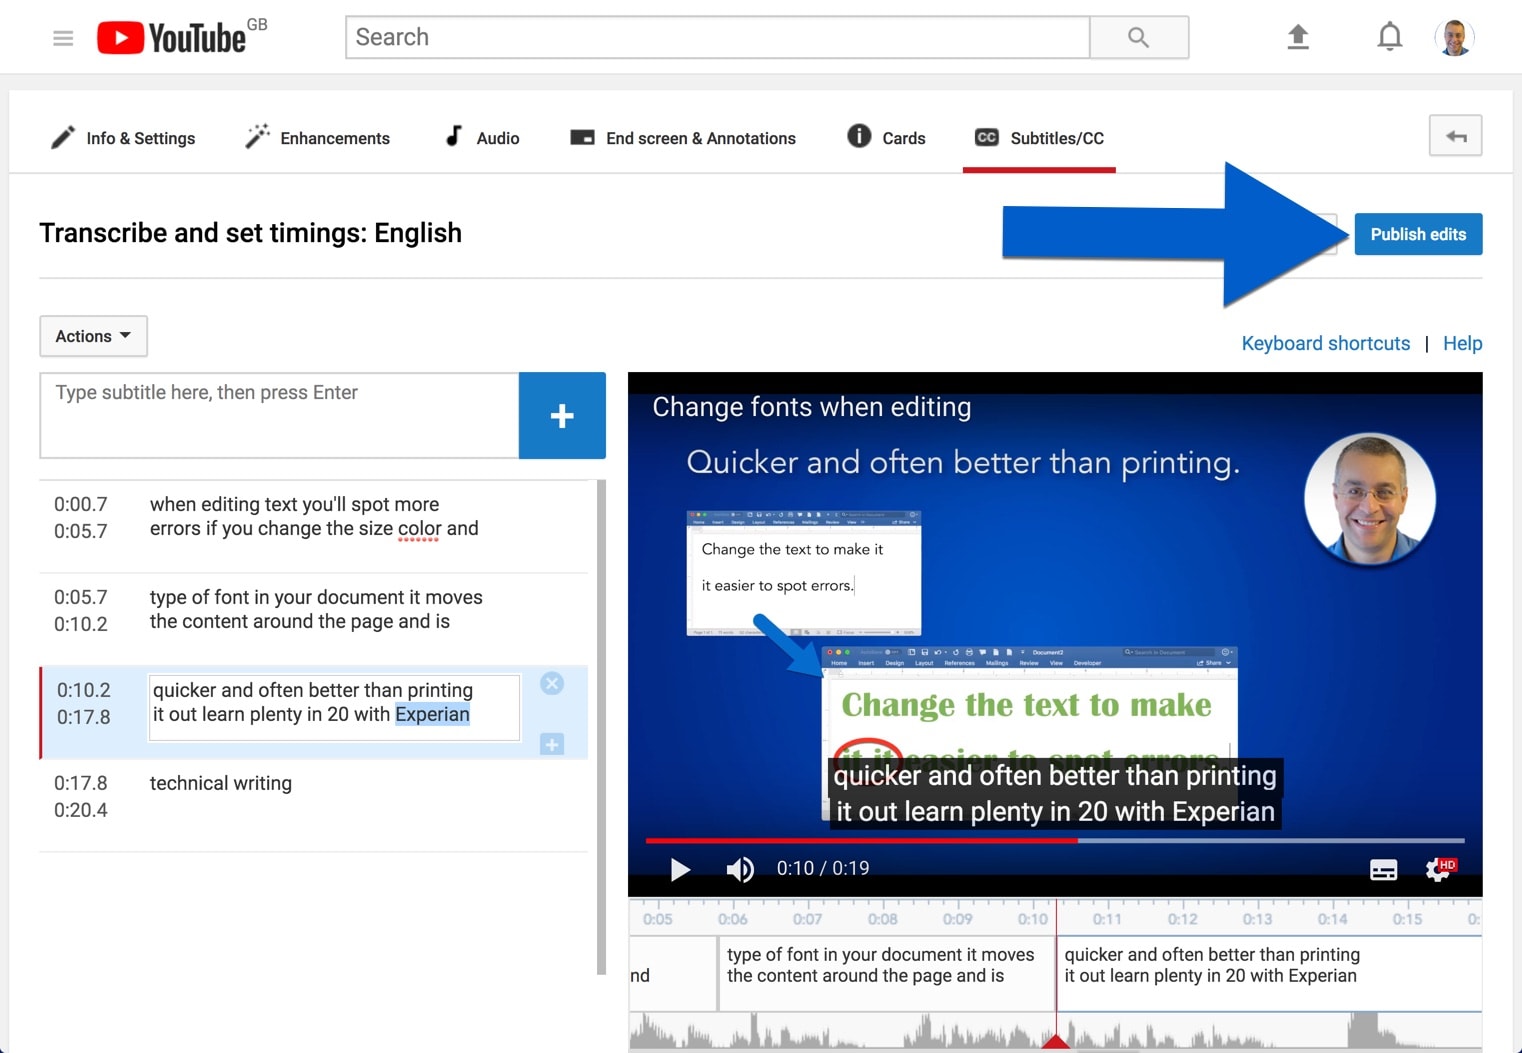
- Make changes to the caption text to the left of the screen.
- Click Publish edits.
-
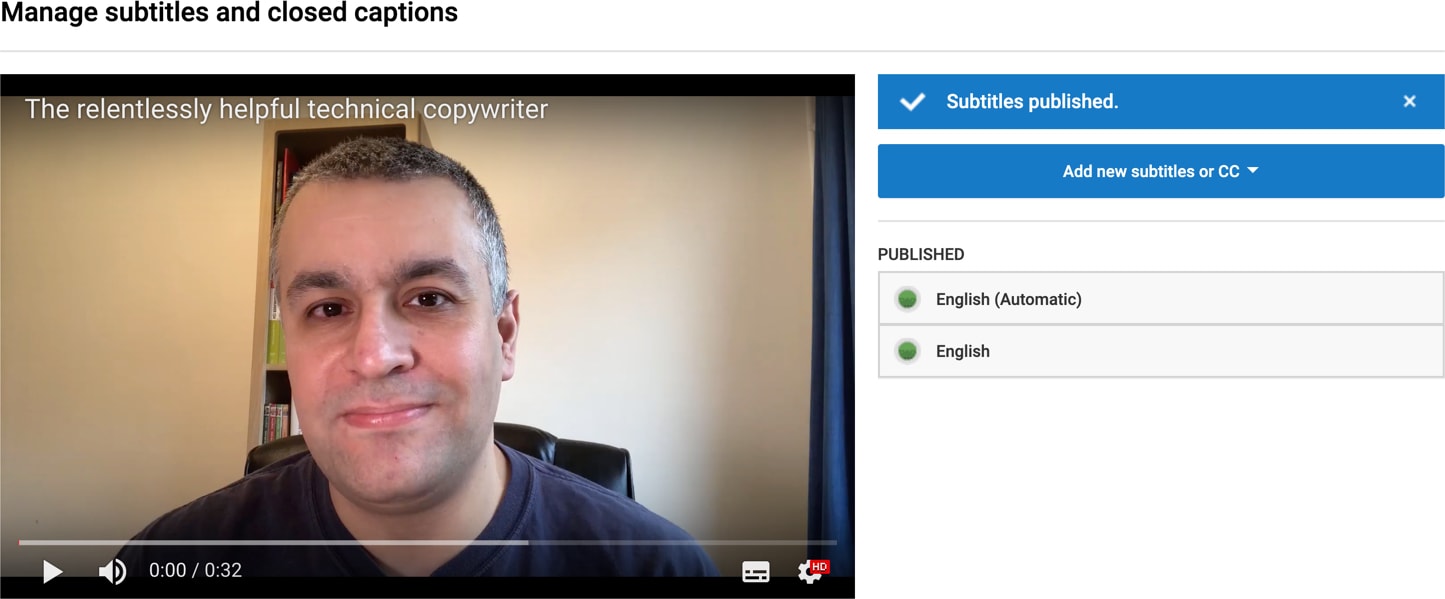
You should now have two sets of captions, as shown below. The automatically generated version can now be deleted.
-
-
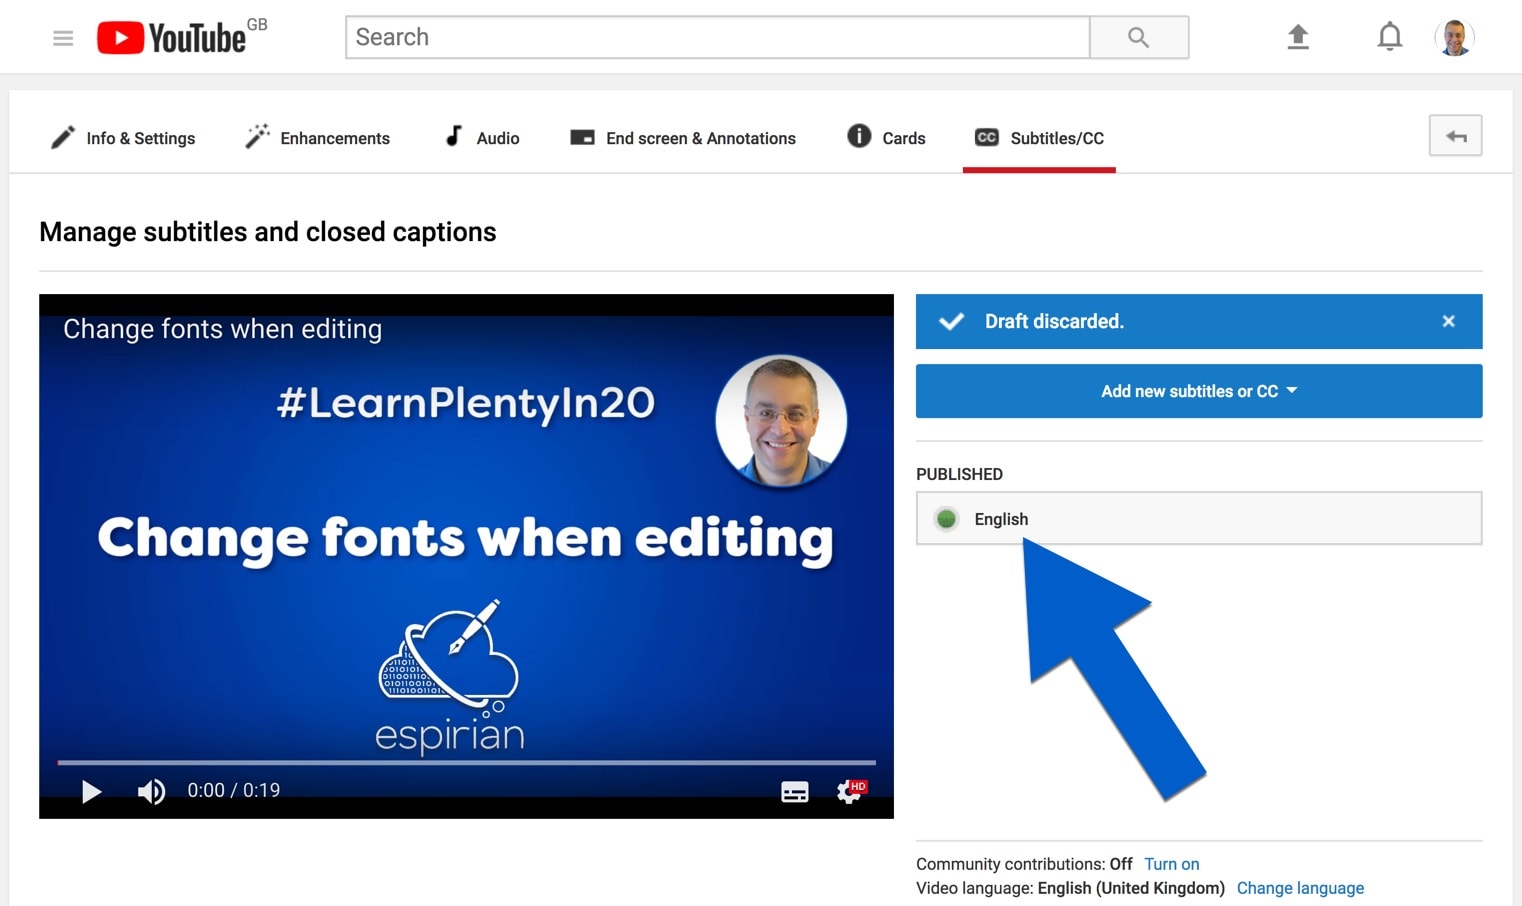
- Click English (Automatic).
- Click Unpublish on the following page.
-
This should leave behind only one set of captions.
-
-
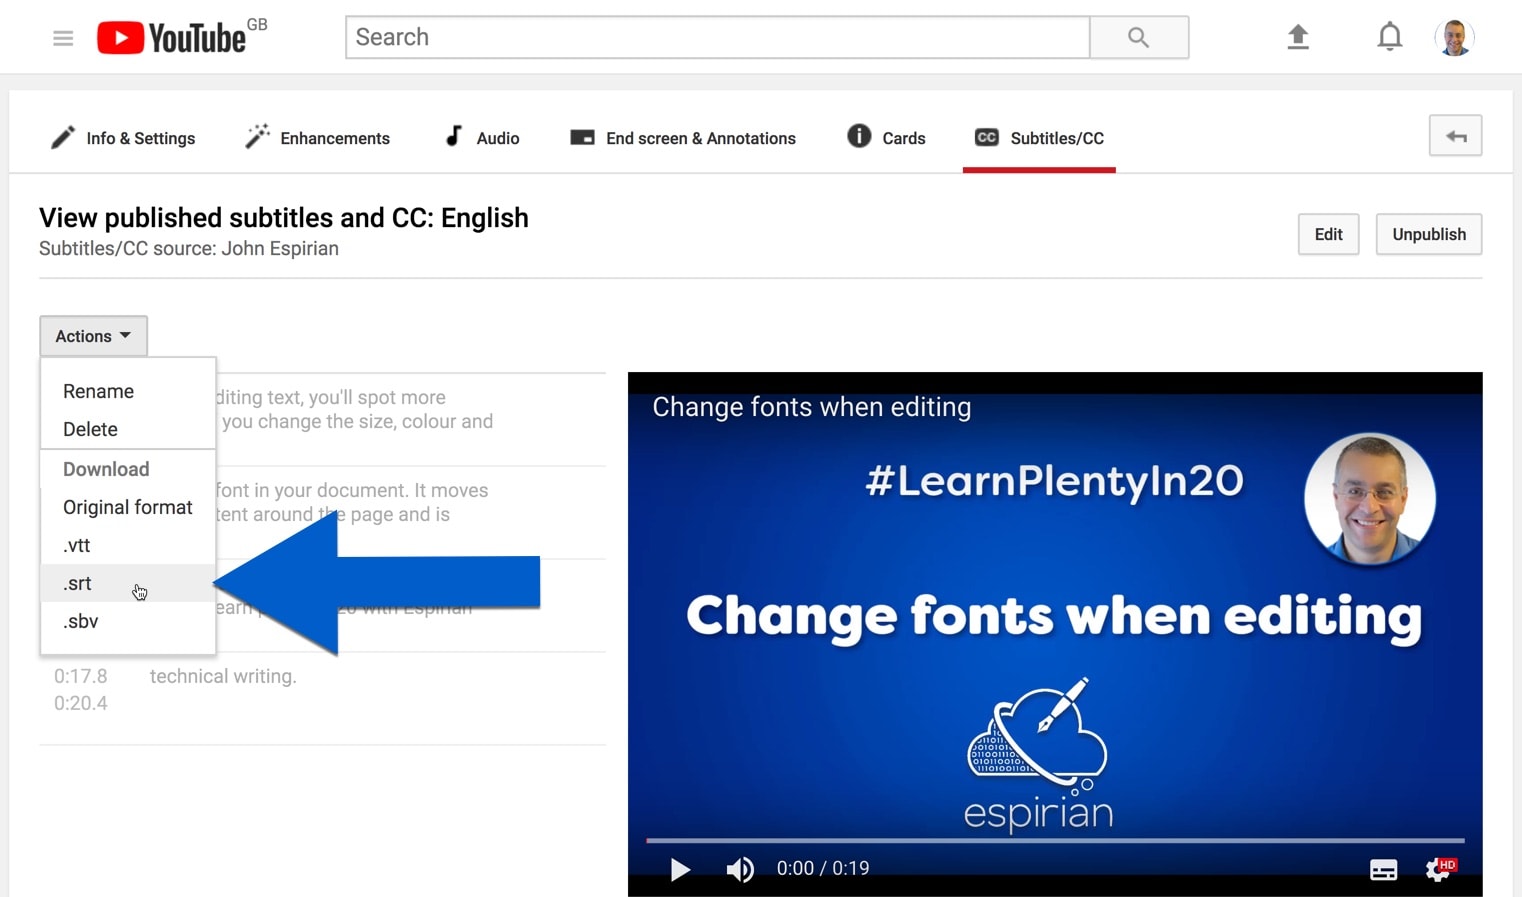
- Click English.
-
-
-
- Finally, in the Actions menu, click .srt to download the SRT file.
-
You can use the SRT file when uploading the same video direct to Facebook, LinkedIn, Vimeo and anywhere else that supports this format.
Twitter and Instagram do not support the uploading of SRT files, so videos you upload there need to have captions embedded. Tools such as Clips, Clipomatic and Kapwing (mentioned elsewhere in this post) allow you to create such videos with captions embedded.
Some other platforms such as Moodle support the VTT format, so you might need to download that version of the file from YouTube instead of SRT format.
Although this method really is free, the time it takes you to edit the auto-generated captions may not make it worthwhile.
I’d guess it takes around 10 minutes to brush up and resave your captions in this way.
For me, it makes more sense to spend a couple of pounds to outsource that task, and that’s why I send my videos to Rev.
How to add live captions to mobile video (iOS and Android).
You can add live captions to videos as you record them on your iPhone or Android phone.
This is great for social media, because most video there will play with the sound off by default. Adding good captions will improve the chances of people watching the content.
The good news is that you don’t need to write your own captions or even use a captioning service to do the work for you.
Instead, use one of these apps to record your mobile videos and they’ll add the captions automatically:
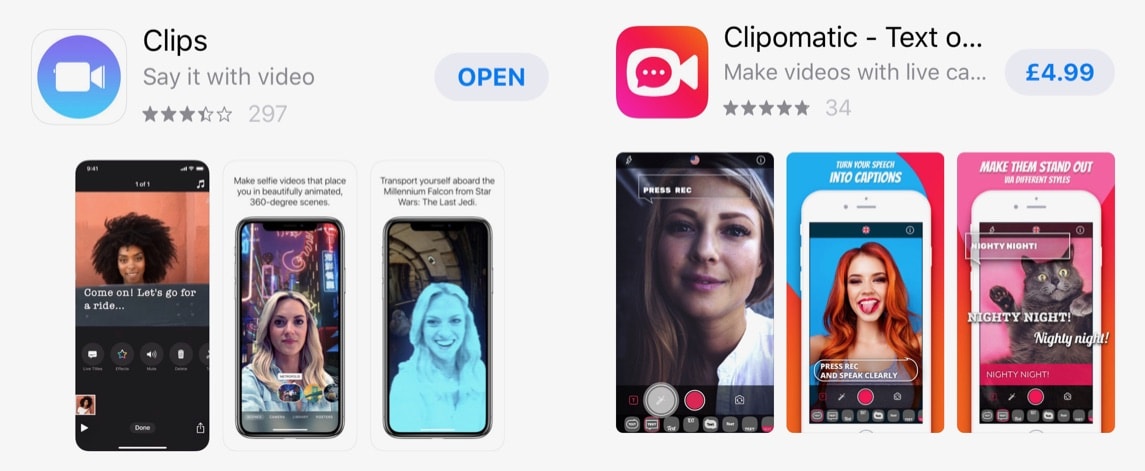
Here’s a video to show how I would record a video and include automatic captions on Apple Clips for the iPhone:
A new tool I found in 2021 has replaced my use of Clips and Clipomatic. It’s called Brivvio and its automatic captions are well worth the $15/month subscription.
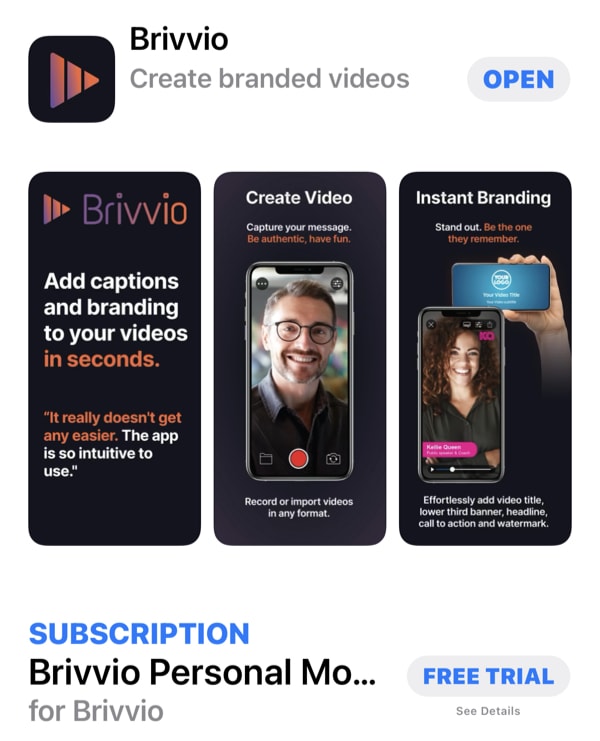
Brivvio is now my preferred app for mobile video captioning. Here’s a quick look:
Which platforms support SRT caption files?
These platforms support SRT caption files:
-
-
- YouTube
- Vimeo
-
The big-name omission here is Twitter. Their lack of support for SRT captions stops me from sharing more video content there.
How to add captions to LinkedIn native videos.
Let’s say you have a captions file for your video (see The time-saving method for creating captions) and you want to add this when uploading a video direct to LinkedIn.
Here’s how to add a captions file to your LinkedIn videos:
-
-
- Create a LinkedIn video post and upload an MP4 or M4V video (see note below).
- A preview of the video appears.
- In the top-right corner, click the pen icon.
- Browse for the SRT caption file.
- Once the video is processed and published (it can take a few minutes), the captions will be displayed automatically when the video is played.
-
Beware: MOV video files will not prompt you to supply captions.
The prompt for captions appears only if you upload an MP4 or M4V video file.
If you save a video from your mobile phone to your desktop computer or laptop, it might be saved in MOV format. If you upload this to LinkedIn, you won’t be prompted to add captions.
Workaround: convert your MOV file to an M4V file using the free media.io tool for Windows and macOS.
The CC icon shows that the video contains captions, and captions are displayed by default. Clicking the icon turns the captions off.
There are no styling preferences available, so you can’t change the colour, size or type of text shown in LinkedIn’s captions.
The default style of white text on a black background looks pretty good to me, though.
How to force closed captions on in YouTube.
As a video creator, you may want to force viewers to see closed captions. To do this, tag the video with yt:cc=on, like this:

When embedding the YouTube video on another website, add ?cc_load_policy=1 to the embed URL, like this:

How to add (“burn in”) captions to an existing video.
If you have a captions text file, you can import the captions to an existing video by using video-editing software such as Camtasia. Then you can export the video with the captions burned in.
You can also write and edit captions manually in Camtasia, though this is laborious for videos longer than about 60 seconds. (We speak around 130 words per minute – do you want to type all that out?)
If you have a pre-written script for your video, you can copy it into Camtasia.
Camtasia lets you add a special captions “track” to your audio, and this is used to type your captions or paste them in from pre-written scripts.
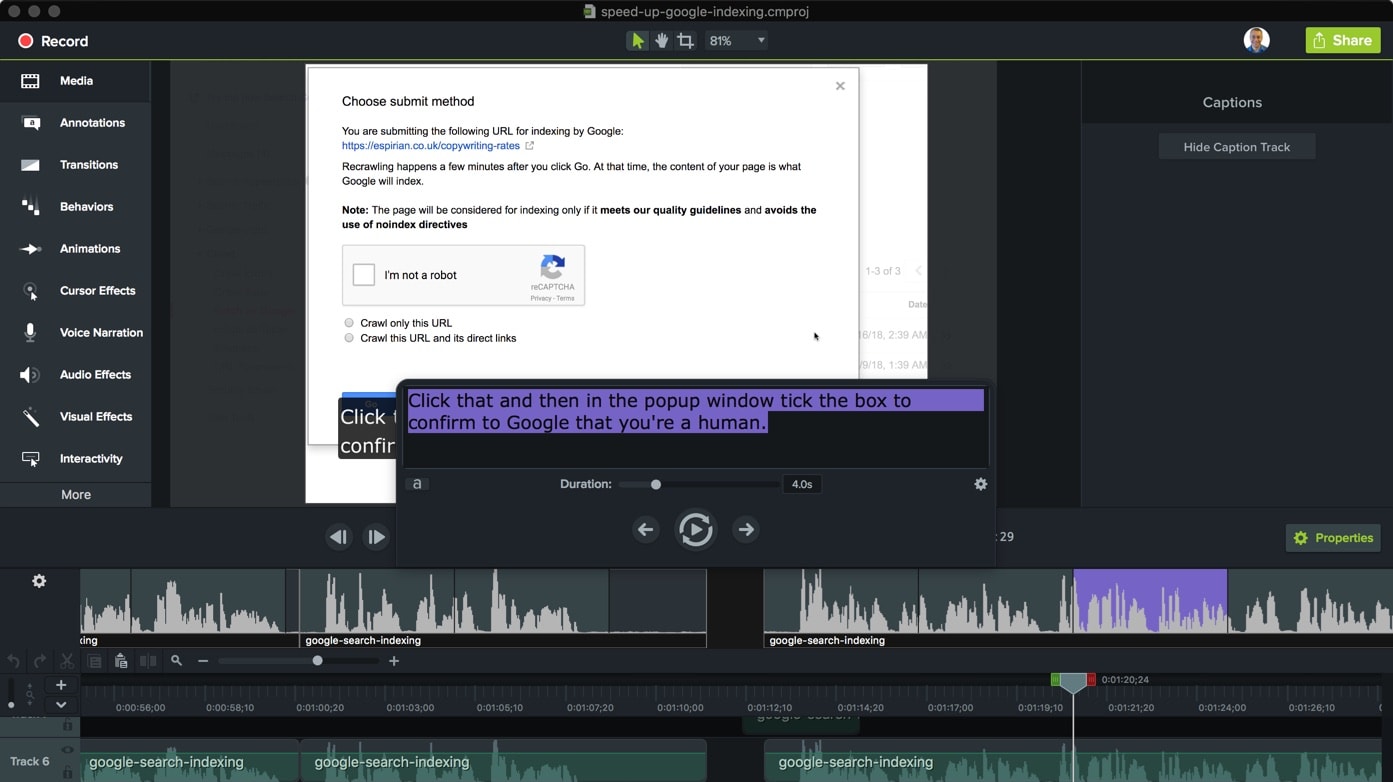
If you have an SRT file handy, you can import it direct to Camtasia.
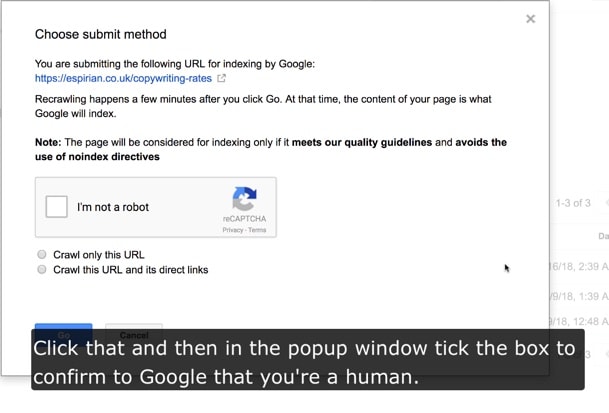
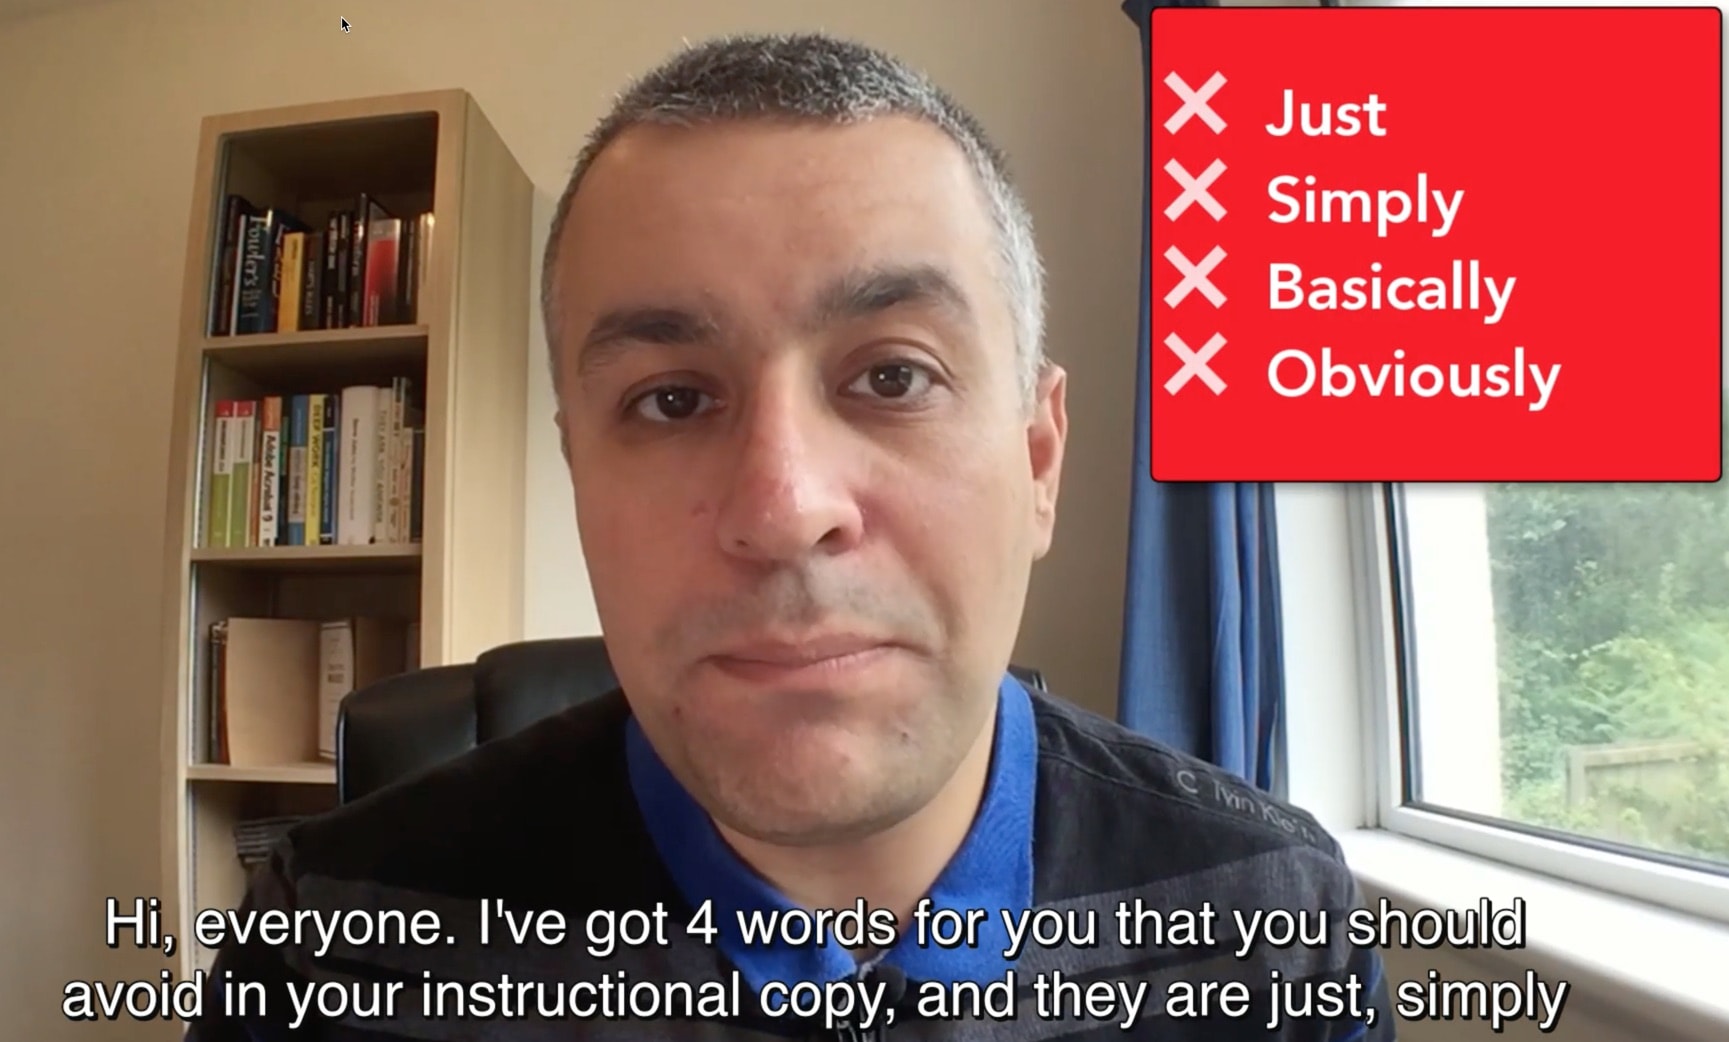
When the video is exported from Camtasia, the captions look like this:
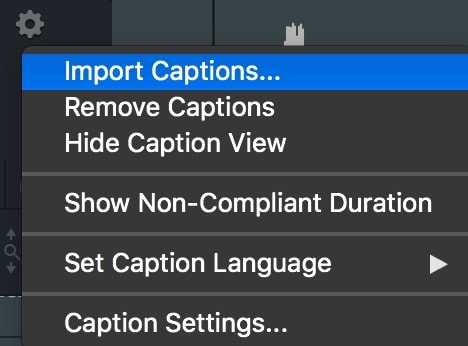
If you’ve used Camtasia to create caption content from a pre-written script, you can export the captions alone (in SRT format) via the Share | Export Captions… menu.
In general, adding captions manually like this isn’t a good use of your precious time, especially when you can get a captioning service to do it more quickly and cheaply (see The time-saving method for creating captions).
Let’s say you have an SRT caption file and want to add it to an existing video, but you don’t want to mess around with Camtasia. What do you do?
Good news: you can add your SRT captions to an existing video by using HandBrake. It’s free and works on Windows and macOS.
HandBrake lets you produce a captioned copy of the video without overwriting the original.
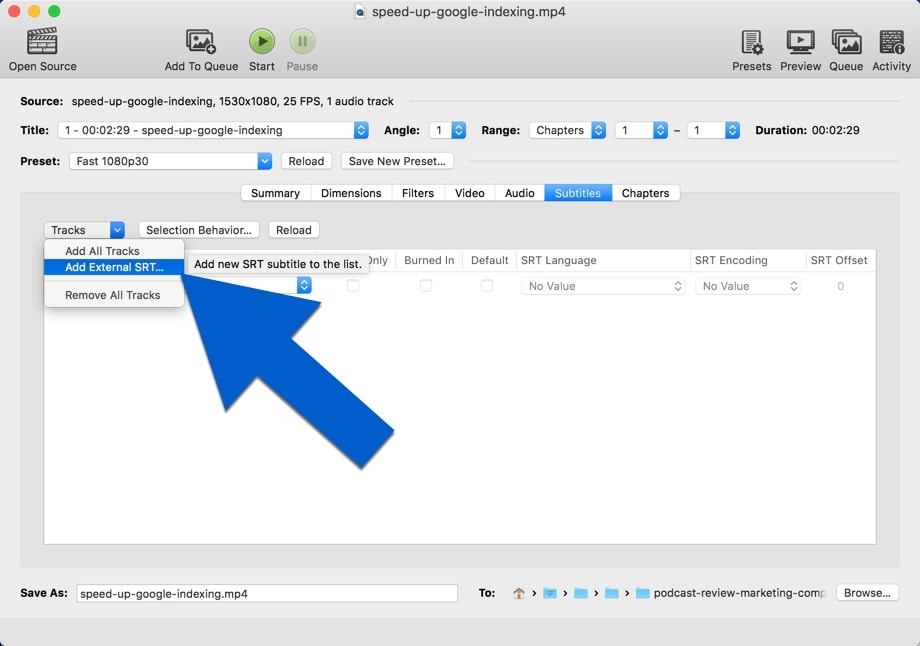
The user interface isn’t the prettiest, so follow these steps to add an SRT captions file to your existing videos:
-
-
- Open the video (MP4) file in HandBrake.
- Click the Subtitles tab.
- In the Tracks menu, click Add External SRT…
- Use the Save As and Browse options to set the destination of the new captioned video (don’t overwrite the original!).
- Click Start.
-
The downside with HandBrake is that the captions don’t look great when they’re burned in to the video.
The resulting white text with black shadow is fine if your video is naturally dark but quite poor if your video has a light background.
How do I produce written transcripts instead of captions?
While captions go in the video, written transcripts can go anywhere to accompany the video.
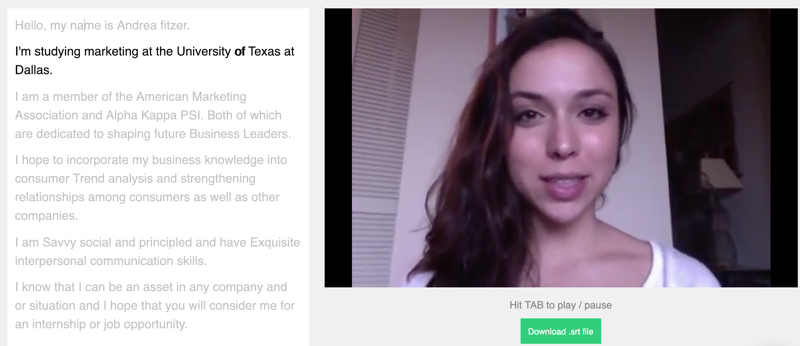
To create these written transcriptions, try a service such as Temi. Your first use is free and then it’s $0.10 per minute of video after that.
You have to upload your video file, which is a pain if it’s a biggie.
Here’s a sample of the results you get from Temi.
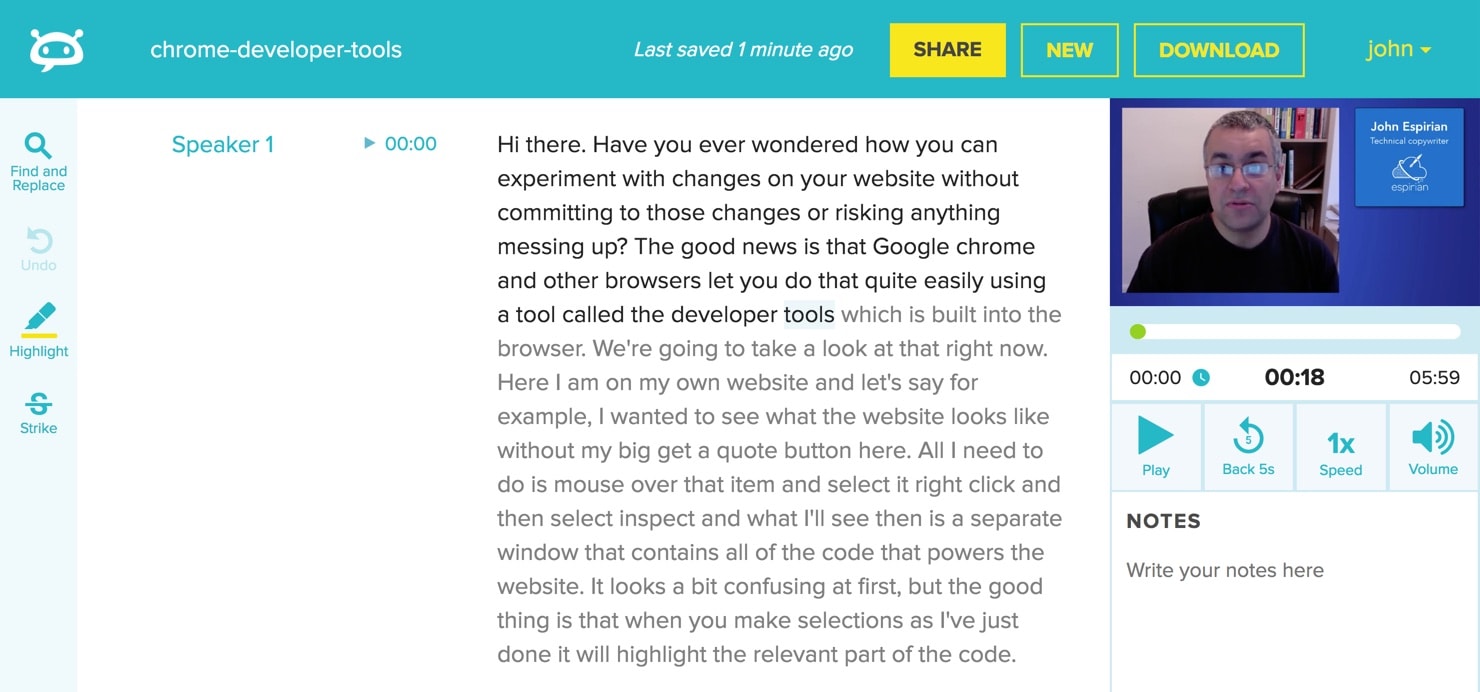
If you want to see how well Temi performed in this test, watch this video and compare it with the full transcript.
Rev also has its own transcription service.
How do I fix captions that are out of sync?
If the timing of your captions is wrong, the video and the words will be out of sync.
SubShifter is a free tool can help you adjust your caption timing so that everything lines up properly.
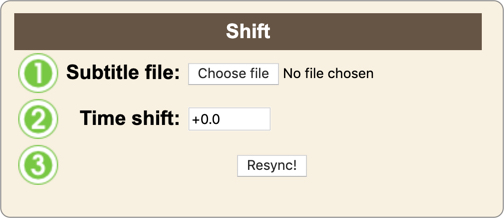
It’s useful if you want to send your video off to Rev for captioning and then add a standard intro segment afterwards.
Trying to adjust your timings manually to cater for that would be a pain. With SubShifter, it should be simple.
(Thanks to Chris Marr for the find.)
What other captioning tools are available?
Here are some further captioning tools:
Splasheo.
Splasheo makes your social media and web videos look great by adding customisable frames to the source video and by embedding captions in the video. This is all done by a human team.
The customer service is great and the turnaround time is ~24 hours.
This video gives you a behind-the-scenes look at the interface. If you want to try Splasheo for free with 4 of your own videos, go to splasheo.com/john
Subly.
Subly automatically creates burned-in captions for your videos. You can edit what’s generated and change the display style of the captions in a nice user interface.
The free plan will be enough for most casual video creators. If you pay for an account, you can caption more content and download the SRT caption file for each video.
This means that you can upload your original video to social media platforms and supply optional closed captions.
Try Subly Pro free for 1 month.
- Sign up for free at getsubly.com
- Log in and go to your Account page (via your photo/name in the top-right corner)
- Click Change plan
- Enter code JOHN to upgrade to Subly Pro for access to all the features for 1 month for FREE (no need to enter your card details!)
The video below shows how long it took me to produce captions for a sample 2-minute video uploaded to Subly. Surprise, surprise: the captions on this explainer are burned in via Subly:
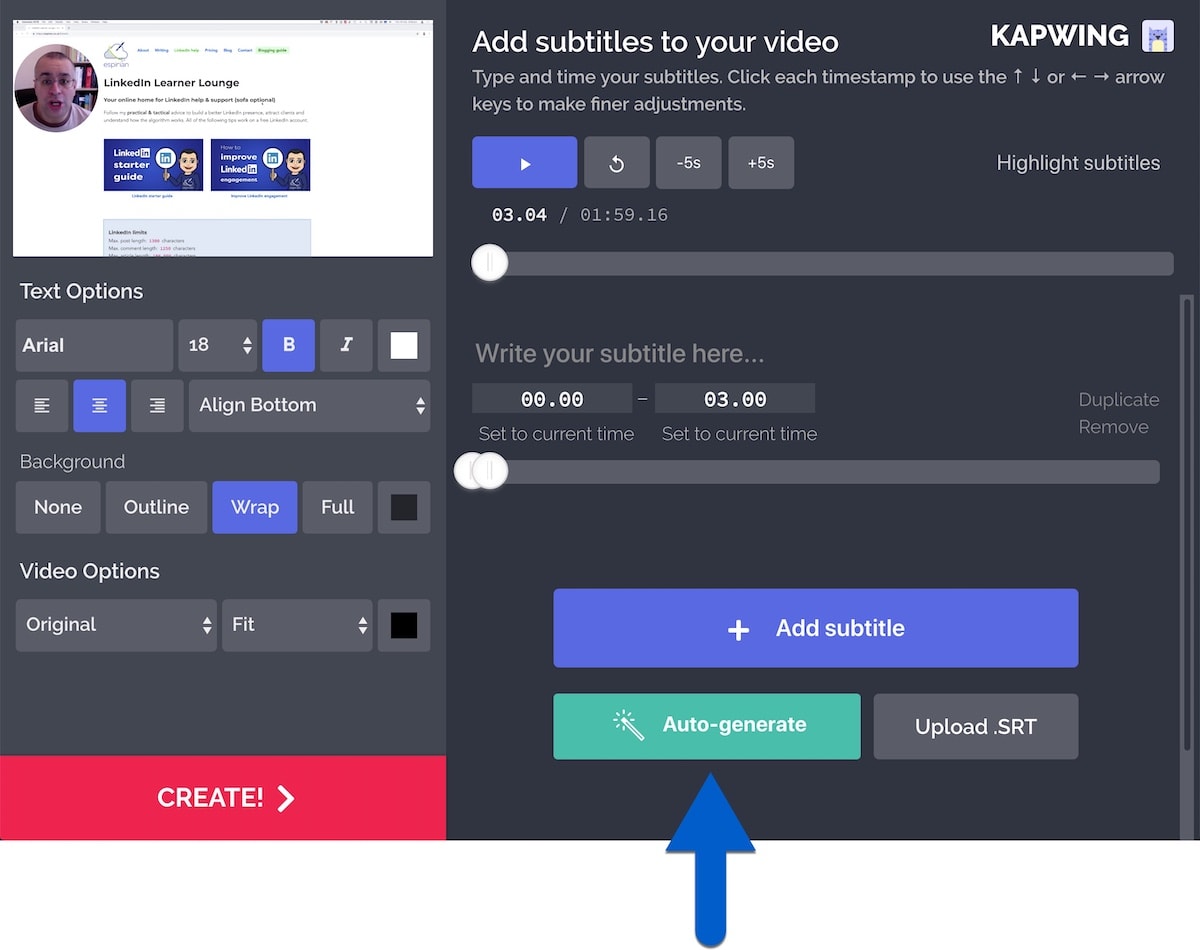
Kapwing.
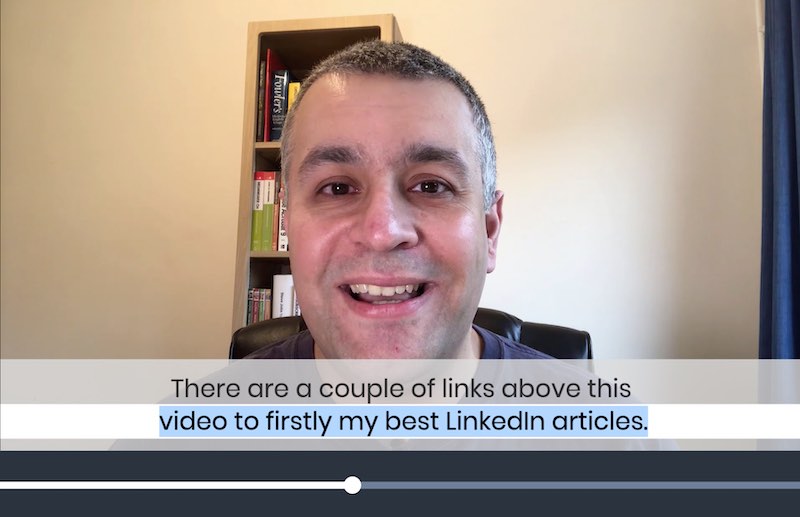
Kapwing is free and its Add Subtitles to Video option allows you to upload a video and auto-generate captions for it.
You can edit the caption text and then download the video file with the captions embedded.
Kapwing videos used to be watermarked, but they no longer are.
You can’t download SRT captions from Kapwing unless you have a Pro account ($20/month).
You have to download your Kapwing videos within 7 days or they’ll be automatically deleted. The Pro account lets you store content indefinitely.
Zubtitle.
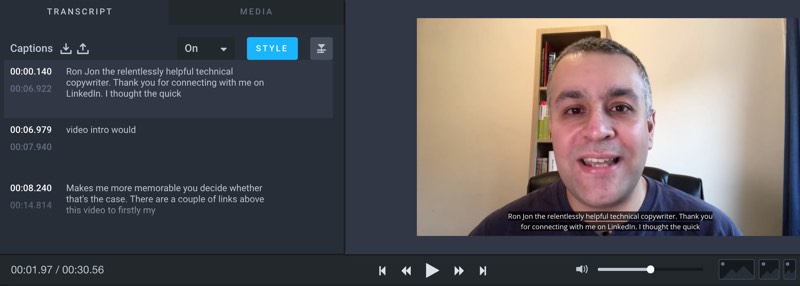
Headliner.
The auto-captioning results from Headliner weren’t great, and the download file is in VTT format instead of SRT.
PS. I’m not called “Ron Jon”.
Caption This!.
Here’s a quick look at Caption This! for iOS:
Y Translator.
Let’s wrap up.
Captions are relatively quick and cheap to add to your videos. I use Rev and it costs only $1.25 per minute of video.
If you’re creating videos on your iPhone for social media then live-captioning via Clips means you can do the job without spending anything at all.
With video consumption on the rise, people are going to expect more video to come with captions.
Get onboard now and use captions to improve the way your audience experiences your video content.
Continue the business blogging guide
This post is part of my definitive business blogging guide.
Previous step
Create videosNext step
Squash typos and errors